Showing posts with label colourwork. Show all posts

Tuesday, March 26, 2019

Fond Memories of Iceland

It's inconceivable to me, but apparently I knit a whole sweater and didn't write about it on this blog the entire time I did it. I posted updates on my Instagram feed, but that's not the same, is it.

This sweater started last August when I found the yarn department at a grocery store in Iceland.
I was hoping to find some of the Lopi yarn Iceland is known for. I bought what I hoped would be a sweater quantity of a medium grey,
and a few colours to go with:
I didn't have enough sense to get a white or natural and had to order some after I got home!

It took me a while after I got home to get started, but by the end of September I had picked a pattern and gotten started. Seeing the Telja sweater on Instagram led me to Jennifer Steingass's designs. She has a lot of great colourwork patterns, but after admiring the rest, I stuck with the Telja design.

I decided to avoid colourwork that required three colours to be carried in one row.
I had done that on my Whistler sweater and decided next time it was required, I would skip the third colour and duplicate stitch it on after the knitting was done.
So that's what I did with the yellow and blue (above) and later in the pattern with the green. (I see in the picture above that I didn't wait until all of the knitting was done to start stitching. I think I remember a late night when I wanted to see how it would look.)

Here's the inside of the yoke after the blue and yellow were done:
Instead of three rows of carrying an extra strand, I just have one strand of blue or yellow going from one spot to the next.

Another thing I added to the sweater was a repeat of the colours from the yoke in stripes on one sleeve.
After knitting the first half of the first sleeve, it was obvious that it was going to be far too tight. I redid the sleeve starting with more stitches and re-figuring the increases so that I would end up with the same number of total stitches as the pattern at the same height of the sleeve.

I have made a few sweaters that have no real front or back (which is usually the case with yoke sweaters) and I always end up deciding one should be worn to the back (because of a seam or the colour jog) and then spend too much time trying to figure which is which when I go to put the sweater on.

So this time I took a small piece of red and wove it into the back in the same place a tag would be.
And then found out it wasn't necessary because the designer had added shaping to bring up the back of the neck and lower the front. (Obviously I knew there was shaping because I was knitting it, but I didn't know how effective it would be.)
Sweaters are a lot more comfortable that way. This picture also shows the I-cord bind off that cleanly finishes the edge of the neckline.

The sweater was worked from the bottom up; the sleeves were done first (to the underarm) and then the back and front together.
The pattern included waist shaping so the fit isn't quite so boxy. I ended up having to rework all of those decreases and increases as well because my waist is a different size than my bust and hips. I also shifted the side seam shaping above the waist so the front is wider than the back.
The sleeve cuffs and hem were started with a few rows of stocking stitch before a bit of ribbing.
This gives a rolled edge that looks like the I-cord on the neck edge.
Once I got going, this sweater really flew off the needles. It is a little thicker than yarn I generally work with, but it was still done on fairly small needles (3.75 mm). I really loved working with this lightly spun Icelandic woolly-wool.
Project Stats
Started
: 28 Sep ‘18
Finished: 20 Oct '18
Pattern: Telja by Jennifer Steingass
Materials: Léttlopi in 57 Grey Heather (378g), 0051 White (42g), 1403 Blue (2g), 1703 Mimosa (9g), 9434 Crimson Red (9g), 1406 Spring Green Heather (1 g)


I've never recorded a video of a finished object before, but I was bowled over by all the noise the birds were making and this was my excuse to record them.

Friday, July 6, 2018

It's Not Going to Work

Or, A Tale of Two Toes, if you prefer.

Once upon a time I purchased this orange sweater second hand with the intent to harvest its wooly blend goodness.
At another time, I found the same sweater in pink, like bubblegum pink.
I used the orange for a pair of socks already (this pair) but I always had the secret wish to use them together in an awesome, albeit eye-searing, project.

When I saw a project from the book Op-art Socks, I thought I may have found my muse. I got the book from the library, carefully considered many projects and then set my heart on this swirly masterpiece:
The designer, Stephanie van der Linden, has conquered my knitting heart with this masterpiece of a design. Look how the swirl moves seamlessly from one sock to the other. Incredible. How much more awesome would it be in orange and pink?

So I set about casting on the sock - I figured I could use the toe as a gauge swatch.
First I tried it with one strand on my smallest dpns (bottom sock above and right sock below). Then I tried it with a double strand on slightly larger needles (top sock above and left socks below).
I calculated my gauge as the following:
  single strand: 41st/4" and 72 rows/4"
  double strand: 34st/4" and 52 rows/4"

What the pattern called for was 34st/4" and 46 rows/4". It looks like the double strand was pretty close, right? It's right on for stitch gauge, which determines how wide the sock is (the fit around the foot); but the row gauge is off (determining the length of the sock).

I debated about reworking the pattern to be knit from the top down so I could adjust the foot length as needed after the colourwork section was done, but the pattern has an unusual heel and it was going to be more work than I wanted.

I went to bed and hoped for inspiration to strike overnight.

It did.

I had the brilliant idea of doing a provisional cast on, working the sock toe-up (as written) starting with the colourwork section, and then coming back to knit the toe as long/short as needed at the end. Ok, now I was set...

I knit happily for the morning and got this far on the colour chart:
It was enough to see 1. I love pink and orange together. 2. It was far too big around. I had had my fears beforehand because the pattern calls for 72 stitches and I don't ever use that many stitches for my own socks, but the maths said otherwise. I followed the maths and obviously was led down the wrong path. (Happens more often than you would think.)

So I gamely ripped it out. No easy task since I had to separate the strands that had been knit together, but I persisted.

I cast on again, with one strand and smaller needles and knit the early afternoon away.
I got most of the way through the colour chart and I saw two things. 1. It is the right size to fit around my foot. 2. It's way, way too short. Where I should have about 4.5" of knitting, I have less than 2".

That is where I stopped.

I have two thoughts: 1. I could knit the chart repeating each row so that it is effectively double tall. This would be a pain in the butt to keep track of because many of the rows are already the same and I'm not convinced it will be tall enough even with that modification.

2. These yarns and this pattern are just not meant to go together.

That is where the project sits. My knitting time that day ran out and I haven't picked it up again. But after a few days in time out, I'm leaning toward thinking it deserves one more try.

Sunday, December 31, 2017

Norwegian Christmas Rose Mittens

When I was ready to take these pictures, we were just
getting our first snowfall. Can you see the snowflake?
Someone I know recently moved from the area. I knew I would have to knit her a farewell gift.

I wanted it to be cashmere - more luxury than she would normally permit herself and yet not fussy. (I know the labels always say to dry clean but cashmere is surprisingly resilient. The dry cleaning chemicals are actually bad for the fibers and will leave them "crunchy" while an easy soak at home will generally do the job.)

I also had in mind that it should be something that took skill - colourwork or intricate lace. I didn't want a "quick" project to be dashed off the needles without a thought. Not having ever seen her wear something around her neck, I settled on mittens. I figure everyone needs something for their hands in cold weather.

I couldn't find exactly what I wanted so I used parts of two patterns and made up the rest.
The flower design on the back of the mitten was taken from the Drop's Design Christmas Rose pattern. I had to adjust it to fit the gauge I got.
The design on the palm of the mitten was taken from Jessica Tromp's Norwegian Mittens. From the same pattern, I used the wrist design.
I added the Latvian braid before and after the wrist section. You'll notice I mirrored the flower design and braid from the left mitt to the right mitt because why wouldn't you.
The stripes along the side of the mitts are kept continuous through the decreases at the top. I worked the final decrease so that the pale blue stripe at the center carries continuously from the one side to the other.
I kept the striped thumb of the first pattern and made the stripe carry across the top in the same way.
Here is the inside of the mitts, for those of you who can't resist looking at the "wrong side".
Probably the biggest change I made from the patterns is the garter rib cuff. I wanted the look of a corrugated rib, which is a rib where the knits are in one colour and the purls are in a second colour. The problem with it is that even though it's technically a "ribbing" stitch, it doesn't have any stretch to it.
So instead, I cast on 15 stitches and worked them in a garter stripe (alternating two rows of each colour), attaching the end to the beginning when it was long enough. Then I picked up stitches along the edge and knit the mittens up from there.
The double layer of cashmere is warm and cosy without being too thick. Now I'm thinking I need a pair for myself. :)
Project Stats
Started
: 26 Nov '17
Finished: 3 Dec '17
Patterns: Drop's Design Christmas Rose and Jessica Tromp's Norwegian Mittens
Materials: 35 g darker blue and 61 g light blue, both raveled from sweaters. I used four strands held together.

Sunday, January 3, 2016

St Patrick's Day at Christmastime

The Christmas gifts have been given, so I can share this project with you now.

I had the good fortune to draw my sister Patricia's name. (Ok, so I wasn't actually there in person and Patricia's the one that organizes it so for all I know she made sure I had her name--I don't know. We're pretty lax about the "random" part of name drawing in my family. If you have a good idea for someone, you're going to magically draw their name that year. It works.)

Anyway, back to Patricia. She worked in Ireland for a time and loves all things Irish and especially celebrating St Patrick's Day. When I saw this mitten pattern from the very talented Spilly Jane, I immediately thought of shamrocks. I don't know what they're supposed to be, but does that really matter anyway? They're shamrocks to me.

I decided to make the fingerless version because by March, you should be able to pare down the warm woolies.

Those of you with good memories will recall that I dyed some wool green during the Olympics in February of 2014 for the Ravellenic Games.
I wouldn't tell you then, but this is the project I already had in mind!

I started the mitts quite a while ago (probably late winter or spring 2014 since that's when I dyed the yarn) but I got too smart with the pattern. Instead of doing colourwork, I decided I was going to double knit them. That way the fabric would be a double layer (warm) and there would be no floats of yarn on the inside to catch on rings and fingernails.

I started with the rib and knit it twice as long as I needed, then folded it over and used all those stitches (twice as many as I really needed) to set up the double knitting. Clever, right? Except I didn't realize just how much it would affect the gauge. Apparently double knitting is way looser than doing colourwork, so it didn't take me long to realize the mitts were way way too big.

I planned to figure out the new gauge and start again with fewer stitches, but never got to it. Finally this fall, figuring I really had the perfect reason to finish these for Patricia, I ripped them out and followed the pattern. Magic how that works out! :)

So I did a 1x1 rib to start. (Ok, the pattern calls for a twisted rib but I really don't like doing it, so I only do it when I really have to.) Then I added a Latvian braid.
I had never done one before but have always wanted to. Then I saw a Facebook post that my cousin just added one to mittens that she was making and I realized this was a great project to add it to. You may noticed that I made sure to change the braid direction so the two gloves are mirror images. I can't help it. By the way, this braid is stupid simple to do and you should add it to anything and everything that you can. It's just purling with two different colours of yarn with the floats in front. Search on youtube--you'll get it.

The pattern itself was fairly straight forward. You put in a strip of waste yarn where the thumbs will go later and knit a straight tube for the body of the mitten.
After that's done, you pick up the stitches off of the waste yarn and knit up the thumb. The flower/leaf pattern continues on the outside of the thumb but it's just green and white stripes on the inside (the part that touches the palm).
I finished with a sewn Kitchener bind off because it looks neat and basically because I still think it's magic the way it makes the stitches continue from the ribbing on the outside to the ribbing on the inside.

My sister seemed as pleased with them as I hoped she would be.
Project Stats
Started
: 4 Mar '14
Finished: 18 Dec '15
Pattern: Heather's Mittens by SpillyJane
Materials: I didn't weigh them but it was a small amount of raveled yarn--70% wool, 20% angora, 10% nylon (Oh, Patricia, I didn't tell you, but this means they are hand wash only. Maybe you assumed that.)

Friday, October 24, 2014

Insulate! Insulate!

You should read that title in a very robot-y voice, as in daleks from Dr Who. My sister found a pattern she loves to make and she made one for me...
In wool! (And she never uses wool. But she did it just for me.)

You can see it has police boxes on it with daleks.
But since these daleks are intent on insulating, not exterminating, I feel quite safe. :)

You can find the pattern here. My sister likes it very much and has made a number of them. (I think she said eight the last time I talked to her!) The pattern shows you how to do colourwork working with one colour in each hand (essentially knitting continental with one colour and English with the other). It sounds like she has been converted!

Here's a little peak at the inside of the hat and her impeccable stranding:
I love it when the inside looks as well attended to as
the "good side".
It sure is nice to get a lovely hat with none of the work it normally takes! :)

Saturday, April 9, 2011

Knitting with an Adrenaline Rush (and Perseverance)

I have been pushing myself hard to finish my Truffle Tunic. It's just been dragging on and on. I put the front aside half way through the colourwork last November and started on the back. That was a marathon of grey stockingnette, and did not lend itself to long knitting sessions because something about the wool, needles and weight of project was really hard on my left hand/arm.

But I pushed through. Last week I finished the colourwork section on the front and was very close to the end of the back. That's when the ball of wool I was using for the back ran out.

I had a ball attached to the front yet. That's all I had left. There were some grey rows to do on top of the colourwork but I didn't want to do them until I knew for sure I had enough wool. I wouldn't know if I had enough wool until the back was done. Conundrum!

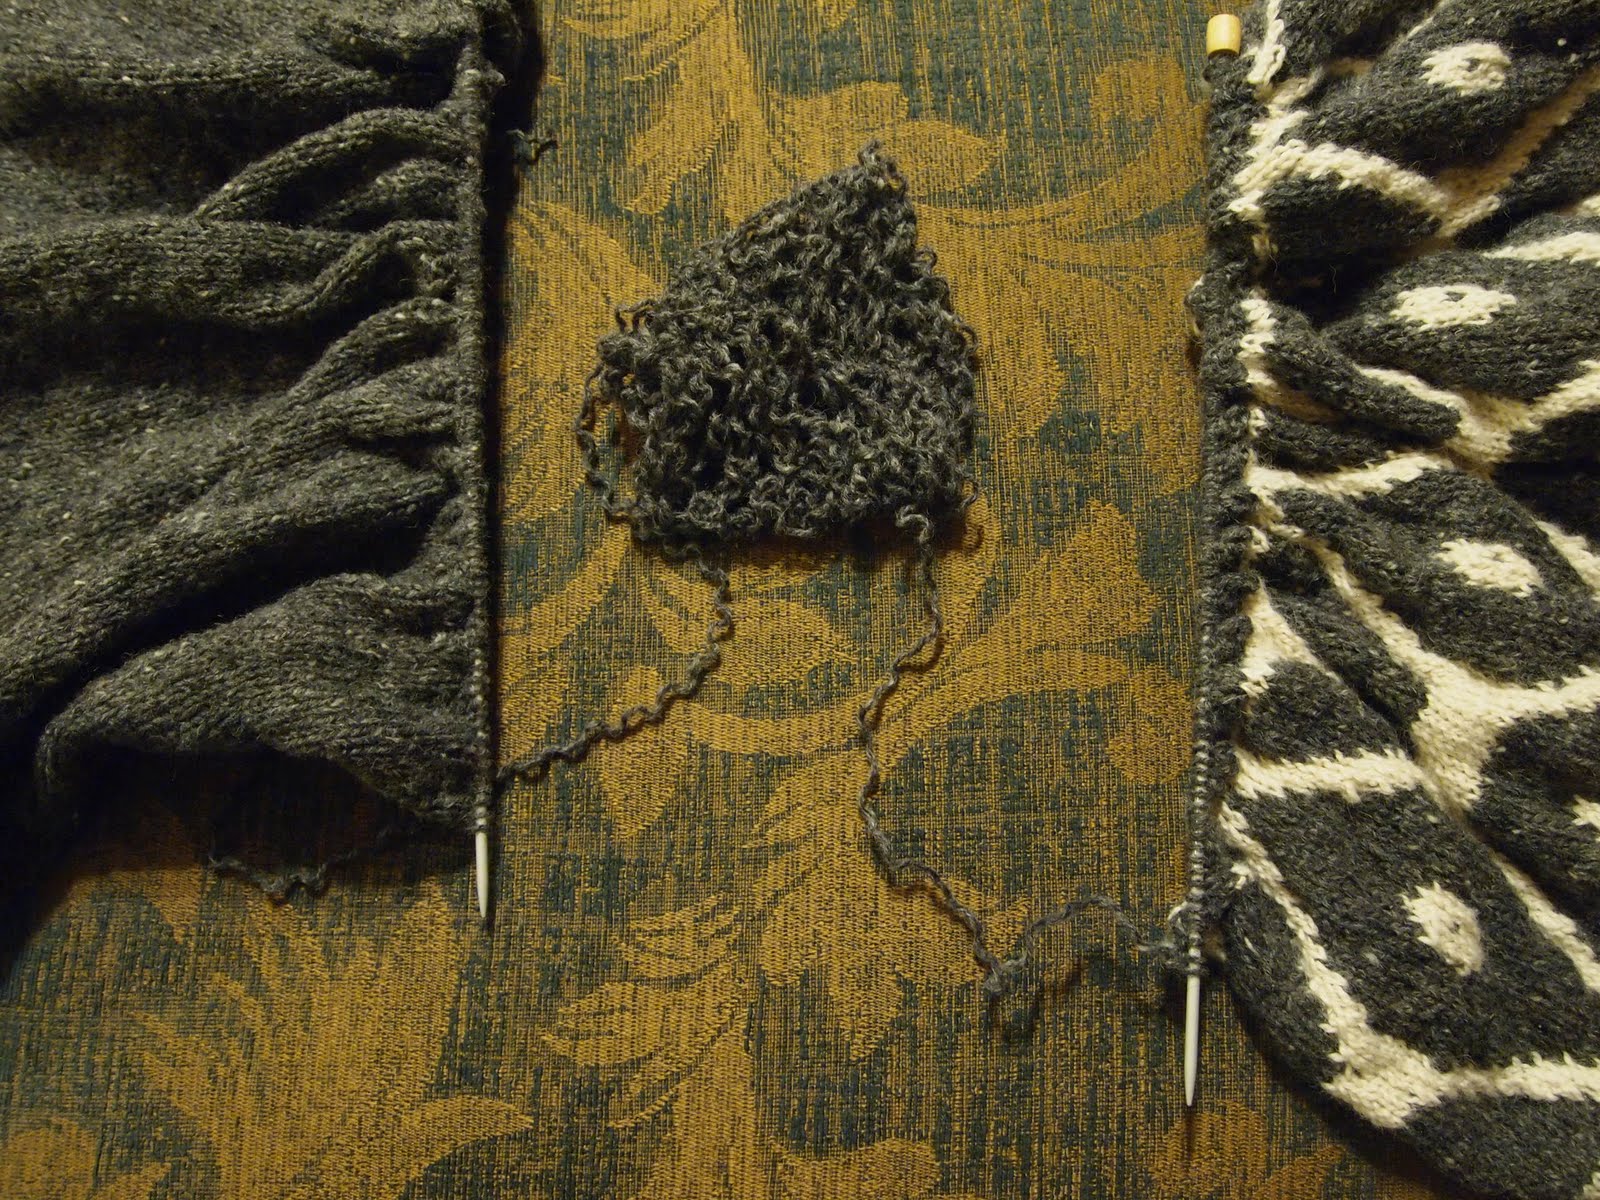
What I did was continue knitting the back with the other end of the ball attached to the front. I ended up with two halves of a sweater connected by one ever-shrinking ball of wool:
Once I had the back knit even with the front and only 4 rows of ribbing to do on each, I felt much better. Whatever happened, I could at least easily make them match. To save on possible rip-backs, I then alternated working on the front and back. Two rows on the front, two rows on the back, the ball of wool is getting smaller!!!

But I got my four rows on each part done, and then I got them cast off. I ended up with this much wool left.

Troy thinks I am a gambler at heart because I seem to keep doing this to myself. ("Not that often," I protest. Wait...the Whistler hat, the Superscarf, the Cuffed Boot Socks,...ok, ok, so those happen to be my last three projects. "Coincidence!" I now weakly protest.)

The only thing that irks me about almost running out of wool in this project is that it could have so easily been avoided. No, I couldn't buy more wool--it was recycled from a sweater, remember.

If I had knit this project from the top down, I could have gotten all the hard parts out of the way first, (made sure I liked it before I had so much invested), and I could have just knit the length until I ran out of wool. Then the only concern would be whether it would get as long as I wanted it to be. But if it didn't, I wasn't stuck with a sweater missing the top part of the pattern or a back shorter than the front. No, worst case, I would have a perfectly usable sweater that was an inch or two shorter than I would have really liked.

Well, let's call it a lesson learned and a catastrophe avoided because I had enough.

On the other hand, getting the finishing done was a lesson in perseverance. The front and back were attached at the shoulders with a three needle bind off. I followed the directions and got all 330 stitches cast off. I then tried it on by flipping it over my head. (At this point the shoulder seams were done and the neck edges cast off so it hung like a kind of poncho.)

Looking in the mirror, I could see that 1. the bind off was too loose on the neck edge and 2. the shoulder seams didn't come in far enough. (I.e. the neck opening was too big.) Ok, I am a big girl. Even though I had been thinking I would finish this thing every day for a week straight, I could take all that out and do it again...

So I did. I didn't have to take out both shoulder seams, but I did have to take out the neck edges and redo part of the shoulder seams to bring them in further and then redo the neck edges. But the big girl did it (without tears). Problems solved, so I thought.

Then while I was working in all the ends (because I was going to get this d*mn thing blocked today if it killed me...), I noticed this:
Between the yellow lines lies a perfectly good seam between the front (top) and back (bottom) from the three needle bind off. Between the red lines is a three needle bind off done from the wrong side resulting in a seam on the outside of my shoulder seam.

Ok, really, big girls don't cry....::chin quivering::

Boo hoo, I had to take it out again only this time I had already cut one end after working it in and had to worry again about the piece of wool not being long enough. But I persevered and got it done without running out of yarn. You can see it looks much better:
as it's lying out blocking.

I have the whole thing blocking, as a matter of fact:
Following my new habit of using the washing machine, I had it soaked and spun out in no time. Pinning took a little more time. After I had it all pinned, a little voice in my head said, "Should you really measure that to make sure the halves match?"

I listened to the little voice and discovered that the front was pulled a good inch longer than the back both above the sleeve increase and below. So I repinned it and now am walking away for a while...
The colourwork is not the best I've ever done for two reasons: there are a lot of very long floats in the pattern and these two yarns do not knit up in the same way at all. (More details here.) I think the results will be livable though. Time will tell.

And now I should really head outside for some work I've been avoiding for a week. (There lies my truest talent.) They promised me very warm temperatures today and I don't think that's come true. And no sunshine. I miss sunshine.

May I suggest?

I Say! or at least I did once...