Are you still waiting for the end of the knit-along I did last fall? The clues were released a week apart and I kept up with the knitting, but it looks like I didn't keep up with the blogging. I wrote about the swatch here and clues 1 and 2 here in case you want to get up to speed.
I really enjoyed the pattern. It was the first time I had done anything but plain brioche and this one involved a lot of multi-step increases and decreases. I certainly "stretched" my chart reading skills - there are a lot of new symbols in the charts. (But for me still a lot easier than line by line instructions - yuck!) The designer also posted video tutorials each week for new techniques.
Each stage of the knit-along built up the "blooming" theme.
Stage 0 - Preparing the Ground (swatching)
Stage 1 - Roots, Seeds, and Bulbs (cast on and first two shapes)
Stage 2 - Sprouts, Leaves, and Vines (three more designs)
Stage 3 - Stems, Buds & Petals (more designs and cast off), which you can see in progress below:
The petals are finished with a cast off that highlighted the petal shapes and continued the contrast lines of the design. This is what really drew me to the design. I would have liked to put three pins in each petal to create a rounded shape on each petal, but that would have been more pins than I own!
Even putting only one pin in each petal used most of my pins!
Blocking
I am happy with the shawl but not happy with the yarn choice. It could have been better.
The two yarns are a different weight and one is a single ply and the other is a multiply (which gives them a different "feel" and drape.) The green on the back reflects light and looks vibrant, but the red/orange on the front seems to swallow the light. I'm not looking for neon but something more luminescent would be nice.
I love the build up of the pattern from round bulbs, to stems, leaves, and buds through to full blooms.
I ran out of green on the second last row. I was eager to continue so I searched through the stash and found something very similar.
You can hardly tell the difference, but after I was done knitting the green I realized I should have used the green from my swatch. Felt a little silly for not going there first. (Reminded me of the time I searched through all my buttons to replace one on a shirt. After it was sewn on, I remembered and found the spare buttons sewn on the shirt seam. Sometimes I'm really not that bright.)
I plan to work a smaller rectangle sample of this design (when I find the right yarn :) that would be suitable to hang on a wall. We'll see how it comes out.
The shall is the size that I wanted - I made the smaller version of the pattern.
Showing the back.
The shawl isn't reversible and the back doesn't make
a very organized pattern, but it's pretty in its own way.
I mostly wear it wrapped around my neck, like so:
Part way though the winter I remembered this green pea coat (I guess it's also pea green!) I had. It was still packed away for the summer. It was the perfect partner for this shawl.
But sometimes around the house when I'm chilly, I have worn it over my shoulders too.
I can't wait to do more projects with this designer's patterns - she's brilliant. "Stacked" stitches are next for me!
Project Stats
Started: 8 Nov '18 Finished: 26 Nov '18 Pattern: Blooming Brioche KAL by Xandy Peters Materials: DeepWater DyeWorks Lush (Aztec), 100 grams, $22, in stash since 2015; madelinetosh Tosh Merino Light (Leaf), 100 grams, $25, in stash since 2014 Ravelry project page:Blooming Brioche KAL, $7
It's not like I've been keeping this project a secret (there have been pictures on Instagram), but sometimes I finish a project before I get a chance to write about it!
So what we have here is a story with the beginning, middle, and end all in one post. :)
When I finished spinning the three colours of Malabrigo Nube fiber I had, I started to look around for a project to use it in. I mentioned that I was looking at the Briochealicious Shawl but I was worried about having enough yarn and it didn't show off the coloured yarn enough for what I wanted with these yarns.
After looking around at a bunch of shawl patterns and evaluating what I was looking for, I decided to do my own Pi Shawl. The Pi Shawl was so named by Elizabeth Zimmermann. It actually has nothing to do with the value of Pi--the key was realizing that the diameter (or radius) of a circle is directly related to the circumference. Which means if the radius doubles, the circumference doubles.
So Elizabeth explained that if you double your stitches every time the radius doubled, you will end up with a circle with no more complicated calculations needed. This basic idea has released an explosion of designs. By doubling the stitches (easily done with a K1, YO repeat) on rows 2, 4, 8, 16, 32 etc, you were guaranteed a circular shape. For most shawls you don't get very far past row 64, so the whole shawl requires no more than six shaping rows. This is revolutionary stuff, folks!
Of course this only works because knitting is stretchy and malleable. You certainly couldn't use this shaping for something made in fabric. The most basic shawl would be stocking stitch with eyelet rows at the increase rows only. But you could do any stitch pattern in each section, as long as the gauge was the same.
For the stitch pattern, I decided to do more than the basic, but to still keep it simple--I added eyelets every six rows. This is a very simple lace design and the increase rows blend into the entire pattern.
I got started with the Archangel colourway. After one false try, I ended up doing eight eyelet sections in the first colour. That meant the first row of the neutral colour was an increase row. Since the neutral was a little thinner than the Archangel, the increase flowed very nicely.
When I was looking at patterns, I was very intrigued by the ones that used asymmetrical shaping to play with stripes. I liked the asymmetry but I wanted to end up with a regular half circle shape, so I played around with short rows:
You can see above that the first colour is symmetrical but after that the neutral and Azules (blue) stripes are wider on the right than on the left.
After that pictures was taken, I ended up ripping back a ways to adjust the width of the last two stripes. I was considering the look that I wanted, controlling the final size, and having enough yarn because the width of these stripes would determine how wide the following stripes would be. After the Azules would come the Lavanda colour and the final stripe would be over a lot more stitches. I didn't want to run out after just a few rows and have a skinny bit of colour at the end!
The second try looked better so I continued on.
You got a glance of the shawl in progress in my Squam post. It was the project I worked on the most at Squam. It was too big for the plane (where I worked on my long socks) but it was perfect for sitting around with other people--fairly simple and a pleasure to knit.
Not long after getting back, I finished the knitting. I had enough of the Lavanda to do the length of the shawl, but ran out while doing the hem that would be folded under. No problem, I thought.
I know the last stripe looks blue in this pic (and some following),
but it is the Lavanda.
I'll use some of the Archangel from the top of the shawl and it will just be a little pop of colour if the shawl edge flips up.
At the beginning, I wasn't sure how I was going to finish the shawl edge. I knew the main concern would be to keep it from curling up. I had thought about an Icord edging all around the shawl, but when I thought about a folded picot hem, I decided it was the perfect finish to go with the eyelets in the rest of the shawl.
There weren't any clear areas in the house where I could lay out a project for blocking, but I realized there was a corner of the office I could clear out and it worked great.
You can clearly see the asymmetry in this shot. The last stripe actually got wider than the middle stripe, but at some point I decided to just knit out the last colour because I didn't want the shawl to be too short.
Blocking was made a lot easier with my blocking wires.
The straight edges were easy with the rigid wires, but the real key was inserting the flexible wires. Since it was a folded hem, I could run the wires between the layers and easily pull out all of the picot points. Perfect!
Once it was blocked, I hung it up for some beauty shots. But the wind started blowing so it seemed a video might be better.
I love how the eyelet rows make even concentric circles but the colour seems to shift on top of them. To me, the colours look almost blended, like the colours were dyed after the shawl was knit. I like how knitters who notice are going to think, "What? How did she do that?"
The shawl sits nicely on my shoulders and doesn't want to fall off.
I think the length is nice, covering my entire back. The asymmetry can be seen but it's not really obvious.
It hangs naturally straight down the front, like an open cardigan.
The asymmetry is much more obvious from the front as the stripes don't match up.
I can throw one edge over my shoulder if I want to be covered up front as well.
But it will take a shawl pin to keep it there.
You can't photograph a shawl without a twirling picture. :)
And you have to have a full view over outstretched arms.
Look at some shawl patterns. You'll see it's required.
I also tried it with the ends tied behind my back.
This would keep the shawl secure.
From the back, you don't see the knot (but I would feel it behind me if I were sitting).
If I pull the shawl up just a bit and fold under the centre, it makes a nice warm "collar" at the back of my neck.
Project Stats
Started: 26 May '17 Finished: 17 Jun '17 Pattern: Adaptation of Elizabeth Zimmermann's Pi Shawl Materials: Handspun Malabrigo Nube (Archangel 64g, Azules 63g, Lavanda 113g); Garnstudio DROPS lace (88g leftover from another project)
The Knitty Gritty:
Shaping:
I started with 5 stitches so the shawl would be a little more than half a circle. (4 sts would give a half circle.)
Increase to 10 stitches on row 2
Increase to 20 stitches on row 4
Rows 1-4 were considered the first eyelet section. Continue to make eyelets every 6th row.
I measured shaping increases by eyelet sections instead of rows:
Increase after 2nd eyelet section (row 10) (40 sts)
Increase after 4th eyelet section (row 22) (80 sts)
Increase after 8th eyelet section (row 46) (160 sts)
Increase after 16th eyelet section (row 94) (320 sts)
Stripes:
Work the first eight eyelet sections in colour A (Archangel).
Switch to colour D (neutral) and work 1 row (increase row).
Work short rows as follows:
Purl 6, slip 6, turn.
Wrap the first stitch on the right needle with the working yarn and return wrapped stitch to right needle (it is not worked), making sure not to pull the working yarn too tight. K12, securing yarn float you work first 6 sts. (*See description below if needed.)
Purl 18, slip 6, turn.
Wrap the first stitch on the right needle with the working yarn, K24, securing yarn float over first 6 sts.
Continue in this manner working 6 additional sts on every row, making sure to do eyelet rows as each section reaches 6 rows high.
Once you have worked across all stitches, work straight for one eyelet section. You will work across all stitches each row but you will still have to do the eyelet pattern by section. You will not be able to do an eyelet row across all sts.
Switch to colour B (Azules) and work short rows the same as neutral section.
Once you are working all stitches with B, continue working all stitches for 4 eyelet sections.
At some point in this colour, you will have to start working the last increase row, section by section.
For each section of 6 sts, when you work the eyelet row, work (K1, YO) 3 times to increase to 12 sts in that section.
For short rows, you will now have to work an additional 12 sts on each row. Note that in the same row, you will be working 6-st sections and 12-st sections. I suggest judicial use of markers!
Switch to colour D.
Work short rows as above but make sure to start on the skinny side of the previous stripes so that you begin to balance the shawl's shape.
Continue increase sections as before.
Once you are working all stitches with D, continue working all stitches for one eyelet section.
Switch to colour C (Lavanda) and work short rows as above, starting at the same edge as previous section.
Since the increase row is complete, each section is 12 sts.
Once you are working all stitches with C, you should be "caught up" with the short rows so that each eyelet row can now be made across one row.
Work even for 4 eyelet sections or to desired length.
After final eyelet row, work three rows.
Bind off.
For hem, fold on final eyelet row and stitch bind off edge to back of shawl.
Weave in ends.
Block.
_________________
*Securing yarn float:
Work 1 st as normal; insert needle for next st, put yarn float over tip of right needle, work next st, passing working yarn under yarn float as you make stitch. Repeat.
Depending on yarn and project, you can secure yarn float every 2nd, 3rd, or 4th st as needed. I chose every 2nd stitch for this project so the float would be picked up above eyelets and not be visible.
In the last week, I have undone the neckline folded picot hem:
I ran out of blue and finished the hem with white. It was on the inside so not visible anyway, and meant the Kitchener stitching matched the original stitching and was less likely to show through.
That was a lot of Kitchener to undo. Phew!
I ripped out the knitting to just below where I originally added the holes for the picot edge, picked up the stitches, and did a bind off row in the blue. Not too tight, but not too loose either so the edge had some structure. The yoke and shoulders of this sweater were going to need all the help they could get.
Then it was time to deal with the ends.
There were a lot of those in a tight space up on the one shoulder. The pattern called for the same yarn to be used where I added all the different colours, so I only have myself to blame for this. But a little careful work and all of those were taken care of.
Then time for a bath and block. I soaked the sweater overnight because I didn't have time in the same evening to soak it and block it. I was surprised to learn recently that alpaca (or was it cashmere?) needs to soak overnight to get fully saturated. Important for dyeing and blocking. Anyway, I figured overnight wouldn't hurt this wool any either.
I then laid it out with blocking wires. I had debated with myself about whether to block it "straight" or follow the lines of the knitting. (Compare the shape above to this picture:
Big difference, right?)
Obviously I went with blocking it "straight." I had to pull the right shoulder pretty firmly but not too bad. I later realized I could have pulled the left side seam down to make the bottom hem straighter and will probably try that next time I block it. I think a sloping hem works with this sweater, so I don't really mind.
I tried it on when it was dry and it feels wonderful. No longer feels awkward or twisted on me. And I think it looks fabulous. I am so happy with it. Pictures of the finished piece on me will come when I get a chance...
Here's another little project. I finished it sometime before our trip but didn't have time to photograph it. Time, and I didn't feel up to setting up the tripod in the snow, etc. So I threw it in the suitcase and stood in front of some mountains.
This is the second time I've made this asymmetric bias scarf-ette. The first one was given away, and I had a day when I realized I intensely wanted one of my own. (I had an outfit on that it would look great with; of course, now I can't remember what the outfit was! But it will come back to me.)
The original was in a linen/cotton blend, which isn't really my cup of tea. It is a perfectly good blend, but I love my wools and silks.
Imagine my delight then, when I found the same colours (or close enough) in a wool/silk blend at Red Purl. I pounced!
I gave the scarf a light blocking:
I didn't really want to forced it to be flat and smooth--what's the point of knitting in all that texture if you're just going to torture it out of it? I did pin it to hold the edges smooth, but didn't stretch it out. And as I suspected, it's gaining more texture the further in memory the blocking gets. Which is fine with me.
Last time I modeled other ways you can wear this little scarf, but today I'll just give you the two basics, long:
If you can fix red eye with the click of a
button, where's the "shut eye" button??
and doubled:
Project Stats
Started: 28 Dec '12 Finished: 1 Feb '13 Pattern: Rollercoaster Triangle by Birgit Schneggart Materials: Handmaiden Fine Yarn Mini Maiden, unknown colour ($38) held double I wore it one day on vacation and we ended up in a museum for most of an afternoon. The scarf was a little warm (yes, even I get too warm sometimes), and so I tied it around my hips like some women do. I didn't think I was one of those women, but I have to say it worked. Perhaps one day I'll even try it when I don't have a sweater and a coat to hide it. :)
Oh here...I found a picture so you can sort of see what I mean:
We're up in the Calgary Tower, standing on the "glass" floor. It's unnerving, but fun!
With a different outfit, that might not be too bad, right? And in any case, it's easier than carrying your scarf in your pocket when you don't want to be wearing it.
For comparison, here is a shot of the first scarf in linen and cotton:
and here's the wool/silk blend:
Pretty close, right? I'm still delighted by the cool blue-greys mixed with the warm orange, and both with shots of yellow. Love. It.
And now, are we done with the vacation shots and finished projects? I think we are. :( sad faces all around
Going to the airport and getting some serious hand-craft time in and meeting this week's deadline on my secret project early has led to some serious progress on some other projects.
Here's a sneak peek at what I finished this week:
All the knitting is done and I got it blocked tonight. The blocking wires were a great convenience. I managed to slide a set in the folded hem of the front and back. It worked perfectly!
And I also managed the whole sweater from one skein!! All I had left was 5 g (out of 100):
But this wasn't a "cutting it close" as Troy accused me. I had bought a second skein because I thought I would need it. Now I'm in the beginning stages of thinking of knitting a matching T, shell or even dress to go underneath. Hmmm....
I'm waiting for some cute clasps I ordered to come in and then I'll be able to wear it!!
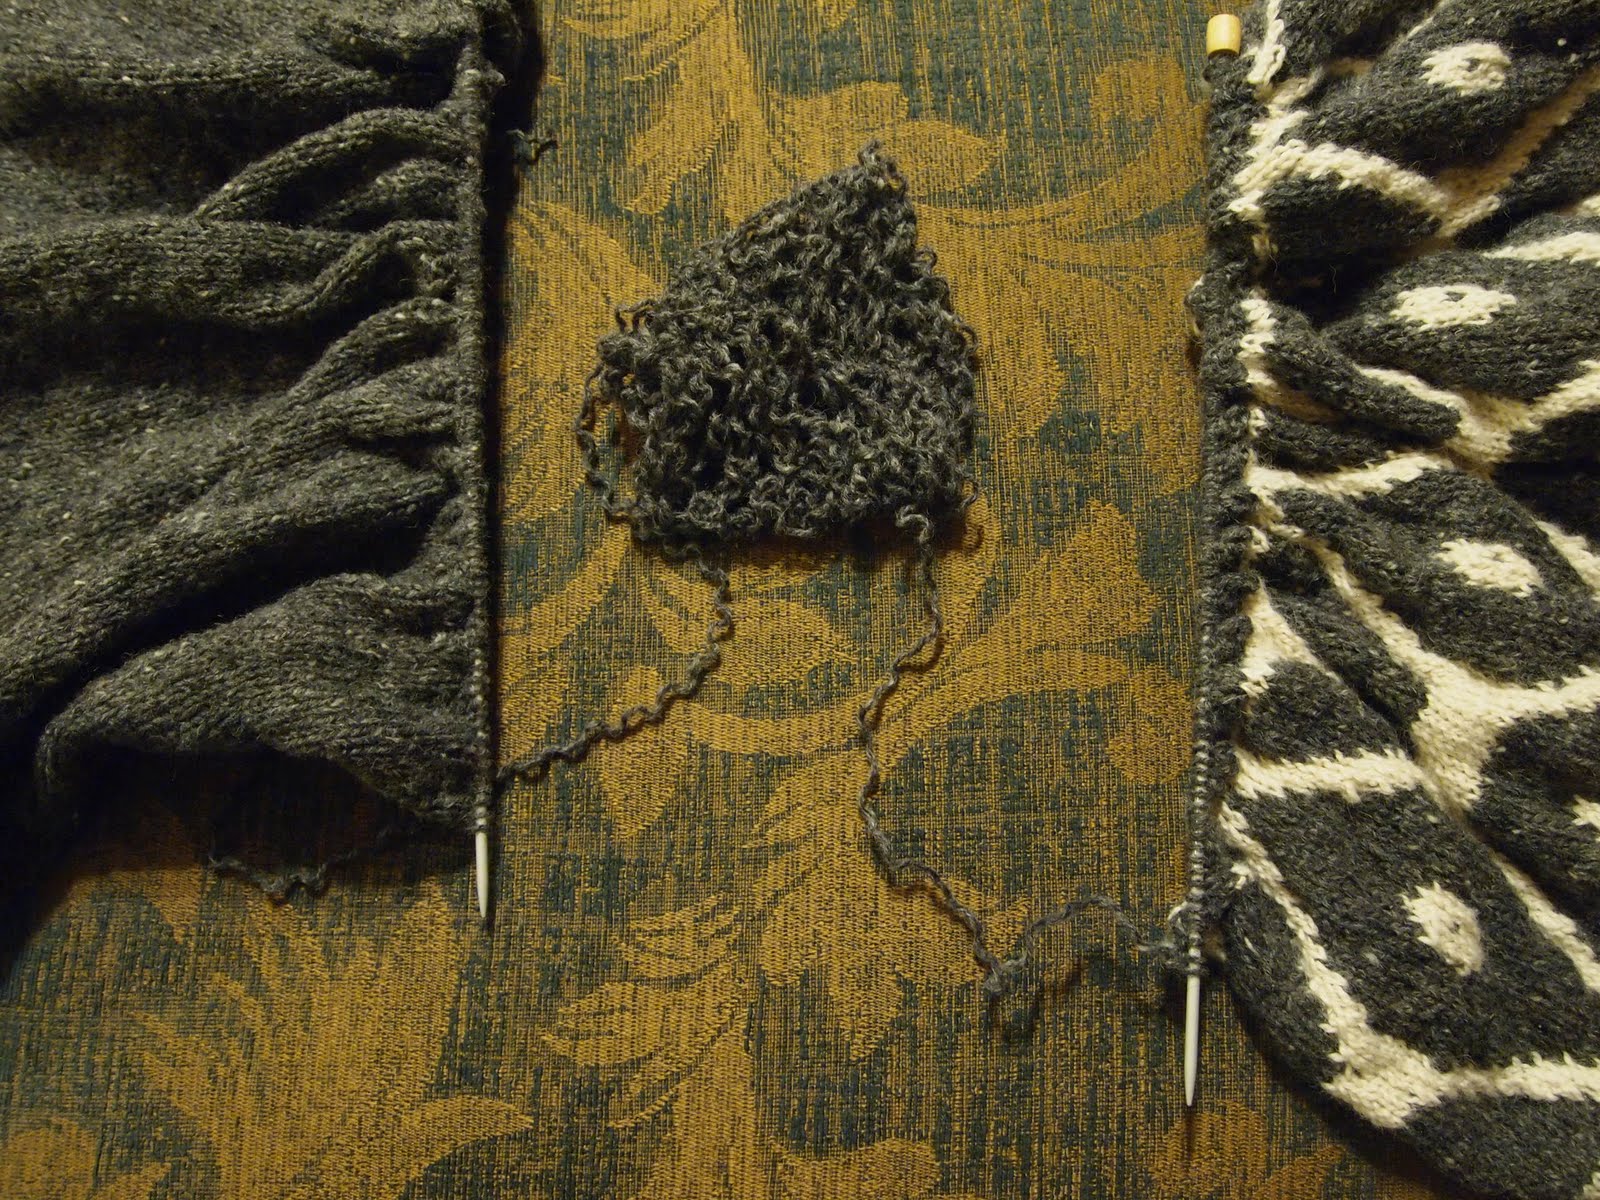
I have been pushing myself hard to finish my Truffle Tunic. It's just been dragging on and on. I put the front aside half way through the colourwork last November and started on the back. That was a marathon of grey stockingnette, and did not lend itself to long knitting sessions because something about the wool, needles and weight of project was really hard on my left hand/arm.
But I pushed through. Last week I finished the colourwork section on the front and was very close to the end of the back. That's when the ball of wool I was using for the back ran out.
I had a ball attached to the front yet. That's all I had left. There were some grey rows to do on top of the colourwork but I didn't want to do them until I knew for sure I had enough wool. I wouldn't know if I had enough wool until the back was done. Conundrum!
What I did was continue knitting the back with the other end of the ball attached to the front. I ended up with two halves of a sweater connected by one ever-shrinking ball of wool:
Once I had the back knit even with the front and only 4 rows of ribbing to do on each, I felt much better. Whatever happened, I could at least easily make them match. To save on possible rip-backs, I then alternated working on the front and back. Two rows on the front, two rows on the back, the ball of wool is getting smaller!!!
But I got my four rows on each part done, and then I got them cast off. I ended up with this much wool left.
Troy thinks I am a gambler at heart because I seem to keep doing this to myself. ("Not that often," I protest. Wait...the Whistler hat, the Superscarf, the Cuffed Boot Socks,...ok, ok, so those happen to be my last three projects. "Coincidence!" I now weakly protest.)
The only thing that irks me about almost running out of wool in this project is that it could have so easily been avoided. No, I couldn't buy more wool--it was recycled from a sweater, remember.
If I had knit this project from the top down, I could have gotten all the hard parts out of the way first, (made sure I liked it before I had so much invested), and I could have just knit the length until I ran out of wool. Then the only concern would be whether it would get as long as I wanted it to be. But if it didn't, I wasn't stuck with a sweater missing the top part of the pattern or a back shorter than the front. No, worst case, I would have a perfectly usable sweater that was an inch or two shorter than I would have really liked.
Well, let's call it a lesson learned and a catastrophe avoided because I had enough.
On the other hand, getting the finishing done was a lesson in perseverance. The front and back were attached at the shoulders with a three needle bind off. I followed the directions and got all 330 stitches cast off. I then tried it on by flipping it over my head. (At this point the shoulder seams were done and the neck edges cast off so it hung like a kind of poncho.)
Looking in the mirror, I could see that 1. the bind off was too loose on the neck edge and 2. the shoulder seams didn't come in far enough. (I.e. the neck opening was too big.) Ok, I am a big girl. Even though I had been thinking I would finish this thing every day for a week straight, I could take all that out and do it again...
So I did. I didn't have to take out both shoulder seams, but I did have to take out the neck edges and redo part of the shoulder seams to bring them in further and then redo the neck edges. But the big girl did it (without tears). Problems solved, so I thought.
Then while I was working in all the ends (because I was going to get this d*mn thing blocked today if it killed me...), I noticed this:
Between the yellow lines lies a perfectly good seam between the front (top) and back (bottom) from the three needle bind off. Between the red lines is a three needle bind off done from the wrong side resulting in a seam on the outside of my shoulder seam.
Ok, really, big girls don't cry....::chin quivering::
Boo hoo, I had to take it out again only this time I had already cut one end after working it in and had to worry again about the piece of wool not being long enough. But I persevered and got it done without running out of yarn. You can see it looks much better:
as it's lying out blocking.
I have the whole thing blocking, as a matter of fact:
Following my new habit of using the washing machine, I had it soaked and spun out in no time. Pinning took a little more time. After I had it all pinned, a little voice in my head said, "Should you really measure that to make sure the halves match?"
I listened to the little voice and discovered that the front was pulled a good inch longer than the back both above the sleeve increase and below. So I repinned it and now am walking away for a while...
The colourwork is not the best I've ever done for two reasons: there are a lot of very long floats in the pattern and these two yarns do not knit up in the same way at all. (More details here.) I think the results will be livable though. Time will tell.
And now I should really head outside for some work I've been avoiding for a week. (There lies my truest talent.) They promised me very warm temperatures today and I don't think that's come true. And no sunshine. I miss sunshine.
It was a Busy Week!
-
I recently shared some of the smaller quilts finished this week. We also
had some larger lap quilts cross the finish line too.
This quilt top has bee...
2025 Laundry Basket Mystery Quilt, Weeks 1 & 2
-
I've been so good this year sticking to my list of projects and not getting
side tracked however I got squirreled! I've succumbed to the Laundry Basket
M...
It's A Bit Supernatural
-
Recently I bought some Spoonflower fabrics inspired by the TV show
Supernatural, and I decided to make some projects with it.
When I found this panel fabr...
What’s math for anyway
-
Well, spoiler alert… Ranunculus fits just fine. This was not at all a
guarantee, despite the rather ridiculous number of times that I checked
before bindin...
#3 : My Most Embarrassing Moment Would Be …
-
This is the 3rd installment in a series of 51 posts inspired by a list
of writing prompts from the website Journal Buddies. If you’d like to know
mor...
Gilipeysa Cardigan
-
Recently I have enjoyed indulging in a sweet little colorwork sweater as a
gift for my cousin’s brand new baby boy!
I have been seeing so many amazing co...
The Christmas Morning Socks Knit-Along!
-
Yesterday on Instagram I posted the idea of casting-on for a sock
knit-along with the goal to finish them in time to wear them Christmas
morning. I thou...