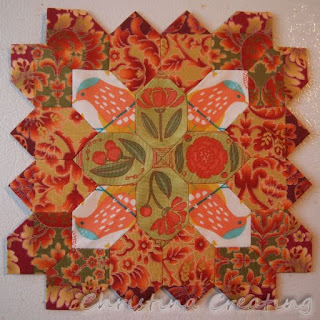
I have completed 11 more Lucy Boston Patchwork of the Crosses blocks. Here they are ensemble:
And here's a closer look, starting with the most tradition constructions -- four different fabrics arranged in sets of four on the inside and sets of eight on the outside ring.
I fell in love with these gnomes, especially the fishers! They were the perfect scale for these honeycomb pieces and were spread out on the fabric so I could cut just one. How handy!
Peter Rabbit characters -- how am I supposed to resist these little fabrics? You can see these rabbits weren't spread as far apart as the gnomes so the pieces aren't quite so "clean", but it works.
Blue and orange and pink - oh my! I really love the pink/purple circles fabric. It has a lot of very useful colour combinations in it.
I pulled out these three fabrics because I saw a similar funny orange colour in them.
I can't imagine using them all together in a quilt that would use larger pieces, but I think this block works:
The block above and below are less traditional in that they use the same fabric for all the pieces in the outer ring. They weren't cut from the same part of the fabric though, so they still look like different pieces.
I had the pieces for the outer ring of the block below for quite a while before I found fabrics to go with them.
The next block uses the same fabric (and fussy cuts) for the blocks in the middle, and the same fabric, but different cuts for the outer ring. I made pairs of sheep, hens, cows and pigs, but even the pairs aren't identical to each other.
In the following block, there is a middle ring formed by using the same fabric for those pieces. I had this fenced village put together for quite a while before I found the right creatures to live in the "village square" in the middle. :)
My most recent block put together some Eiffel Towers. The towers are formed by fussy cutting and pattern matching three different honeycomb pieces.
While cutting out the fabric and basting them to the papers, I made sure to mark them in sets (A-D) because there was no guarantee the top of one tower would match with the bottom pieces of another set.
It was some very customized fussy cutting. I gave myself a break by making the rest of the pieces non-pattern matching!
I really liked some Tula Pink fabric with snails on it and did a similar pattern matching over three honeycomb pieces. But you can see I arranged the rest of the block quite differently:
Finding the purple and greens to go with it was a happy accident of having a ridiculous amount of fabric out at the same time.
Finally, I can show you a new spiral block design. The first uses some Cotton and Steel fabric with squirrel tails and a grey text fabric. (I call this "squirrel swirls". :) )
For the next one, I had the idea to do a primary colour gradient. First thing I did was go through all of my fabrics (scraps, fat quarters, and full yardage) and cut a honeycomb from any fabric in the right colour that read mostly as a solid or tonal. FYI, that took a really long time.
Then I arranged them from light to dark. (I can't imagin why there are so many more reds than any other colour!) Then I pulled out six fabrics that made a nice gradient from light to dark.
Here is the final block:
I really like the softer look of the solids/tonals. The spirals are not quite as obvious, but it's still an interesting block.
And here are all the sewn blocks so far:
That's 29 out of 56. I have five more ready to sew and a couple more that are partially designed.
I can't sew quite as much as I would like because my left wrist is acting up. (It doesn't like gripping the pieces together for such long periods.) If you have any ergonomic suggestions for me, please let me know!
It Takes a Village
-
I can't thank enough for all the quilt tops we have received here at Many
Hands and Many Hearts. It has been a bit of a challenge to get them all
quilte...
19 hours ago


