Showing posts with label Red Triangle Stole. Show all posts

Monday, June 6, 2016

Ordination Stole

It was a great privilege to participate in the worship service this morning wherein our new minister was ordained. As part of that, I got to present a stole I had made for her. Here are a couple pictures I got from Facebook:
In my hand, ready to present. (I'm on the left.)
Thankfully someone from her family got pictures because I didn't dare have anyone take some during the service (although I was trying to think of some way I could get some).

Now that you've seen how the stole looks on, I'm going to get into some of the details of how it was made.

I talked about knitting the stole here and here. The summary is that I took a scarf pattern and knit two scarves side by side and then cut a steek up the middle to separate them. They were joined at the back with a 45 degree angle. (I knit them side by side to make the colours match.)
Knitted item.
Sewing along both sides of the centre stitch.
Cutting up the centre stitch. I did the centre
three stitches in a P-K-P rib so the centre
stitch would be very easy to follow.
The knitting was completed in August of 2011. I really enjoyed the process, but once it was done, I didn't think the colour change was dramatic enough to really make the triangles enough of a design element. The stole ended up in a ziplock bag in a box. I figured I would unravel it one day when I had another project I wanted to use the yarn for.

But then I found out that we were calling a new minister and she said she was interested in a stole made by me. (It's amazing how motivating a little appreciation can be!) And so I started to rethink this stole that I had knit. What if I just used it as a base? A starting point for something more...

So I thought of embroidering on top of the garter stitch scarf. More like weaving really:
I got the idea from a cowl pattern by Franklin Habit. It ends up looking woven and I thought that might be just the thing. Plus the yarn worked through the stitches would help to stabilize the fabric. (Garter stitch is very stretchy and on top of that the weight of the stole hung along the bias.)
I used a silk blend that I had in a pale gold colour. The more I did, the more perfect I thought it was.

It would have been too much if I did the whole stole and I did just the bottom portion:
Yes, there's a pale red triangle on the bottom without the embroidery. I can't remember if I decided to do that on purpose or if I just forgot at the time. But when I noticed it, I decided to keep it that way.

Next step was to work on the embroideries I wanted to apply. First I traced the triangle shapes they were going to fit on and then I drew several symbols (based on ideas from a Google image search):
I traced the symbols onto embroidery cloth with a water soluble pen:
 Yes, the lines are a little messy, but they're just a guide so it's ok.
Here you can see the first layer of embroidery. In order to make it have more body, I stitched perpendicular to the direction I wanted the final stitches to be. Then I worked over them with the same colour in the other direction. This way the stitching stands up higher and the layer underneath fills in for any gaps in the stitches so white won't show through.

Here are three finished designs:
I decided to use a red silk blend for some accents on the cross and then decided it would be good to fill in some of the gaps on the other shapes to make them easier to cut out and make into a patch to be sewn on. (The red was done in one layer only to allow the design to "pop up" and stay dominant.)

Meanwhile, I had to continue finishing the body of the stole. I decided batting (my first idea) was too thick and heavy to use to stabilize the knitting. Instead, I spray basted some flannel to the back side of the knitting, trying to make the knitting as square and "straight" as possible.
Yup, sometimes you use what you've got.
Even when it's pigs and pink roses.
Once the knit fabric was stabilized with the flannel, I cut out the correct shape from batik fabric for the backing. I put the layers together, right sides together, and sewed around all the edges. I made sure to cut the batik extra big and sewed from the knit side so that I could follow the edge. (Although stable, it still wasn't perfectly straight and square.) I left a gap along part of the edge and turned it inside right more easily than I thought I would.

Here is a view of one end:
It already looked so much better. Fabric was stable. Edges were straight and even with each other and I corrected both the length (had to come up half a triangle) and the angle at the back (had to make it steeper than 45 degrees). It sat on my shoulders really well and I was starting to think this was really going to work!

Next step was a little quilting to hold the layers together and give a little depth and texture. I started at the bottom of each side and went up to the centre back by following the zig zag path of the lines between the triangles.
I was using the walking foot to keep all the thick layers moving together, but it was catching and pulling on the silk embroidery thread, so I switched to my new clear round quilting foot. It worked wonderfully!

I did one more patch based on a celtic design to represent the Trinity.
After I had stitched the gold parts, I was thinking it would be nice to have a contrasting colour for the circle. And then I remembered I had silk in white. It's wonderful to have a stash so that whatever you wish for is already there! :)

To make it into a patch, I trimmed a wide margin of the base fabric and then turned it to the back side with the help of an iron. I basted it in place and then hand stitched muslin to the back along all the edges:
I was going to sew them onto the stole but I decided that pinning them in place would work better.

The original plan was to have the Trinity sign on one side and the three symbols of the persons of the Trinity on the other, but when I "dry fit" it, it was way too much going on. So I decided to finish the one patch and pin it on. I'll finish the other three and then they can be changed depending on the season. (They can also be easily removed when the stole needs to be laundered.)

One last view of her wearing the stole as she ends the service with a blessing:
What a great project this has turned out to be for me, especially as I had once given it up for useless!

Project Stats
Started
: 16 May '11 / Finished: 3 Jun '16
Pattern: Adapted from Multidirectional Diagonal Scarf by Karen Baumer
Materials: Evilla Artyarn 8/2, A-85 red variegated, 160 g ($35) and small amounts of silk blends for embroideries; two yards batik for backing ($25); flannel for lining.

Wednesday, May 25, 2016

Let me explain. No, there is too much. Let me sum up.

I haven't been knitting too much lately, but I picked up the needles enough to finish these three bibs I've been working on since the end of March.
A couple people I know have just had a baby or are about to, so I felt a deadline on these. None of them are exactly the same because I was making them up as I go. They're all double knit in the centre with a garter stitch border.

And just because I am obsessed with Kitchenering and managed it in garter, I'll show that too:
Can you find it? Don't worry, you're not really supposed to!
I used it to join the end of the neck band to the beginning.

I'm also working on a liturgical stole. I knit the base a while ago and finally figured out how I could use it. I'm also going to apply some embroidered symbols:
Three down, one to go. Deadline for this is June 5 when it will be presented to our new minister when she is installed that day.

I applied to have my orange and grey zig zag quilt in the Shipshewana Quilt Festival and just found out Monday that it was accepted!!
Wow...it's my first time and I am very excited.

This also means I have to add an identification label and a hanging sleeve to the back of the quilt before June 18 when I have to turn it in.

I've done a little more quilting on my Mt Robson quilt. Here's a piece of the sky
 and a bit of the water:
The quilt is too thick for my machine to free motion quilt comfortably and I have to go painfully slow. But I did get the sky and water done and now I only have the ground (very little area) and the mountains left! The only deadline associated with this project is that I hope to enter it in the county fair at the beginning of August.

Of course, I have been keeping up with the Farm Girl Vintage I'm doing with my sister. In addition to sewing blocks, I took some time to play with layouts.

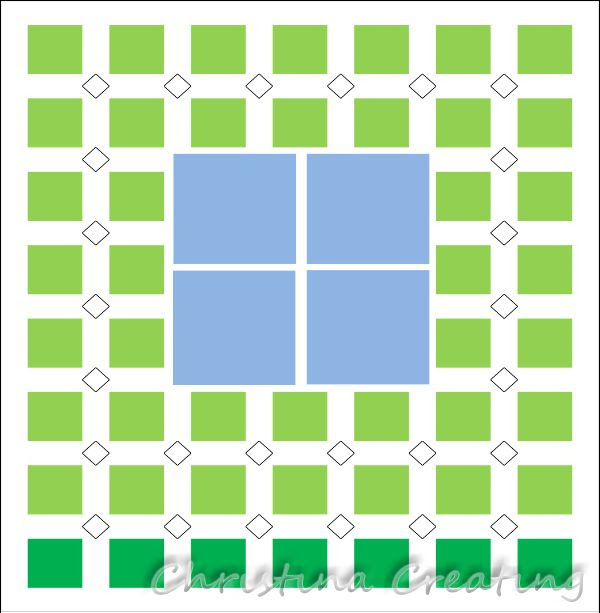
My first idea with to have the four 12" blocks in the corners with the 6" blocks filling the rest:
So the blue squares are the 12" and the green are the 6". The black outlined squares are like cornerstones, but set on point. Currently I am thinking they will be a brighter print--all of them done in the same fabric.

But I realized that this would make the 12" squares hard to see on a bed because they would be hanging off the edges. So I looked at a layout that would put them in the centre, sort of like a medallion quilt:
I wasn't happy with the spacing around the larger blocks, so I kept trying. This is the design I landed on:
It gets the larger blocks toward the centre but still has a nice spread out grid feeling to it. There are also fewer cornerstones so that makes it easier! :)

Yes, I have a new block to show you, but I'll do that in its own post later this week.

And finally, briefly for now, I fell in love with a fabric line, had to have it, and had to start a new project with it right away.
I did four blocks to try out the idea I had. I need to get a little more fabric to get some more variety in the striped sections and to complete the pattern I have in mind, but I am itching to work more on this project. No deadline--just fun!

Tuesday, June 21, 2011

Red Stole Redux

I've been wanting to touch base here, but I don't feel like I have a lot to report. Such is the bane of working on large projects! (Never mind that I'm keeping one of them secret. And it really is taking a lot of my time.)

I can say that my red triangle stole is going much better since I ripped it back and refigured it.

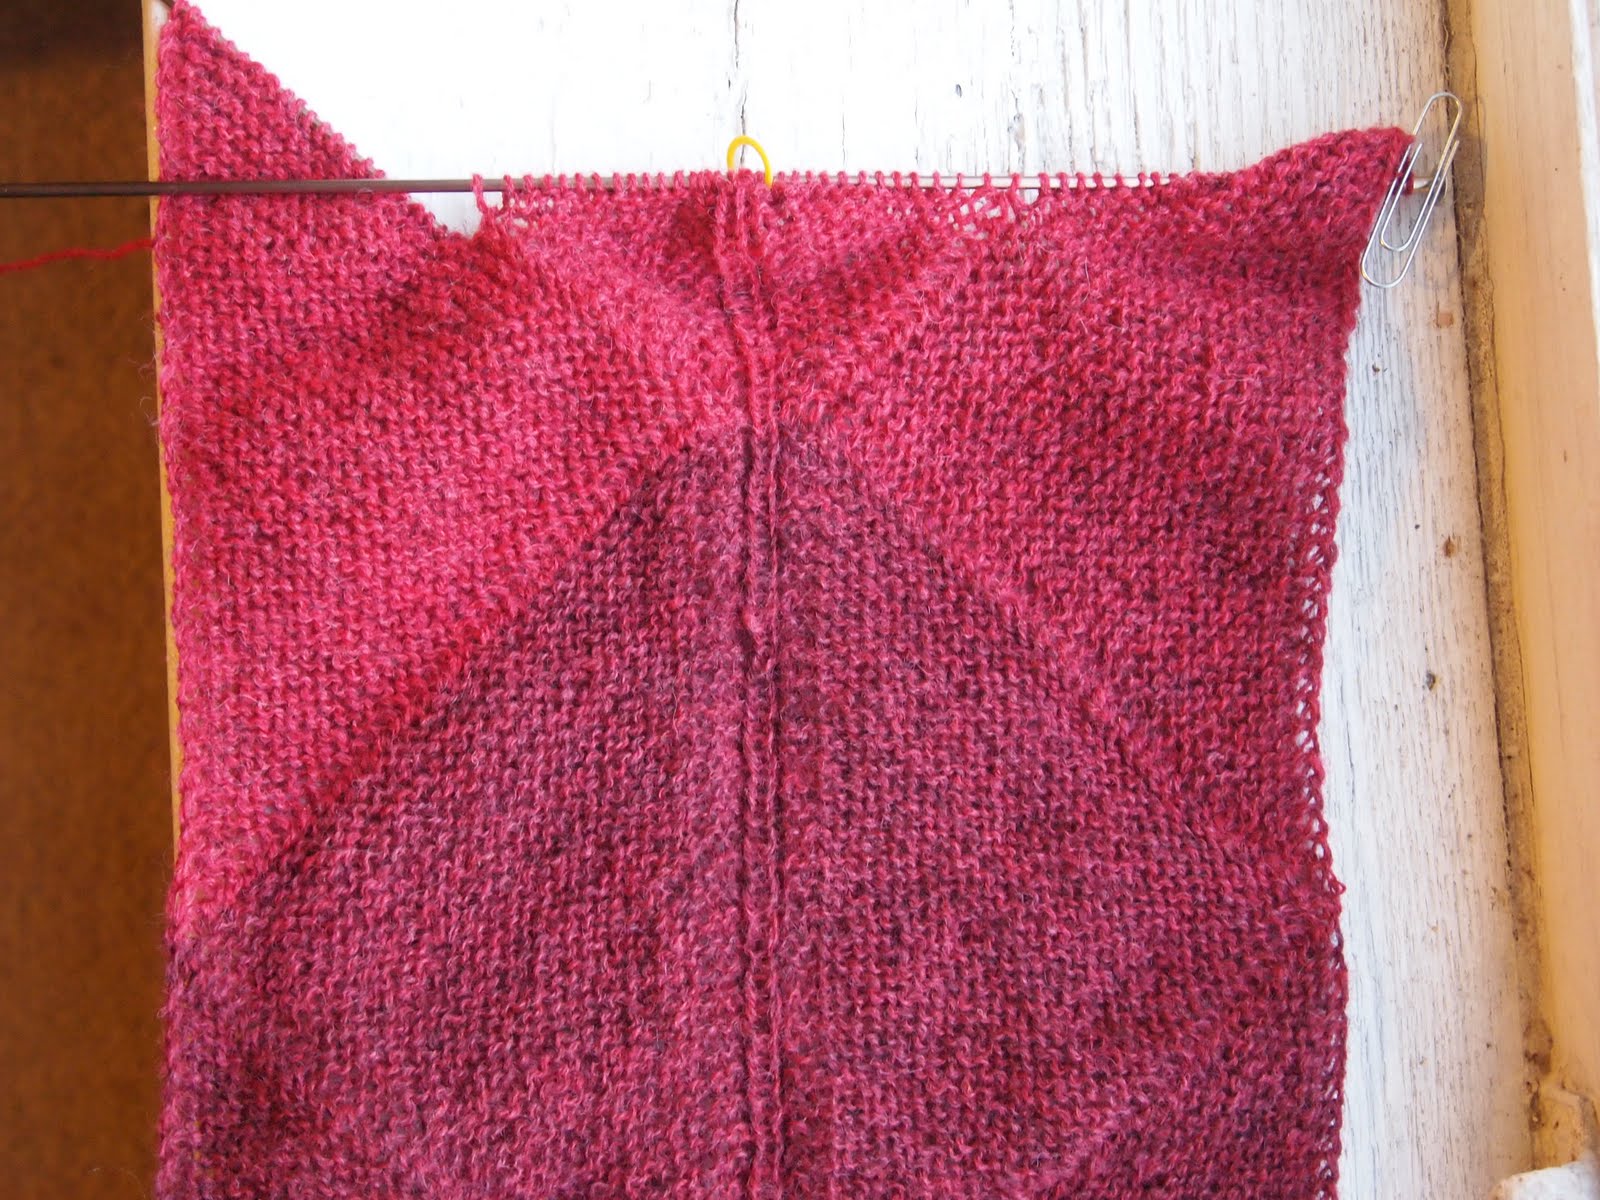
Here is the old version of the stole:
You can see how after the initial shape (on the left), the whole things pulls in severely. That was the problem. The new one:
is so much better. But of course, with almost 50 percent more stitches, it is going slower.

Here is a view of the piece spread out: (just to remind you, I will be cutting it down the middle to form the left and right sides)
You can see the triangle shapes here, I trust, and I captured where the yarn is transitioning from one colour to the next. You can see the right side triangle was done first because the lower part of it still matches the previous triangle pretty closely. After the right one, the left one was knit, and you can see how much more it contrasts with the previous one on that side.

For you knitters out there who are wondering how I adapted this scarf pattern to a two-sides-at-a-time stole, here is an overview:

1. The fabric--essentially two scarves knit side by side at the same time:

2. Here I will outline the triangle shapes so they are very obvious:

3. The yellow lines demonstrate the direction of the knitting on each triangle:

4. After the initial shape is done (a modified bias square that I think I talked about in my first post), you begin the alternating triangles:
Starting at the bottom of the picture, I am knitting across both centre triangles as demonstrated by the lower yellow lines. There is an increase at each green dot which is what makes the knitting flare out and form the triangle, and the steek stitches are between the increases. When the last row is done (top yellow line), I start one of the side triangles.

Starting at the left lower blue lines, I again increase at the green dots. When that triangle is done, I swoop all the way down, across the steek stitches in the centre and to the beginning of the second (right) side triangle. Again I knit following the lower blue lines (this time on the right), increasing at green dots.

Once that side triangle is done, I am back at the center and can begin again. Easy, peasy, right?

One thing this project has going for it is that it is easy to pick up and put down. I've done quite a few sessions waiting in the drive through line!

I still have not worked through all the yarn that I raveled from the first try, but I'm getting there. Whenever I have to rip something back, I always feel a little unsettled until I've knit up all the raveled yarn again. Usually this makes me work on something long past when I should be doing something else, but in this case it was so much that I had to admit it was not going to happen in one sitting!

Monday, May 30, 2011

Starting and Restarting

I mentioned a new project that I said I was obsessed with--I've started a stole. I plan to give it to my church if it turns out nice enough. I asked someone there a while ago if they needed a new red one because I had this project turning in my mind. If they had said yes, I would have got right on it. But I never heard back. Then I decided I had to get this project out of my mind whether they wanted it or not! If not, I'll find something else to do with it.

So what is a stole? It's a little confusing as the word is more commonly used for a fur wrap worn about the shoulders. (Well, not that I see too many of those these days.) But this type of stole is basically a long scarf that is worn with its center at the back neck and each end hanging down over the front of the shoulders.

The only difference between what I'm knitting and a long scarf is the shaping given at the back so that it turns the corner while lying flat. That's the basic idea anyway.

I wanted to use my colour changing wool and I wanted to make the gradation mirror itself on the two sides. I did not want to start at one end, knit all the way around and have the colours just fall where they may. So where did that leave me?

I decided to start at the center back, knit a bias square and then knit the two long pieces off of two adjacent sides. (So it would be like two long pieces meeting at a 45^ angle.) Except I couldn't knit the two long parts separately--I would have to knit them at the same time by casting on a few extra stitches and steeking it down the middle when I was done. That way the colour changes would be the same on both sides. Brilliant right?

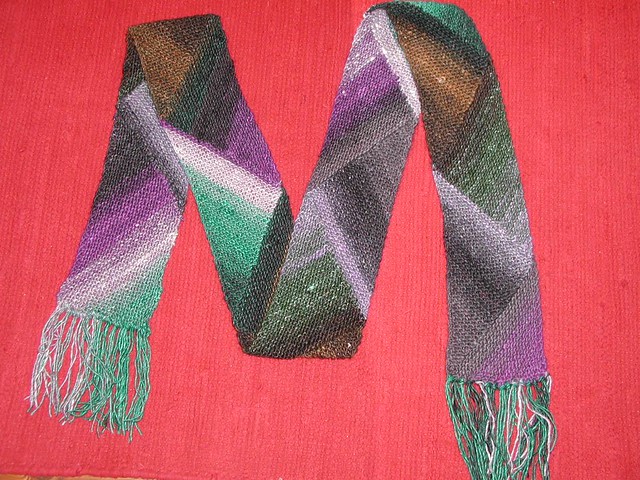
But what pattern to use? I was drawn to the Multidirectional Diagonal Scarf which I had suggested to Amy as a Red Purl knit-along a while ago and it's been a big hit ever since:
It's constructed from triangles in a garter stitch and you can see that it really does interesting things with colour changing yarn. After knitting about a third of mine, I think the scarf is better on quicker colour changes than what I'm working with, but it will still be effective. I like the triangle construction because it's interesting and because of the shape's association with the theology of the trinity. (Or Trinity? Do you have to capitalize that?)

After making some headway on the two long sides pieces, I noticed that the beginning square was wider than my pieces were now. I mulled on that for a while and finally realized that I had let my math training down (again) and failed to realized that I needed to apply a basic geometric principal. The way I had put it together I had assumed that the side of the triangle was the same length as the base. But it's not. So although my beginning square was the right dimension, my long scarf parts were too skinny.

For a while I figured it wasn't "that bad." Then I figured I could "block it out," but yesterday morning at church (before the service) I finally acknowledged that I had to redo it. So I tucked it away and on the way home, I ripped and ripped and ripped. (I really had quite a lot knitted.)

So now I am back to the beginning. I have figured out the math (thank you, Pythagorean Theorem!), how many stitches to increase and when. I have a feeling I won't be quite as obsessed now that I have a better feel for how the project is going to go (when I start something like this it's always, "just one more triangle" or "just until I finish the colour change") but it's a very easy project to take along with me and knit anywhere. That is always a good thing for finishing projects.

The only disadvantage to knitting this in public is the funny looks and blank stares when I answer the question of what I am knitting. "A stole." Yup, then comes the blank stare or funny look. People just don't know what to do with an unexpected response.

Maybe I'll just tell them I'm knitting a scarf. That should keep them happy.

May I suggest?

I Say! or at least I did once...