Sunday, October 26, 2014

A Warm Hug From Your Best Boyfriend

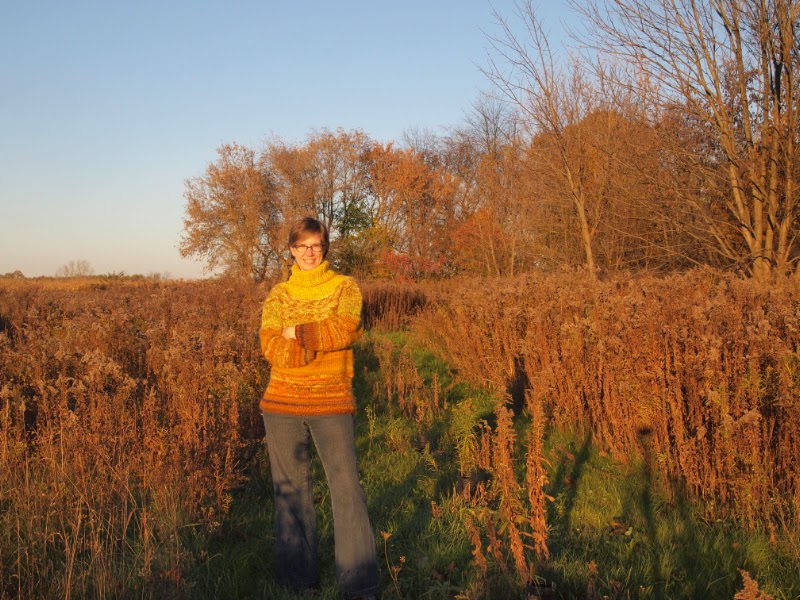
(Trying to take a selfie while giving myself a hug!)
That is how I feel about my new Ombre Yarneater sweater.

I have worn it numerous times and I can not get cold in it. (Nor do I get overheated, but I like it warm.) Even on the days when it's been a little windy outside, I can feel the wind as it makes its way through the knitted fabric, but it's not cold. (Contrast that to a nylon jacket where the wind can't get through but the nylon on your skin definitely feels cold.) It's very cosy. Mmmmm...excuse me as I snuggle for a moment.

Here you can see the full sweater a little better. I ended up with seven stripes as I made my way through the yarns. It's more striped than an ombre effect, but on the other hand it definitely progresses from a lighter, brighter colour to darks. I am happy with the balance.
To review the construction a little, the pattern starts with a big ribbed cowl neck:
Then the body is shaped with evenly-spaced increases around the yoke:
That's  my first handspun in the first few rows of the
second colour. It blends right in with the Malabrigo!
On the pattern sample the increases were more noticeable (little holes) but I wanted mine to be less visible. I used the lifted increase, lifting and knitting into the leg of the stitch below the current stitch. I don't think this type of yoke is the most flattering and I usually avoid it, but I thought it suited this sweater and since it is oversized, the fit is not as crucial.

After the yoke, the stitches are split for the body and sleeves. The body is worked straight with no waist shaping.
The body and sleeves are finished with 2x2 ribbing:
I had to make the ribbing a little shorter than the pattern called for because I didn't have enough yarn, but I don't think it hurts the sweater any. The sleeves also are a little shorter than called for, but I think that has worked out for the best. The sweater could easily look really sloppy and too-long sleeves would not help.

Another thing I worried about while working on it was the overall length of the sweater. Too long and it's a tunic. Too short and it's cropped. Plus making sure the stripe widths were balanced. I'm really happy with where the length ended up, and thankfully didn't have to work hard or finagle much to get there. :)
The only negative about the sweater is that it does make me look rather like a football player. The shoulders are wide and of course the whole thing has a very bulky fit.
My best impression of a body builder pose.
Ya, there's a reason I don't do this professionally...
But on the other hand, although fitted bulky items are fine when that's what you want, I definitely wanted a roomier bulky sweater in this piece. And I got what I wanted.
It took me a while to get pictures of this sweater once it was finished. With the long work hours and the shorter day length, it was hard to find an opportunity. But last Monday it was sunny when I got out of work and I knew the best of the fall colours had just passed, so I got changed as soon as I got home and ran outside to get these shots.
I mentioned before that I started collecting these various yarns well before I knew what I was going to do with them. I didn't think that they were colours that I wore much so I wasn't sure how that was going to work out. Of course, the first time I wore the sweater, I looked through my closet to see what I could wear with it and found a perfect green skirt with orange flowers and mustard-yellow tights. I am amazed how often that happens and it makes me think I have no idea what colours I wear!

I also wouldn't think yellow would be good on me but I think the warm tones of this sweater are fine.
That is a happy knitter.
Project Stats
Started
: 19 Sep '14
Finished: 4 Oct '14 (I read on Ravelry that someone got theirs done in one week. I was hoping to match that, but it took me two.)
Pattern: Ombre YarnEater by Stephen West ($12 in ebook with 2 other patterns)
Materials:
1. Ella Rae Classic Solids, Heathers & Marls (601 yellow) 1 skein total ($0)
    Malabrigo Yarn Lace (35 Frank Ochre) 23g ($5.50)
    Malabrigo Yarn Merino Worsted (Sauterne) 59g (leftovers)
2. Handspun Fleece Artist Merino 50g ($10) alternating with
    Malabrigo Yarn Aquarella (c12 Palmar) 198g ($17)
3. Malabrigo Yarn Merino Worsted (37 Lettuce) 54g (leftovers)
    Berroco Ultra Alpaca Fine (1292) 50g (leftovers)
    Lorna's Laces Shepherd Worsted Multi (40ns Sunshine) 36g (leftovers) alternating
    with Ella Rae Classic Solids, Heathers & Marls (601 yellow)
4. A few rows of Malabrigo Yarn Aquarella (c12 Palmar) to blend
5. Lana Grossa Olympia (417) 100g (€8.50)
6. Mystery handspun thick and thin 91g ($30)
7. Lana Grossa Olympia (040) 100g (€8.50)

Friday, October 24, 2014

Insulate! Insulate!

You should read that title in a very robot-y voice, as in daleks from Dr Who. My sister found a pattern she loves to make and she made one for me...
In wool! (And she never uses wool. But she did it just for me.)

You can see it has police boxes on it with daleks.
But since these daleks are intent on insulating, not exterminating, I feel quite safe. :)

You can find the pattern here. My sister likes it very much and has made a number of them. (I think she said eight the last time I talked to her!) The pattern shows you how to do colourwork working with one colour in each hand (essentially knitting continental with one colour and English with the other). It sounds like she has been converted!

Here's a little peak at the inside of the hat and her impeccable stranding:
I love it when the inside looks as well attended to as
the "good side".
It sure is nice to get a lovely hat with none of the work it normally takes! :)

Tuesday, October 21, 2014

Maybe I Should Have Called It Spintober?

For the past week I have been doing very little knitting, sock or otherwise, because I saw this fibre at the Red Purl and "couldn't resist."
It's Nube from Malabrigo and Amy assured me it would spin like butter. Although I enjoyed my last (and first) bit of spinning in February, I didn't really get the results I wanted. I'm just starting, so obviously I have a lot to learn. And not just mind-learning but also muscle-training learning.

I started on the small spindle I bought second-hand. But the hook kept coming out and when I mentioned to Troy that it was too small for thicker yarns, he immediately asked lots of questions about what would make a good one and jumped on the lathe (not literally) and made me one.
It was a good prototype but the next one will have a number of changes. :)

The spindle is too heavy to use it as a drop spindle (it pulls the strand apart if it's not twisted or is too thin) and I am still doing the "park and draft" style of spinning as I learn. That means you spin the spindle, then put it between your knees (or sometimes under your arm) as you draft the fibre and allow the twist to move up the strand.

Since I like to sit cross legged, I held the spindle in the crook of my knee and worked over my lap. It's not the fastest way to spin, but it was just the right speed for me. I enjoy pulling at the fibre and watching the colours blend as the fibre twists up.

Once the spindle was pretty full, I wound the yarn onto my niddy noddy until I needed it again.
Then I looked at the first bit I had done on the small spindle and decided I would try to re-spin it. It was not very even and I thought although the fibre may not be in the best shape after already being spun once, it was worth a try. So I un-twisted it all, then pulled it apart a little (with the grain and against the grain) and it spun up pretty well. Certainly better than the first time. I've never heard of people "tinking" their spinning (does that make it "nipsing"?) but maybe they just don't blog about it.
When I had to stop spinning (reluctantly),
I tucked the spindle in the couch beside me.
After I had all the yarn spun up into a single, which I think took most of the week I think, I wound it into a cake.
Then I took each end of the ball and twisted them together in the opposite direction onto the spindle. That way I plied the two strands together.
I thought I was going to have to cut the yarn, but I just worked carefully and managed to get it all on the spindle. :)

After a long soak and hanging to dry, I had this:
52.3 metres / 57.5 yards of bulky wool.
There are still some thicker parts and thinner parts, but it's pretty even. The next task will be to find a pattern I can make with that much yarn. (It's a tough job....)

Saturday, October 11, 2014

Ombre Yarneater: Colours and Underarms

Truth be told, I've already finished my Ombre Yarneater sweater and worn it a couple of times. (Ok, more like every chance I can.) But before I have a chance to get pictures, I'll show you some progress.

Last time I showed you the sweater, I was just to the split for the sleeves and was working with multiple strands. After that I jumped to the next colour, one of the Lana Grossa Olympia balls.
But after working a number of rows, I really didn't like the abrupt colour change. So I ripped back the Olympia and worked a few rows with the Malabrigo Aquarella. I had two skeins of the Aquarella and just happened to start with the skein that wasn't as green. This was perfect as the greener skein blended nicely.
I'm a lot happier with the transition now.

The second thing I'm going to show you is how I do the underarm stitches. I used to do what patterns told me and cast on additional stitches to go under the arm, and then pick up off the cast on edge when working the sleeves. (And in fact some patterns have you cast on for both the body and the sleeves and then sew this short seam later--even crazier crazy pants.)

But I thought, how much better to do a provisional cast on so that there is no tight pulling at the underarm seam. And that's what I did for a long time--a provisional cast on over a piece of scrap yarn. When I was ready to do the sleeves, I just picked up the stitches and continued on.

But after doing so many socks toe up and realizing that it's easier to do a short row toe when I cast on over the cable of the needle instead of scrap yarn that I have to pick up stitches from, I applied the same idea to my sweaters. (I know--you realized I could do this when I started the explanation, but it takes me a while, people.)

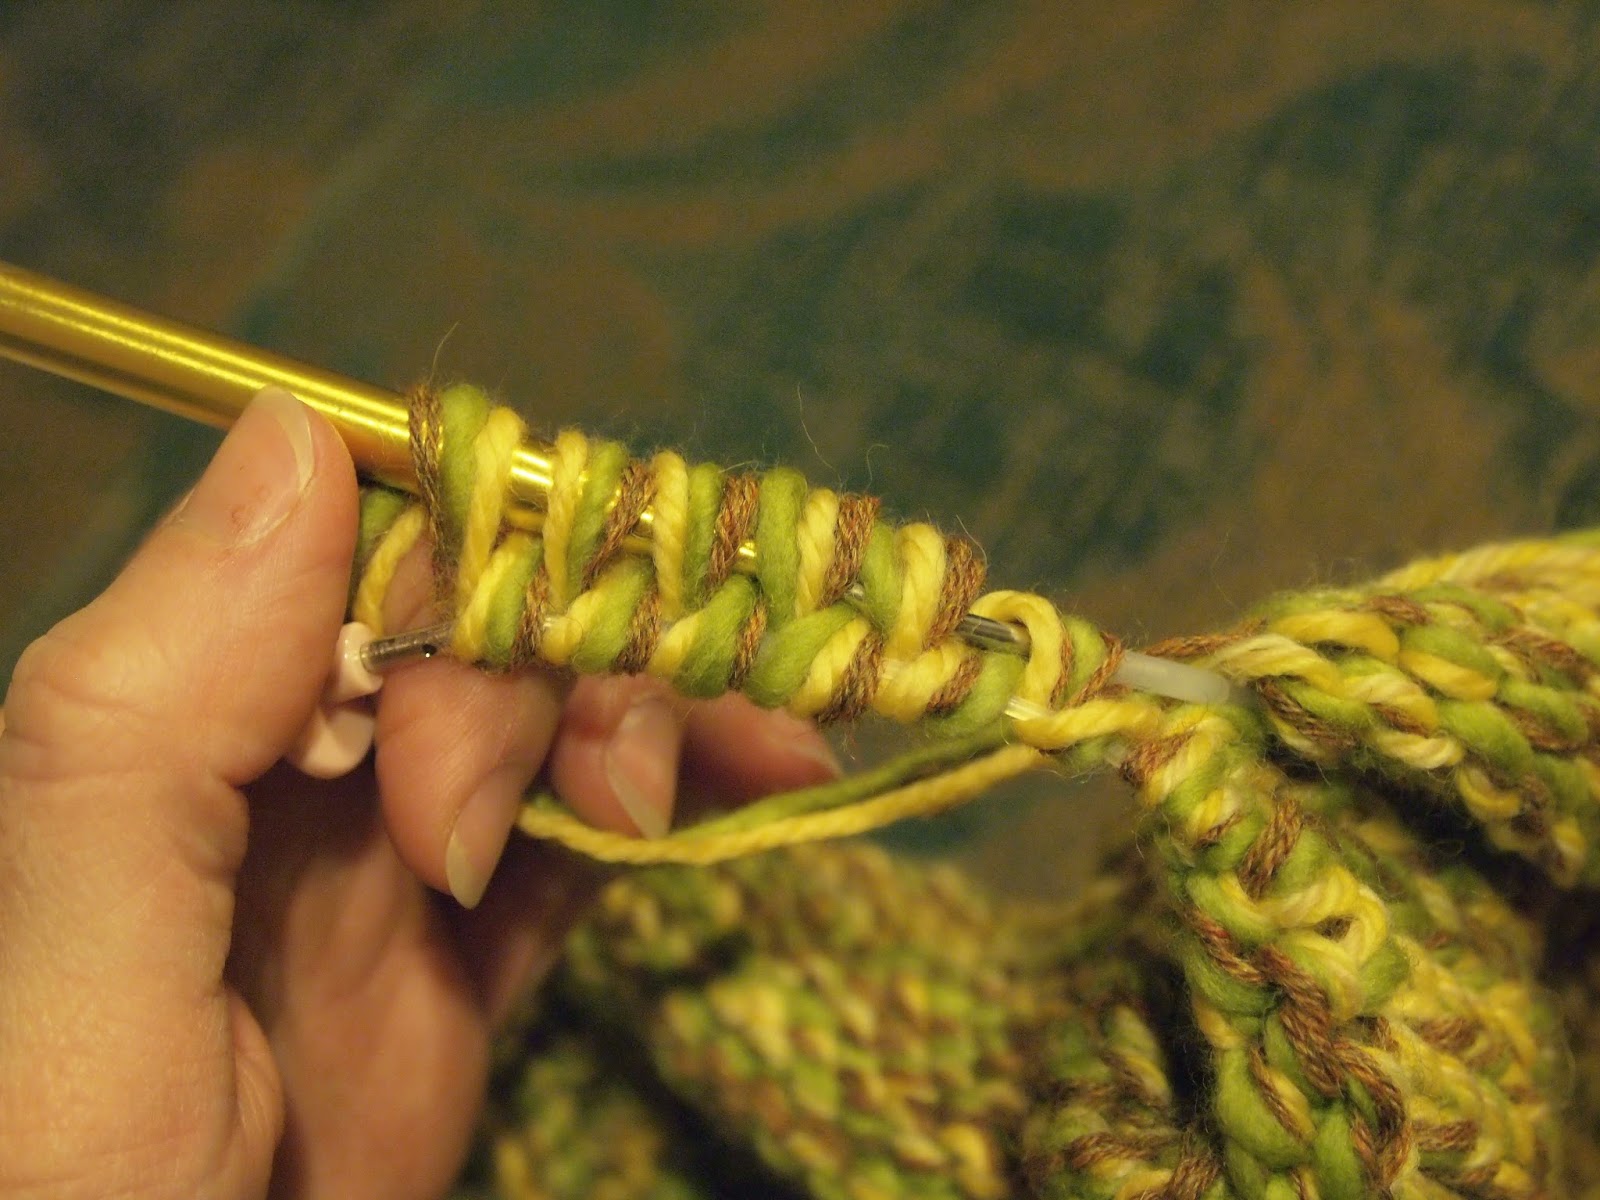
So when casting on additional stitches at the underarm while working the body, I did a simple figure-8 cast on over one needle and the cable.
After knitting the body, you can see where those additional stitches are knit down one way, but patiently waiting for the sleeve to be done the other way. The stitches sit on the same cable that is holding the sleeve stitches.
I started knitting the sleeve half way through those stitches so that my end of round would line up with the side "seam" and when finished it looked like this:
View along the side "seam". Sleeve on top; body below.
Like any place that you cast on extra stitches there can be loose stitches or holes at the sides. You can leave a long enough tail when you start the sleeve to close these up and/or work the stitches with a needle or hook afterward to tighten the loose ones and spread the slack out over more stitches in the same row.

I'll try to get finished pictures up real soon!

Tuesday, October 7, 2014

Tulip Fields Socks: Finished

Let's continue celebrating Socktoberfest by looking at my most favourite socks:
It's getting to be that time of year when the light is short and my work days are long, so these are all the pictures I managed to get of these socks!
These socks had a most unusual construction which I discussed before. I made them a little different than the pattern in that I started at the top of the leg with a provisional cast on so I could pick up the stitches later and do ribbing at the end and use up every bit of yarn. (Or, in case I ran out of ran, I could work a cuff in a contrasting or complementary colour.)

I also worked the stripes with intarsia across half the sock. I.e. after the heel, I went down the sole making the three stripes, and then did a short row toe and went up the top of the foot and front of the leg with three more stripes, attaching it to the first half as I went. I really enjoyed doing it this way and plan to make my own like that, once I choose the yarn and get to it.

My own? Yes, these socks are a gift so even though I love them so much, I will not be keeping them!

Project Stats
Started
: 12 Jul '14
Finished: 23 Aug '14
Pattern: Stripe Tease by General Hogbuffer
Materials: Katia Darling, 2 skeins in colour 208 (€9.90)

Wednesday, October 1, 2014

Socktoberfest!!

You thought I'd forget again this year, didn't you? Well, I didn't!

I started celebrating Socktoberfest by packaging up the socks I have ready for Wool-Aid. I'll be shipping them out tomorrow. They issued a challenge in September to get things wrapped up and sent in so they could fill up their fall shipments. Here are the socks I had ready:
Oh yes, that's a new one on the bottom. I just finished them up last week.
I blocked them on my sock blockers but they're definitely bigger than the socks I wear.

I used a 3x2 rib to "change things up" from the 2x2 rib I did on the other Wool-Aid socks. Yes that's a little facetious, in case that wasn't obvious.
I put in a very small gusset and did a short row heel.
I ended with a cuff of 1x1 ribbing and my usual sewn Kitchener bind off. What can I say? I still love it.
Now I'm looking around the stash for more worsted wool for the next pair. (I may have to ravel another sweater to get it.)

In the meantime, I have a new pair of socks going that I will be gifting to someone in the family. No pictures yet but I will tell you that they are a certain special shade of blue...

May I suggest?

I Say! or at least I did once...