Showing posts with label crochet. Show all posts

Saturday, September 12, 2020

Summer Dreams Top: Some Crochet Fun

I've been following more crochet accounts on Instagram and when I saw the Summer Dreams Tops come up on the designer designsbykey's feed, I loved it right away!

I pulled out some raveled yarn that I had and started swatching. The first swatch on the left below was with a 2-ply raw silk. I got gauge but I didn't like the feel of the fabric. Working with two strands that weren't spun together made it difficult too.

So I added a wool/angora blend and worked with both yarns at once. That swatch is on the right.
It also got gauge but the fabric was a lot better in the hand. And I thought the pattern would show up better with a denser fabric. And, believe it or not, adding two loose strands of wool/angora made it easier to work with. I guess the wool helps to keep all the strands together.

This is really the only in-progress photo I have:
It was taken the day after I started the project. The project was a good combination of mindless and interesting, not over too fast but not taking too long.

After the main body was knit, I blocked it before seaming.
Blocking first makes it easier to seam. Since I don't do a lot of crochet, I figured I should make it as easy as I could on myself!

Once seamed, you add a few rows of single crochet for the waistband:
And some more single crochet around the neck to support the edges of the wide opening:
The sleeves didn't need any extra trimming as they ended with two rows of half-double crochet.
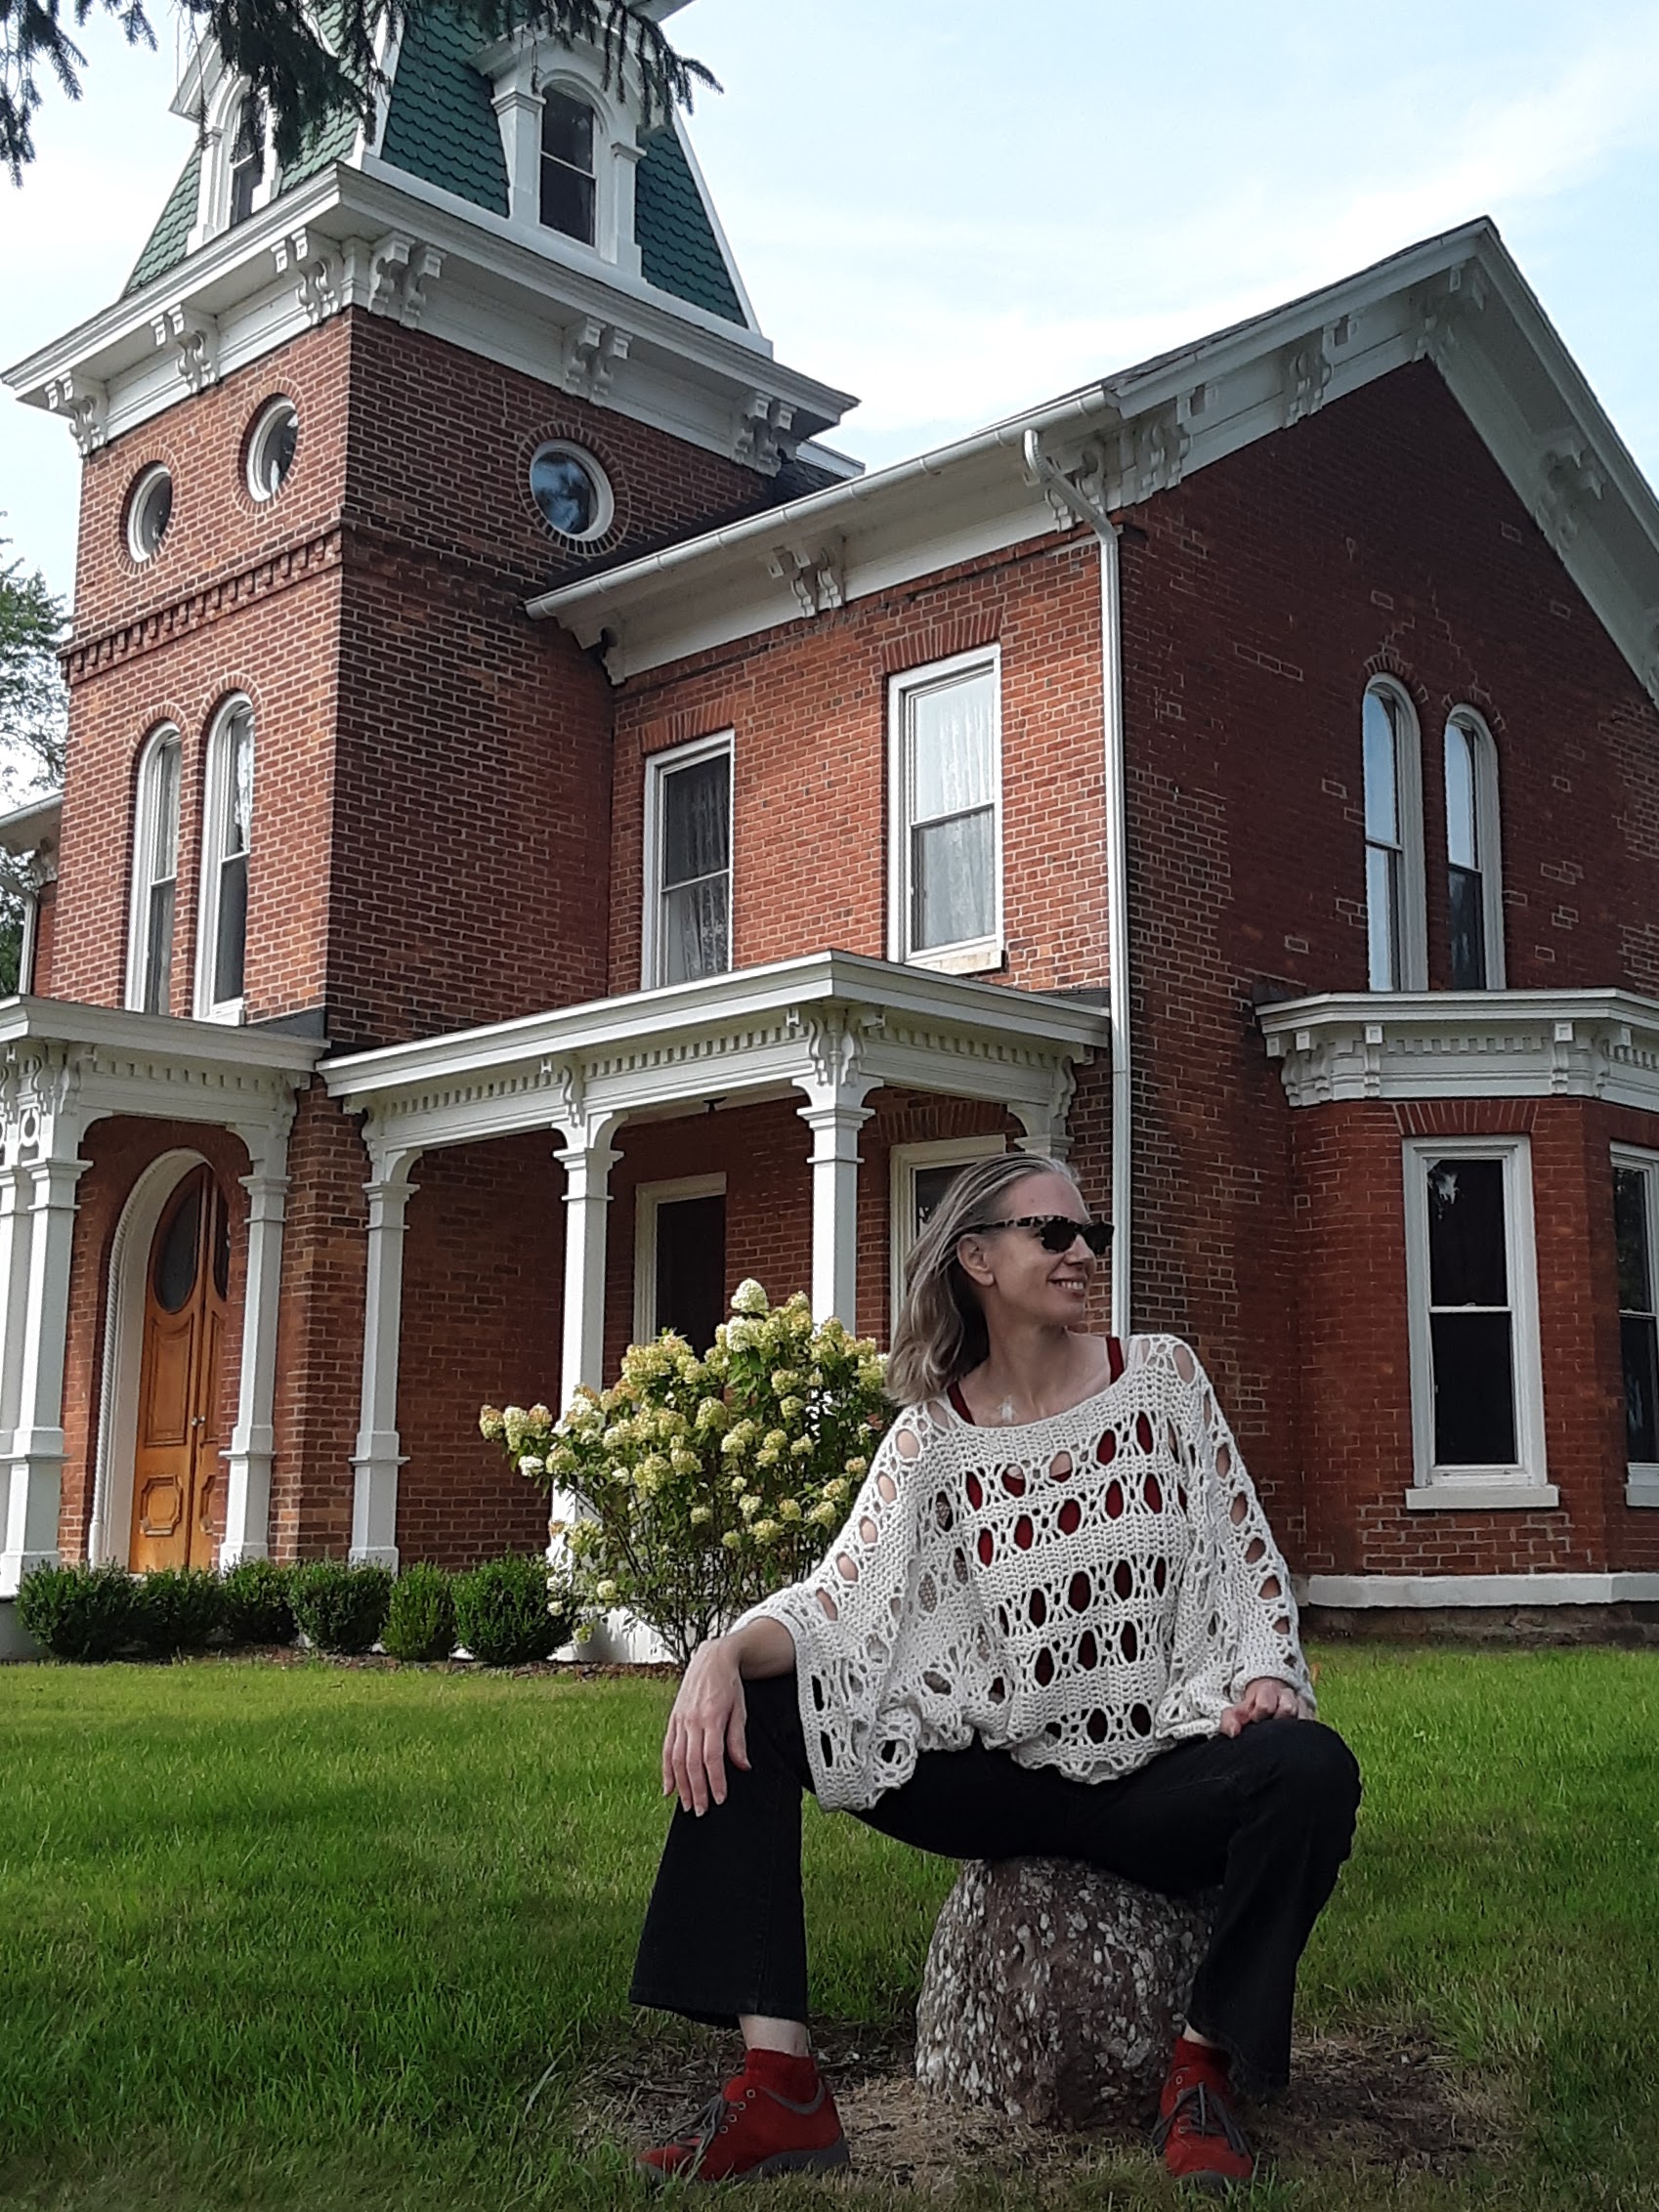
And here's an overall view:
It has huge wide sleeves and I love them.
The combination of wool blend with a holey fabric is good for warm weather. (Maybe not hot weather!)
It's a simple shape that makes a fantastic garment.
This piece is made with "regular" crochet stitches that even a beginner crocheter should know. I did learn a new trick with the cast on--the Foundation Half Double Crochet. You form the stitches as you go instead of making a billion chain stitches and trying to stitch into them for the first row.
The pattern should come with a warning though: door knobs, drawer pulls, and handles are hazardous to your health, liable to catch in a hole and stop you short!!
The structure of the garment isn't really obvious during normal postures; it just looks like a loose flowy garment. I do like how it hugs at the waist. I feel like it gives the garment structure and keeps it from wearing like a big cape.

Project Stats
Started
: 3 Aug '20
Finished: 12 Aug '20
Pattern: Summer Dreams Top by Designs by Key [These two are Rav links.]
Materials: Silk raveled from a VJ Petites sweater, 253g/968y, and wool/angora blend from a MC Carroll sweater, 195g/956y, held together throughout.
Ravelry project page: link


Thursday, August 22, 2013

Do We Know What We're Getting Ourselves Into?

About two months ago, I saw a link on Vogue Knitting's Facebook page to this article about a Cabbage Patch Doll hat. It's a hat that looks like CPD hair. (It's worth a click to the link; the kid is stinking cute.) I shared it on Facebook and wondered in writing where the nearest chubby-cheeked baby was.

I was reminded that my two great-nieces would be perfect candidates and before I knew it, my sister and I had committed to making hats for them. My sister got hers done well before me. Seeing her pics on Facebook put me in the frame of mind to finish mine.

It didn't take long. It starts at the top with a tight circle
and increases out until you have the right diameter. Then you work even until it's long enough. Then add a few rows of loopy stitches in the front and you are done.
Oh, wait. Not quite done because you have to add the pony-tails!
I decided to tie mine twice.
In two evenings I had a pretty cute hat! By the time I was done, my sister had already delivered hers:
She looks pretty stinking adorable, doesn't she!!

Of course, when I finished mine, I couldn't resist trying it on. Since I don't mind looking silly, I'll show you:
Little did I know that this was prescient on my part...

When my niece posted pictures of her daughter on Facebook, it started an extended comment conversation between me and three of my sisters. By the end of it, my sister and I had agreed to make hats for all of us to wear when they come to visit this fall and we head to the Haunted House for an evening.

The really funny part is that the fifth sister has no idea. (The price to be paid for not having internet at home.) But she will find out soon enough...like when we hand her a hat-wig and tell her to wear it!!

Rest assured, pictures will be taken and shared....

Thursday, May 30, 2013

Preparing for Squam

A week from today I will be at Squam, probably eating breakfast (something I never do at home) and wondering how my first class is going to go.

I am in such a tizzy right now I haven't been able to pull myself together to pack or even think about what I need. For a while I pretended it was because I didn't know what the weather would be like, but I think my brain just isn't working right. But I could make other preparations.

For one thing, there was the Squam garden a few people are planning. It's a yarn bombing they will be doing at the Rockywold-Deephaven Camp site. They invited people to send flowers and other "gardeny" type things to them and they would be pulling it all together.

I finally put to use a pattern I bought back when the tsunami hit Japan. (Every disaster now, people will donate profits from their patterns when you buy.) It's for some crocheted cherry blossoms. The pattern had them very artfully displaced on a bare branch and they looked beautiful. Mine are a little more prosaic, but in part because I wanted them to be bigger to fit the larger woody context.

In three sessions, I was able to make 12 of them:
The original pattern called for a different colour for the first round (the centre), but I just couldn't get myself up for all those extra ends to weave in.
I think they're pretty cute in one colour anyway.
I used bits of extra sock yarn and some raveled sweater yarn I had around. I varied the size by using the yarn single, double or tripled (with navaho plying) and changing the hook size to suit.

The flowers are extra clever because you make a little loop on the back of them so they are easy to mount on twig branches, hair bands, elastics, anything really. My niece was visiting while I was working on them and she was doing some crochet, so I passed the pattern on to her. I am looking forward to seeing what she will do with it!

And then I thought I was done my crafty preparations for Squam. I had my lace coat done. I mailed my flowers off to be incorporated into the project. But then...

I had a little necklace I wore sometimes made from little letter beads strung on a leather thong. Usually it spelled out my name. For a while it was "Bonus Mom." I pulled it out yesterday and wore it, and it occurred to me that it would be a handy thing to wear at Squam. It would be like a name tag, but crafty and (dare I hope) a little cool. But it needed one addition:
I added a second strand and spelled out my Ravelry name. You see this all the time on crafty blogs and in the crafting world--you give your Ravelry name like you might normally give out your email. Except it's not just a way for people to contact you, it's the way they know you on the site. Your posts, your projects are all identified with that name. So I thought it would be perfect for Squam.
A bonus of adding the strand is that I redid the clasp and fixed two things: the lobster claw was on the wrong side so I used to have to do it with my left hand, and the necklace was just a touch too short and constricted my neck.

Add a smile:
and I figure I am all ready to be meet some strangers and make some new friends. :)

Wednesday, January 6, 2010

A Star is Born

I have for you today two more Christmas items I actually made over the holidays this year.

The first is an ornament ball crocheted out of 34 gauge craft wire (two strands). The beads were prestrung on the wire and added after every other stitch.

I used a very simple ball pattern from Dragonfaeriee Crochets, originally intended for children or pet toys. Instead of doing it in two halves and sewing it together, as the pattern says, I made it one piece. I could get away with that because I wasn't stuffing it with anything.

I was hoping the ball would be a little more malleable, but it's not too bad a shape--not quite sphere, but close enough. (Next time I'll think about stretching it over a clear glass ball if I want it to be more "perfect.")

It was a quick project that I finished in a "bonus" afternoon when a flight I was supposed to meet was canceled. Working with wire is always a little fussy but no worse than some fussy yarns I've worked with!

The second project was a little more involved (to grossly understate the situation). It certainly took more time, for one thing. And it had a lot more shaping and fiddly work. But the pattern caught my eye just at the right time to take advantage of some clearance yarn and...ta da! a star is born!

It is a dodecahedron, (in the "small" stellated version according to Wiki); that is, a twelve pointed star. How could that not catch my eye, right?

The pattern is by the prolific Norah Gaughan, well written and easy to follow. Each point is made in the identical way and joined as you go by picking up stitches off of previously made points. There's a lot of casting on, however, and it all goes in fits and starts as each point is quick, but there are 12 of them to do.

Things zip along like holiday traffic (fast in between bouts of stop and go) until you get finished the penultimate point. Then you have to stop and stuff:
Then you have to figure out how you're going to pick up all the stitches around the opening for the final point.
Things are a little stretched out and although it is quite straight forward, that doesn't mean it's simple to actually do!

But I managed. Then you proceed to knit the final point, stopping occasionally to stuff it while you still have the chance.
(That opening is only going to get smaller.)
Until finally, the point is knit; the star is stuffed; and you are holding a perfect 12 pointed star in your hand:
It really came out great.

Project Stats
Started
: 12 Dec 09
Finished: 2 Jan 10
Pattern: Celeste (free)
Materials: Blue Sky Alpacas Alpaca & Silk (color 144), 1.2 skeins @ $7.50/ea
I'm very happy I used a "luxury" yarn for the star--it is a tree-topper after all and should be worthy of that position of honour. The silk gives it a very nice sheen without being as gaudy as actual sparkles!

I was planning to just lay the star on the top of the tree next year (removing the center spike that's usually there), but Troy has plans for suspending it from the ceiling so it hangs just above the tree. Should be nice.

I haven't had a tree in years, so this will be a nice incentive to get going on it next year.

Thursday, January 1, 2009

Better Plastic Bags

Last spring my aunt sent me an article about cutting up plastic bags and using them to crochet bags. The idea struck a cord and I went to town. My first bag was a black and white book/magazine tote made completely from WalMart bags for my mom (bottom left). She loved it. From there I made a couple larger totes which my co-workers admired so much that I gave them each one (below right).

The detail pic of the red bag (below left) was actually made from purchased fabric strips with a few stripes of white plastic bags thrown in for interest. That one went to my MIL who likes red almost as much as I do.

And then I did two more for myself: a smaller bag (above right) which I used as a purse for a while and a large yellow and white tote (not pictured). Then I ran out of bags (and wasn't getting any more because I was in the habit of using these better plastic bags when shopping) and ran out of steam as well.


Well once my family saw what was being produced, they started to collect nice or interesting bags for me, especially the red ones available where they are in Canada. After Thanksgiving and Christmas visits when they were able to get the bags to me, I'm starting to feel a little overwhelmed! I spent a whole evening this week sorting and folding the bags so they wouldn't take over the room. Now I'm feeling pressure to do something with them. At least I have enough red ones now that I am ok with using them. (Scarcity breeds hoarding in me...)
There are, however, a few really pretty ones that I only have one or two bags of:
I will have to think carefully of what to use them for.

After a search through Ravelry for a suitable pattern, I may start with this paperless grocery bag from Coats and Clark. I especially liked this version
by Ravelry user knitgranny. If I can figure out how to do the appliqued leaves in plastic it would be a perfect use for the limited special coloured bags I have.

It takes about 60 bags to do a smaller bag and I'd say up to 100 for the larger totes so if I got going on a couple bags I could use up this supply handily. I also have a store of the new WalMart bags (they switched from the preferred black and white to a funny grey and blue bag) to use as a base colour. I have a strict policy of using only "used" bags (i.e. I will not grab a bunch of new bags at the checkout just to crochet them up). I also have let myself get lazy about having the bags with me when I shop. Perhaps that is partially due to winter weather and the extra trouble it brings.

To make the strips, I fold the bags flat (as pictured above) so I can cut off the bottom seam. Then I cut .5" to 1" strips (depending on the thickness of the bag and what I need) from the bottom to the top. At the top I cut as close to the handles as I can and then discard the handles. You crochet with these loops like you would with a yarn, but when you get to the end of the loop, you slip knot the next loop into it...and repeat...and repeat. One loop makes about 3 dc stitches, so you are adding more loops all the time! But on the other hand, it does break up the crocheting...

I'll let you know how the new bag goes...

May I suggest?

I Say! or at least I did once...