Showing posts with label Socktober. Show all posts

Friday, November 1, 2013

Fancy Footwork

Look what the...elephant...dragged in:
My Socktoberfest socks were completed a few days ago. Here they are still damp from blocking:
We had a little party to celebrate and invited all the elephants to come:
(Honestly, these are but a very few of my elephants.)
I am relieved that my first pair of colourwork socks fit.
All that stranded colourwork makes the sock warmer, but keeps them from being very stretchy. That doesn't leave a lot of wiggle room.
The soles are as fancy as the top:
which is another thing I like about them. Many colourwork socks have uninteresting stripes or other boring patterns on the bottom, and where is the fun in that? (It's missing, that's where it is.)

I followed the pattern exactly.
I know there were some of you who thought I couldn't, but I did. :)
I probably won't do it again, but it was a little liberating not to have to make any decisions.
The partridge heel is nice. It will likely make appearances in future socks. (Whether the pattern calls for it or not.)
The toe was a standard decrease. The fit is fine (although the toe is a little pointy) but I really don't like the strong line that develops on each side. My toes in the future will be made with short rows.

The only other thing I would change on the socks is the length. These are far shorter than what I like to wear, but I knew that going in. Otherwise, I couldn't be happier!
They definitely get "two trunks up"!

Project Stats
Started
: 1 Oct '13
Finished: 28 Oct '13
Pattern: Water for the Elephants by Rose Hiver
Materials: Pagewood Farm Chugiak Hand Dyed Sock Yarn in Really Red (~1/2 skein) ($18) and Raveled wool/angora from an MJ Carroll sweater (~20 g) (<$5)


Tuesday, October 15, 2013

Half way through Socktober...

Yup, the month is half over, but I can show you a toe:
That means one sock is done. One to go!

Go, Socktober!! :)

Saturday, October 5, 2013

Socktober Day 5 Update

I've been making good progress on my elephant socks. As usual, chart knitting is completely addicting and hard to put down. This pattern uses one large chart for the leg, but I find it easy to keep my spot by using a couple sticky notes on the pattern.
I put them on "upside down" just above the row I am currently knitting. This way you know exactly what row you're working on and you can see the work that just did. As I work charts, I refer to the row I just did more than counting stitches on the current row. It's generally easier and keeps you on the right path. The only part that's a pain is you have to move the stickies every row. But I think it's easier (and less permanent) than highlighting each row as you go.

I had some comments in response to my first post where I claimed I would be following the pattern and not making my usual changes. Apparently some of my readers found this hard to believe! Well, so far I would say that I have followed the pattern...but it was an iffy start.

The pattern says to start with a twisted German cast on over two needles. I have to admit right up front that I didn't even know what that was, but I do know what I like to use. So that's what I did, and I cast on with the same method I would use for a two strand double stitch.* It's the same cast on I used for my "punked" youtube video,** only in this case I used two strands of red instead of different colours.
What you're looking for is a cast on that won't bind the top edge. It needs to stretch with the ribbing.

[*Can I just add an "internal footnote" to say that although this makes me sound like a curmudgeon who doesn't like to learn new things, it's more an issue of really wanting to start a new project and not wanting to slow down to look stuff up? I prefer to think I'm eager; not close-minded.]

Below a close up, and you may be able to see how the cast on looks like the stitches just wrap around the edge in a K1, P1 pattern. (It completely blends in with a 1x1 ribbing, but it's not quite as smooth on the 2x2 ribbing of this pattern...but you will notice that I didn't substitute it. (Although I considered it.))
Now, before you start jumping around and saying I cheated, after recommended the twisted German cast on, the next line of the pattern says, "you can use your favorite cast on." And so I did. And so, technically, I am still following the pattern.

Since working on the sock, I have looked up the twisted German cast on (anything you need to learn about knitting, just search youtube). It is a cast on that uses knots between each stitch--something I don't like. Knots restrict movement. Knots make hard little knobs in your knitting. Although you occasionally need to use them, I try to avoid them. And when I heard that this cast on is normally done over two needles to make it "stretchier," I put up another black mark against it. If you ask me, using two needles just makes it looser, not stretchier and makes it look messier. I just don't like it. Even the cast on I did use looks "ruffle-ly" and loose when it's not being worn. I can't imagine it being even looser. Anyway, that's where I stand and I'm glad I used the cast on I did. (Even if it was a complete pain in the keister to do in a single colour. Worth it.)

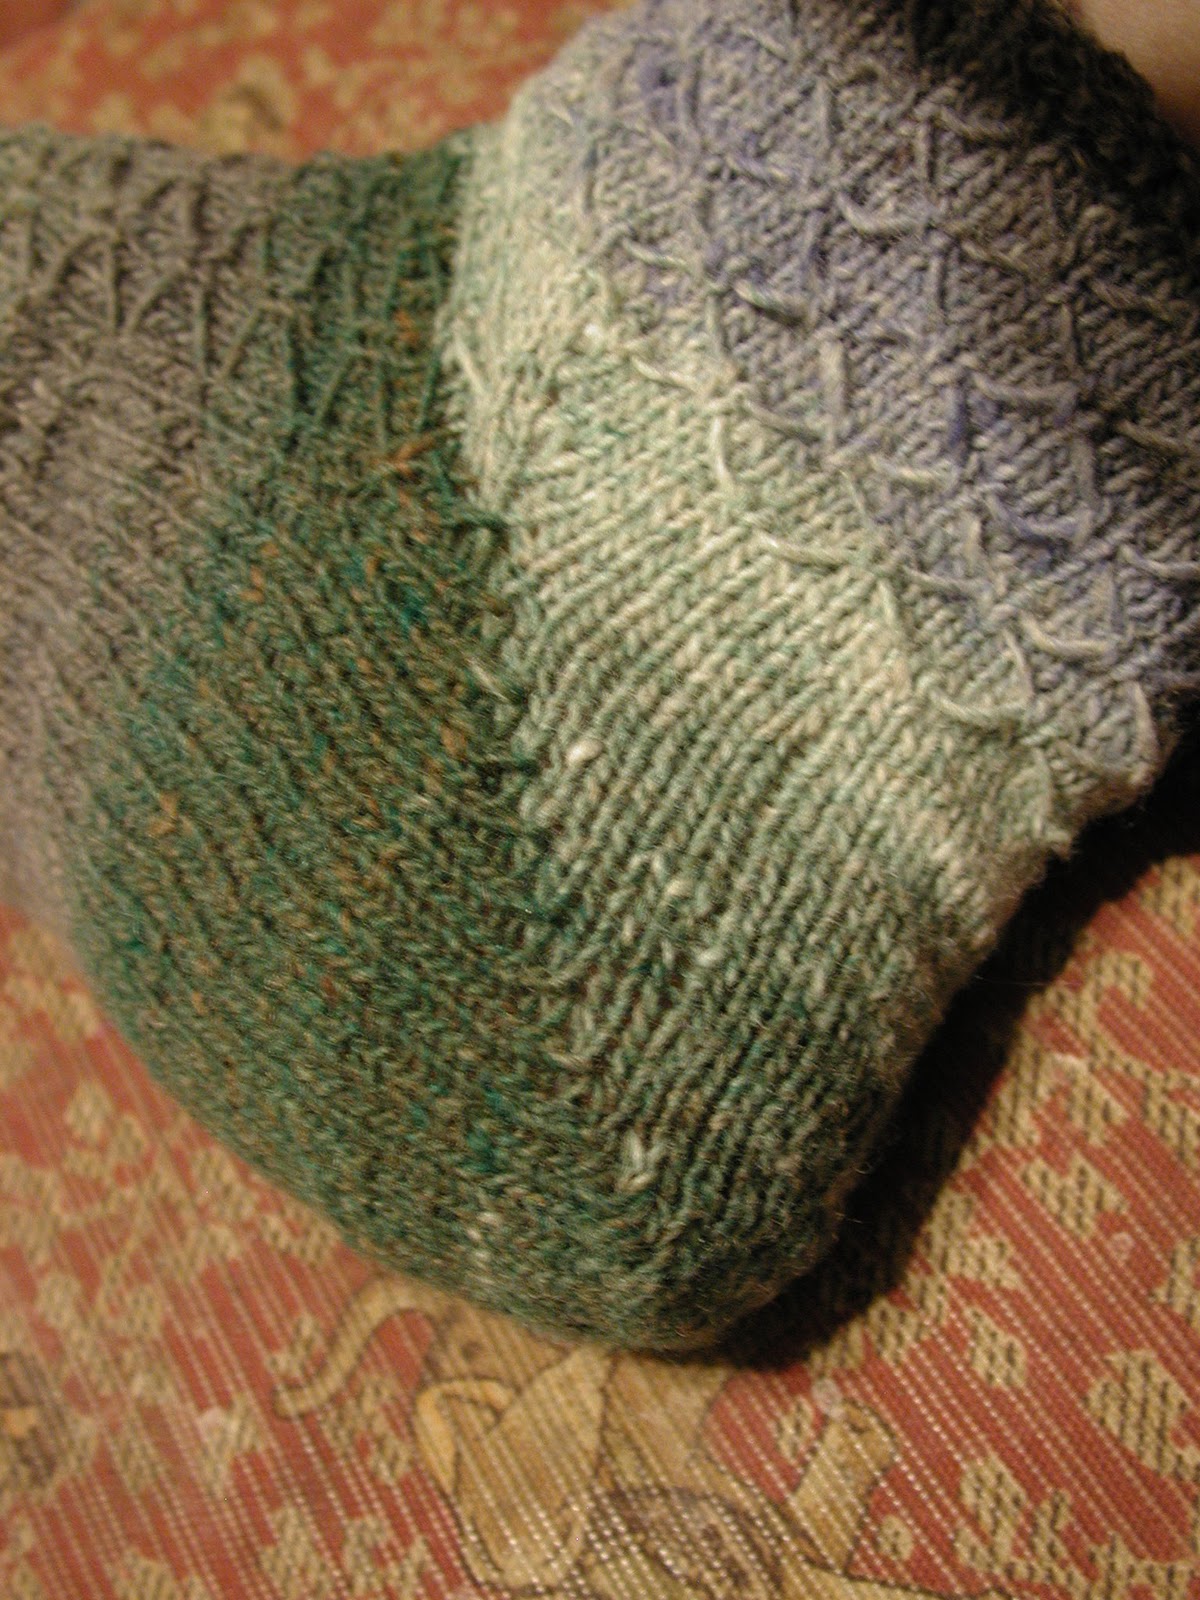
Anyway, once the 2x2 ribbing was done, and the leg chart was knit, it was time for the heel. A "partridge heel." I have heard of them (a lot) but had never done one. I knew it was a type of slipped stitch heel flap, and it turns out I was right. On the heel flap, you slip every other stitch on the knit rows. Not only do you slip them but you twist them as well. So they kind of stick out.
And because the slip stitches alternate "columns," you get a pretty sort of checkerboard pattern. The slip stitches draw in the knitting and are supposed to make the back of the heel more durable. On the back you get longer floats on every other row,
which also is a type of reinforcing as the floats double the knit stitches and give you two layers, in a sense. When I slip stitch the heel flap, I usually line up the slipped stitches so they're always in the same column of stitches. I believe this is called a Dutch heel and considering I learned it from my Dutch grandmother, I guess that makes sense. (Unless this is another case of Dutch meaning German (like Pennsylvania Dutch). I'm not sure.)

And again, for my certain readers, I will note that the pattern instructed me to slip the last stitch of each row and knit the first stitch of the next row, which is completely opposite of what I usually do (slipping the first stitch and knitting the last stitch). But I followed the pattern along to see where the designer was taking me. Turns out the two methods would have been equivalent, but I didn't know that until I did it, so I did it her way. (See? Following the pattern!)

The heel turn. It's a very sharp angle. I'm not sure I
like that. But it'll stretch to shape when being worn,
so it's nothing to make a big deal about.
Once you get to the bottom of the heel, you do the turn with some short rows and decreases. This is also a first for me. Usually the bottom of the heel flap is half of your total stitches and you have to decrease all the stitches you pick up from the side of the heel flap. But in this case, you end up with fewer stitches at the bottom and only decrease some of the side stitches.

My mind is still working out if this will make for a better fit (it certainly will make for a shorter gusset), but I will find out in the making. Again, following the pattern to see where it will take me...

Once the heel flap and turn were done, it was time to pick up those stitches on the sides and continue working all the stitches:
You start with the left sock, so this is the "inside" side.
This is where I really struggled. After completing the heel, the designer had the nerve to tell me to cut my yarn. AAAHHH. Cutting yarn in the middle of a sock!? That is crazy talk. But right in the pattern, she admits that she hates to work in ends, so I had to take her instruction to cut the yarn seriously. I did stop to consider how else I could work it, but I decided to just trust her and cut my yarn. It hurt though.
This is the "outside" so you can show off your
clever little elephant.
At this point I tried the sock on. It's tight going over my heel, but then fits fine. That's the risk with stranded socks--they really don't stretch. I went down a needle size because usually 72 stitches is way too big. I think it's going to be ok.

(Famous last words?)


________________
**Story here if you don't know it or want to reread it.

Tuesday, October 1, 2013

Socktober 2013

It's that time again...time to celebrate Socktober. No, this is not another excuse to drink beer in October. It's just an excuse to knit more socks. (Needless to say the crowds are smaller at this event, but the fun usually lasts all month.)

I knew I had a skein of Pagewood Farm's Chugiak sock in "Really Red" that had been waiting for a long time to be put to use. I decided this was the time. But not plain red socks (as if red could ever really be plain), but I wanted to do some colourwork with it.

I did a mental search for some coordinating sock yarn, and I had none. But I did have a wool/angora sweater that I bought some time in August. It's white and I thought it would be perfect to practise dying (when I get to it). Meanwhile, the white would be perfect to work with the red.

So last week, I took off one of the sleeves and raveled it. The angora makes it "sticky" and a little tough to take out, but this piece wasn't too bad. I had a couple breaks in the top shaping, but after that it was clear sailing.

It still took the entire evening, however; in part because the sweater is done in brioche stitch and that means a lot of yarn. I got about 400 meters from just the sleeve. (That would be enough to do a pair of socks right there--even my long ones.)
I now had to find a pattern. I haven't done a pair of colourwork socks before but I've looked at a few patterns. My favourite so far is the "Water for the Elephants" pattern by Rose Hiver. I'm just a little obsessed with elephant patterns and add them to my Ravelry queue often, and I had just finished reading the book, Water for Elephants, that inspired the pattern. Seemed like a good choice.
I'm knitting without a net and am going to start the socks without a swatch. Besides being my first colourwork socks, I am also going to depart from my usual routine and follow the pattern in knitting the socks from the cuff down. I considered knitting more on top so they would be longer (I hate the draft short socks don't stop), but I'm just going to follow the pattern. I decided I have enough going on and am going to give myself a break. (Following these charts will be work enough!)

Wednesday, December 7, 2011

Socktoberfest isn't over until the socks are done. (Put down your beer; they're done.)

I have to admit--favourite sock pic yet! :)
Ready for some pictures?

I didn't finish my Soctoberfest socks in October, but that didn't mean I gave up on them. As I recall, I got the first sock done in the month, but then the project sat for a while.

As other projects wrapped up, I set to the second sock and got it done in "no time." Then it took almost as long to get pictures done!

Tip of the day: if you're taking pictures of socks you are wearing and are using a tripod, set up the picture with a spare set of shoes. Then replace them one at a time by the shoe on your foot. I happen to have a 2-sec delay option on my camera and it works great for these situations.

Back to the socks...you may recall that I converted them to toe-up with a short-row toe. The original pattern had a purl ridge on the top where the toe meets the foot because of the way the sock was cast off. I liked the look of it, so I kept it in even though it was completely unnecessary.
I ended with just a couple rows of 1x1 ribbing and an "invisible" cast off:
I would normally do more ribbing, but I wanted to finish the pattern repeat and then I was running out of yarn. And I haven't forgotten that I promised a video on the invisible cast on. I think I'm really close to getting it done. (My poor Hourglass socks...they have been waiting since early June to be finished because I'm going to use them in the video!)
I think the mock cable pattern showed up fine through the colour changes:
I was worried the changing colours would distract (and detract) too much from the pattern. But I think because they were relatively long colour runs, it worked out fine.

You can see that the colour runs did not work out to make matching socks:
but I'm ok with that. (They're termed "fraternal" in the sock world.)
Yes, when I wore these socks for the first time, I wore them with these heels. (But I chickened out by wearing them with long wide pants.) Project Stats
Started
: 1 Oct '11
Finished: 26 Nov '11
Pattern: Nutkin by Beth LaPensee (free)
Materials: Lang Yarns Jawoll Magic (colour 84.0063), 1 skein ($20.14)
I know there is a strong tradition of wearing your hand knit socks with heels (especially mules), but I have never felt comfortable with it. But close to finishing these socks it occurred to me that they would look good with these brown heels and then I had to try it.

Mock me if you want; I don't care!! :)

Tuesday, October 25, 2011

Socktober Progress

Have you been enjoying Socktober? We've certainly had some cold and wet enough weather to warrant warm socks. I, for one, have been enjoying my hand knits. (Especially those Mini Mochi Circle Socks I recently finished. Best. Socks. Ever.)

The current pair I'm working on had a pretty rough start. They were too big with the recommended number of stitches and needles. So I foolishly changed two variables at once and went down a needle size and decreased the number of stitches. This turned out to be too small so I made some increases after the short row toe. The right number on the smaller needles turned out to be what the pattern call for!

There were a few other small mishaps that affected how the sock looked. I told myself that I was going to just live with it because it in no way affected how the socks would work. But before I finished the first repeat of the pattern, I realized I couldn't live with it. So I ripped them out and had a much better second start.

One detail I really liked about this pattern was the purl row between the toe and the patterned part of the foot.
When I actually read the pattern, I realized this wasn't a purl row, but in fact was the cast off. The pattern calls for the socks to be knit from the cuff down. The short-row toe is knit from the bottom, around the end of the foot, and back to the top of the sock. The two parts (toe and foot) are then seamed together with a 3-needle bind off. This is what forms the ridge that I thought was a purl row.

I decided to mimic the design element with a purl row across the top of the sock after the toe, even though it was not necessary since I was knitting the sock toe-up.

Once the sock was off to a good start, it has been good knitting ever since. I made up some increases for a gusset and a larger short row heel. The leg of the sock is 72 stitches. (I started with 64.) I'm learning that I need a larger leg than foot. (Most patterns are written with the same number of stitches around the foot as around the leg. This just doesn't seem to work for my body.)

Once the heel is done, the cables are added at the back of the sock. To incorporate the increase stitches, I added two additional purl stitches between the mock cables. That reminds me, I decided to go with mirrored cables on each sock. (I mentioned I was debating between this option and mirror imaging one sock to the other.)
I have a ways to go on the leg yet. After the first two chart repeats, I changed to one size larger needle. I expect I may do that one more time yet. (If needed, I may add more purl stitches as well.)

So there you have it. Now that all the details are worked out, I just need to finish this one and then make a second just like it. The wool has been nice to work with (a little splitty but I can live with that) and the colours are perfect for fall knitting. There was a knot already so the colour change was interrupted and abrupt, but I'm not going to let that bother me. (I'm not!)

Saturday, October 1, 2011

Socktober Once Again!

If you've looked at your calendar today, you should have noticed that it's Socktober!! (I know most calendars do not have it labeled correctly--let's work on that, shall we? Find your calendar. Grab a sharpie. Write a little vertical squiggle in front of "October" and it should now say, "SOctober." Problem solved. Well, unless you made your squiggle go the wrong way and then it will say, "ZOctober." I guess that would make it a German celebration of socks. In that case, problem zolved.)

Anyway, back to socks. Knitting a pair of socks would be the perfect fit for my current "knit small projects only" condition. I have selected a sock yarn from the stash:
(The name kind of looks German, doesn't it? "Jawoll." It might be, I suppose. The label says it was made in Italy for a company in Switzerland.) It is 75% wool and 25% nylon which means it should wear really well and last a long time. You can also see on the label that it is superwash. How convenient.

I purchased this ball at a yarn store in Bowling Green, KY, when we were there visiting friends last March. I searched out a yarn store and Troy and Isaac indulgently let me shop for a bit. They had a lot of nice stuff but this ball was the best thing that fell in the overlap of the categories of things I could afford, things I liked, and things I actually knew what I would do with. (And things I couldn't easily get at my LYS at home.) Now as I knit on these socks and eventually when I wear them, I will be reminded of the nice visit I had with my friends too. Like a memory book (scrap book) I can take with me.

But no wool is any good without a pattern to shape it. I have chosen Nutkin by Beth LaPensee. It is a very popular pattern on Ravelry and with good reason--I think it looks great!

I hope the colour changing properties of the wool don't overwhelm the stitch pattern. I looked up other projects using this combination of pattern and wool on Ravelry and many of them did not look great. But there weren't really good quality pictures in the batch so I am going to try it for myself and see what I get.

Automatic modification will be to work toe up and to start with a short row toe. I'm pretty sure I am going to mirror image the mock cables as well. Just not sure if I will mirror them within the sock (and thus each sock will be identical to its mate) or knit one sock according to the pattern and knit the second sock mirror imaged. So many choices...

Thursday, October 28, 2010

Socktober Progress Report

Clickety Clack, reporting in.

I have finished my first sock. It fits wonderfully and I love it.

I can show you the leg here:

Or maybe here:
Or maybe here:

I don't know what's up with Blogger tonight but I couldn't upload pictures the easy way. And however I figured out how to do it, the formatting is not working. Please bear with me. (Be so distracted by the beauty of the sock that you don't notice the crappy formatting.)

I have started the second sock and am reminded again how much more quickly things go when you've figured out how to do them already. (I.e. I don't need to repeat the mistakes and/or "wrong paths" of the first one.)

I am almost done turning the heel.

I had a knot come up in the yarn 2/3 through the heel so I have a sudden colour change again. Since all these colours are sort of muted and don't make a ready pattern, it's not a big deal. (And I'm kind of relaxed about these things.)

I've been arguing with myself about whether I should let myself be surprised by the stripe colours coming up or take a sneak peak. (While I would never call knitting "boring," there are times it gives you a lot of free brain time to wondering about obscure things if you have a wont to do so.)

Anyway, the top of the ball is rather messy and it's very hard to tell what's coming up, except in a very general sense. (Like "sometime in the future" I'll be knitting that nice dark forest green.) This is the side that I normally see as I knit.

The "bottom" of the ball that I rarely see, however, is very neat and you can see the greens, greys, purples and blues coming, each in turn.

No, now that I think about it: I prefer surprises. It's like magic the way the colour slowly reveals itself to you. There's no sudden jump; it takes almost 1/2 inch to change from one colour to the next.

I'm still hoping to finish this pair in Socktober, but it'll be a close race between my needles and the calendar.

Friday, October 15, 2010

Socktober Check In

We're half way through Socktober, so I should be done one sock, right? If only!

I was doing pretty well. I was flying through the beautiful colours of the Noro. (You can see it's not really variegated which is what I thought looking at the ball. It's a typical long colour run of Noro.)
I had figured out my tension on the floats so things were going well.

I turned a heel (short-row, in this case):
(Isn't it funny how the colour changed so dramatically just after I turned the corner of the heel? Now it practically looks like I sewed two pieces together!)

Then I was zipping along on the leg:
But after quite a bit of denial, I finally had to admit that the leg was too wide.

See:
It really was too big. So I have ripped it back to the heel and am starting that part again. (There are some increases after the heel in the pattern; I just did fewer of them.)

But before I ripped it back, I weighed the two parts--the sock and the ball. I was starting to get worried about just how tall I could make the first sock while leaving enough for the second sock.

This actually delayed progress for quite a number of days. I can't find my scale. So the poor sock sat around languishing. Finally I gave in and used Troy's scale in the garage. The one he's always telling me to use. It was quite dirty, but I managed.

Anyway, the good news, and I'll type this for the record, is that the sock weighed about 30 grams and the ball weighed 75. That means there's plenty of wool--yeah!!

Now that I'm back on track, I'm hoping this sock will fly again. And hopefully I'm taking good enough notes that the second one won't need as much ripping back!

Saturday, October 2, 2010

Guess What Month It is...

Give up? It's SOCKtober, of course!! That month in which knitters and those privileged to received socks from knitters celebrate the no-longer-so-humble article of clothing that is the sock.

It's not an overly organized event; you pretty much just do what you want whether it be knitting as many as you can, knitting challenging socks, knitting special socks, or just reveling in wearing your hand knit socks.

Kirsten Kapur at Through the Loops! is doing another mystery sock KAL this year. I thought about joining because it would be fun but didn't quite feel up to committing. You know I could never just knit the sock; it would mean extra blogging, extra time on Ravelry chatting with all the other KAL-ers and feeling the pressure to finish each clue before the next one came out.

Instead I decided to knit a pattern I liked with some yarn I got at Red Purl at the Green Sale last spring. Noro Kuyeon Sock yarn (70% wool/30% nylon) in some lovely shades of blue and blue/purple. A lot of people go heel* crazy for anything Noro so I had to try it out.

The pattern, Leyburn, was discovered on the Yarn Harlot's blog. (The specific post is here but that kind of dumps you into the middle of the whole throwing the first pitch story, so I'll let you know the end of that story is here. Even though it has nothing to do with knitting, it's very much worth a read.) Leyburn was "July" in her self-imposed sock-of-the-month club.

Back to the pattern itself, I think the slip stitch pattern is great for showing off the colours in a variegated yarn. It also should fit the bill as far as being easy to memorize but still interesting.

I cast on last night. And I managed to finish the short-row toe. A nice beginning.

This morning I got past the initial increases and started the lattice pattern.
About eight rows in I tried it on and it is way too big.

This is kind of a good thing. The whole time I was knitting, I felt like the needles called for in the pattern were too big for the yarn. It made the fabric too thin; I like my socks denser. But I was following the pattern. My yarn was close in size to the yarn called for in the pattern so I had no reason to change anything. But now I do. And I will.

Another reason I need to restart this sock is that the lattice pattern isn't working out very well for me. The pattern warns you not to pull the strands too tight or they will make the sock pucker and make it hard to get your foot in there.

But apparently I overcompensated because my loops are way way too loose:
Can you make it out on that picture? (You can always click it to enbiggen.) I will have to pull those strands a lot snugger as I go along next time. I've done the lattice pattern before (for instance on the recent pink hat heel socks I made) but those patterns knit more rows between the making of the loop and the picking it up. That would eat up a lot more slack.

In any case, I will be starting over because the only thing worse than redoing something is keeping it when it's wrong.

I'm also considering making the toe less pointy. I like longer toes, but not quite this pointy. I'll have to think about it because you can't have one without the other!

I have to add that after working on the Summit shawl and Truffle tunic exclusively for the last few weeks, it is such a nice break to have something small on the needles! Light, wieldy, and lightning fast!!


_______________
*heel (pronounce like "hail") is a dutch word meaning "very." My mother and grandmother used it, however, when the english "very" wasn't enough. This is the superlative of very. And it was always emphasized and drawn out for about three words' worth: Susie is haaaaaaail crazy for this or that.

May I suggest?

I Say! or at least I did once...