Showing posts with label Mug Rug. Show all posts

Sunday, August 16, 2020

Desk Warming Gift

I finished a little something.

We are in the process of moving our "office" desks from the dining room up to our bedroom, now that the bedroom is largely finished.

Troy recently finished his desk top (which he mounts on a pair of file cabinets). When he first sat down at it, he commented that he is going to need a mug rug to protect the desk surface.

Well, that is something I can take care of making! A few days later, I was in the mood for a small project that I could finish in short order and got to it.

I knew I had some leftover half-square triangles (HSTs) from my Merrily Christmas quilt top:
I had a bag of brown/tan HSTs and a bag with the green and red ones. I found the brown ones first, so those are what I used. And happily, that meant they were much less Christmas themed as well!

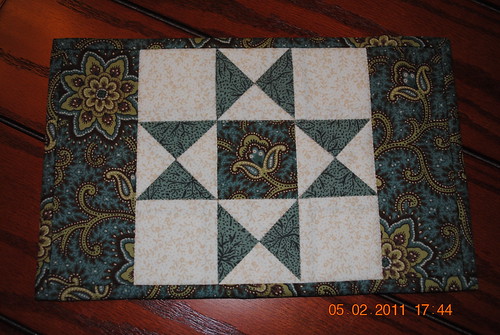
I pulled out all the HSTs from the bag and played with them until I had an arrangement I liked. Then sewed it together like a simple 16-patch.
I layered it with a layer of cotton batting on top (to absorb any moisture) and then a layer of wool batting on the bottom (to keep the moisture from soaking through). That's the theory anyway; I'll let you know if it works!

I backed it with some of my never ending supply of black leftovers and quilted it in echoed mitered corners.
My machine wasn't too happy with the thickness (or at least, that's what I assume it was). There were some flubbed stitches that you can see on the back.

I used the edge of the pressure foot to guide the distance between the lines and that happened to also cause the lines to fall along the seam lines. I had considered ahead of time whether to do the calculations to make this happen but decided to leave it to fate. And it worked out that way anyway. I wouldn't be surprised if the makers of pressure feet design them that way. (For example, making the edge of the foot 1/4" from the needle position would mean that it would line up with almost all blocks as they are general sized every 1/2".)

That is as far as I got the first afternoon. The next day I took the time to make binding from a piece of grey fabric I bought for my Lucy Boston project but didn't use. There wasn't enough for a double binding, so I just used a single thickness. It's not like this edge is going to get a lot of wear or have to stand up to much use.
I stitched it to the back so that the part that folded over to the front would be longer. Then when I stitched it by machine on the front, the stitching ran beside, but not over, the binding in the back.
I don't usually enjoy stitching binding by machine and am not usually happy with the result. (Those two things just might be related!) But for this one, I hand basted all the way around the front, right next to the fold. Then I could stitch just inside that stitching and nothing had a chance to shift or move. This isn't practical for a large quilt, but it was worth it to me for this project.

So now Troy has a mug rug for his desk, and since he's getting close to finishing my desktop, I have to start thinking about mine! I think I'll go look for those green and red leftover HSTs, Christmas themed or not...

Wednesday, May 1, 2019

Bonus, not Waste

While making blocks for my Merrily Christmas quilt, I ended up with a lot of extra HSTs (half square triangles). These are literal waste because of the way the block is put together. Well, I can't let that fabric go to waste. (It doesn't help that they're small and look so cute! I'm a sucker.)
The pieces all comfortably cut down to 2.5" square so that's what I did. Some people find this tedious and not worth the effort but I enjoy it.

HSTs are nice because you can arrange them in so many ways. I decided on zig zags, doing one across and one up and down. I sewed 12 HSTs together and had a good start for two mug rugs.
I layered in some leftover batting, also "waste" cut off of another project. With a small project like this, I don't bother sew the pieces together; I just lay them side by side and pin the layers. I used white fabric for the backing because I wanted it simple, wanted to save time, and the white fabric was out and convenient.

I quilted both pieces following the zig zag lines.
I had wide enough strips left over of the grey that I did a machine sewn binding. I made a great discovery that made my corners so much better.
I usually pin the binding clockwise, the same direction I sew. But when I pinned it counterclockwise and tucked the first side under the second (right side under the left side in the picture above), the miter lined up so that nothing shifted as you sewed it. When I did it the other way, the right side was on top and the zipper foot just pushed it out of position as the needle got close.

I'm still not super neat with my machine sewn binding, but this technique will help a lot!

I didn't have very wide scraps of the red, so I hand sewed it.
2 inch binding on the red, folded in half, machine sewn on the front, folded to the back and hand sewn. 2.75" binding on the grey, folded in half, machine sewn on the back, folded to the front and machine stitched.

I was inspired to make these mug rugs because I have two gift bags to fill that will go to a boys club for them to give to their mothers. I thought a cute mug with the mug rug, a treat and a coffee store gift card would make a nice package.

Tuesday, August 7, 2018

Mug Rug Swap (2018)

I've mentioned the quilting group on Ravelry that I'm a part of, Quilters Knitting. This summer they organized a mug rug swap and I jumped on board. Sign ups were closed June 15 and the mug rug had to be delivered by August 15. (In their hands, not in the mail.) One person organized it so that we were all given a person to send to and someone else would send to us.

The last week of July, I received this beauty:
Isn't it so wonderful?! Here is the back, nicely "signed":
And here are some detail shots of the quilting.
She said she is new to free motion quilting and pieces like this are great to practice on.
She did a great job.

Meanwhile, I had already been working on my mug rug. I had bought a pack of english paper piecing papers on sale when the local quilt shop closed earlier this year. I knew I'd do something with them!

June 9: The papers were small diamonds for making a star pattern. I pulled out some fabrics, covered some papers, and started playing with a design.
Soon I had the design laid out,
except I needed to make special pieces to make a straight edge. I simply took the three pieces needed to fill the space (bottom of picture below) and taped them together to make one piece (upper piece in picture below).
Then I could cover that one piece with fabric and save myself a bit of sewing. There was no need to make all those pieces separate.

By the end of the day, I had pieced together the centre star with the background pieces.
Isn't it so cute!?

June 10: All the pieces are sewn together and it is time to take out the papers:
Even though the diamonds were very small, I still punched a hole in the middle to make it easier to pull them out. After loosening the glue holding the fabric to the paper, I insert the seam ripper under that paper through the hole and pop the paper out. This is not only easier but saves a bit of wear and tear on the edges of the fabric.

Once all the papers are out, the pieces looks a little ragged,
but nothing that a session with an iron won't fix.
Look at all those furled intersections! I love it. This happens automatically, as long as you wrap your fabric around all the papers in the same direction.

This was a nice trial to see if ironing the fabric before washing out the glue would harm the iron or cause any other problems. It all worked fine and now I know I can do this on my Lucy Boston blocks if needed.

I did, however, go ahead and soak the piece to get out the glue before proceeding. After drying and ironing, everything looked neat and trim:

Next stage is to layer it with batting and a backing.
June 11: The quilting is done. I hand quilted it, outlining the individual pieces in thread that matched the colour of the front.
I had enough of one of the blues to use for the binding. It was a small piece, however, so I had to use a few short cuts of fabric.
The first time I tried to sew it on, I got a seam of the binding in the corner three times. So I took off the binding and started in a different place so the seams would land in the middle of a side instead.

Here is the backing that I chose to go with the binding:
It was a beautiful piece of orange and blue batik. I only had a small piece, but it was enough for this.

Here you can see some of the design made on the back by the different colour threads:
And here is the finished piece.
A mug rug in three days. I was done in plenty of time for the deadline, but then I decided to enter it in the county fair. So my poor recipient was forced to wait. On the good side, it did get a blue ribbon! :)
I mailed it yesterday and my recipient should have it by Thursday (August 9 - so plenty of time before the deadline!) I really loved making this piece and the final result, so I hope she likes it. I know she really likes stars in quilts, so I think I'm safe.

Wednesday, February 15, 2017

Turning Spare Parts into Mug Rugs

Before I put away the scraps from making all the blocks for the Farm Girl Vintage quilt, I used the many leftover little pieces to do some fun improv piecing.

I made some "slabs" or crazy log cabin blocks in single colors. I also pieced a bunch of the triangles that were cut off from making half square triangles into new half square triangles. And I pieced some improv flying geese blocks and used them as roofs (rooves?) on improv house blocks.

Then I put them in the bag with the scraps without doing anything with them. But I knew they were there, ready for when they were needed.

Well, last week I decided to try putting some of them together into mug rugs. (An object between a coaster and a placemat.) I pulled out some of the "house" blocks and found three I could use to make a minimal street scene.
I pieced blue scraps together to make enough sky above the houses so that the three pieces were all about the same height. I didn't want the middle house and the one on the right to be the same height, so I added a strip of pink to the bottom of the one. Maybe it's a stoop. Maybe it's a porch. Maybe the paint is just faded there. You can make up your own story. 😊
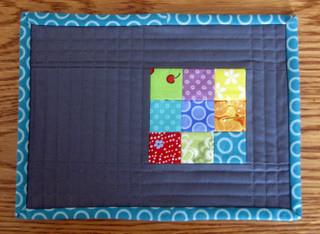
Final measurements: 6" x 8.5"
I didn't think the portions were quite right so I added a bit of green on the left side. we can pretend it's a tree or bush or whatever you want.

I quilted the sky in blue thread in gentle waves--the wind isn't blowing too hard. I quilted the houses in lines to echo the outside shape of the house, with lines in a perpendicular direction on the red door. I used a light colour with slight variegation. The "tree", I did with green thread.

I used a solid batik for the back:
I didn't want to bind them, so I finished the edge with a satin stitch. I actually went around the edge four times, if you can believe it. First I did a straight stitch to keep all the layers together and in place. Then I went around with a narrow zig zag (a width of 2, I think) and a length of about 3 so it wasn't really close yet. This stitch goes over the edge and starts to put things in place.

Then I went around with a satin stitch (shortest length--1) at a width of 3. This fills in the space and stitches over the previous stitching because it extends further to the left and right. Finally I do a final round of satin stitch at a width of 4. It's not thick enough to really cover the edge if you only go around once, but it lies better if you widen the stitch each time. At least that is my experience.

It's still not perfect, or even particularly satisfying, but it works.

For the second mug rug, I took four matching half square triangle pieces and made a pinwheel for the centre. I had larger half square triangles that I matched in pairs and sewed into flying geese units and added them to both sides.

But the pinwheel wasn't really big enough. Instead of cutting down the flying geese units, I added a strip to the pinwheel. Then to make the final proportions better, I added a strip of green to the entire length.

You can see I quilted it in all over waves. I added more movement (and avoided it looking too mechanical) by making the dips and peaks closer together and further apart in different areas.

While I was making it, I thought the green strip went on the top, but when Troy looked at it, he immediately set it with the green on the bottom.
Final measurement: 6.75" x 9.25"
Fortunately, there doesn't have to be one answer--it'll work just as well however you like it.

I backed this one with a piece of cheery cotton:
After it was quilted, I turned it over to see the back and got a surprise. Can you see the dark spot in the top right? Now that I've drawn your attention to it, you probably can. Apparently there was a scrap of fabric that stuck to the backing piece that I didn't notice. By the time I did, it was too far quilted in there to make it worth trying to get out!

This could open up a whole new way to add design layers to a piece when you're using lighter fabrics. (That's me making a mistake into a "feature".)

PS Did you recognized the thread I used for the satin stitch edging? Ya, it's from the cone I bought when I quilted my nine patch quilt. You will likely see it on a lot of projects!! 😉

Saturday, December 3, 2011

Little Christmas Pieces

It's certainly "that time of year." Time to worry about all the little Christmas gifts you need for the people in your life. I'm not talking about your kids or your parents...they're kind of a given. But where to you draw the line? Co-workers? Friends? Friends' kids? Mailman? Teller at the bank that always gets your deposit wrong but he's so nice about it you're not supposed to hold it against him?

I usually draw a pretty tight circle. Partly because most people I know have so much (more than they need) that worrying about giving more seems almost improper. Not that I won't pick something up if I think a certain person will like it, but I don't worry about it. Except for work...

I know we are having a Christmas party at the end of December. I know that my coworkers will be giving gifts around (based on last year's precedent). And I will feel bad if I have nothing to give in return. A little resentful that we are playing this game, but bad nonetheless. Last year you may recall that I made mini knitted stockings. This year, I have just finished little mini quilts (about 6"x8") that can be hung or used as a "mug rug." (Think coaster, but a little bigger so it can hold a drink and a snack.)

I have to admit I think they are pretty cute. Maybe I will even have to make one for myself.

Before I show them all to you, I will give you advance notice that I will be asking you to vote for which one you think should grace the front of my Christmas card this year.

And so, without any further comments, here they are:

(1)
(2)
(3)
(4)
(5)


Ok, here's the poll. Please vote on which mug rug you would like to see on my Christmas card. You may vote for more than one, if you'd like.


You have until December 10 if you want your vote to count.

Returning to the quilts themselves, the backs of the quilts are all single pieces of fabric.
I quilted them all the same. I think you can see it here pretty well:
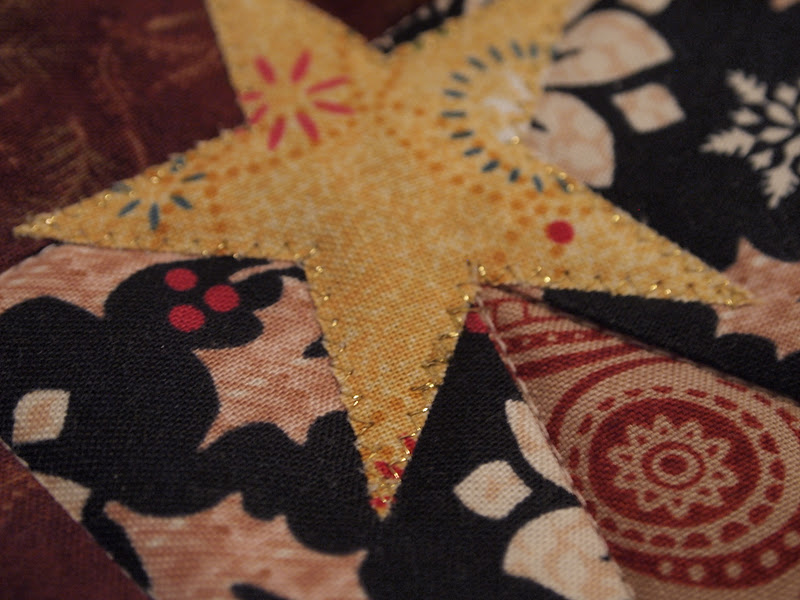
It's a basic outline of the tree and the box around it. (The inside edge of the border.) And then of course, I stitched around the appliqued star as you can see in the very first picture. I used my "light neutral" piecing thread for all of the quilting on all the quilts, regardless of fabric. And I used my shiny gold "lame" thread for zig zagging around the star.

The design itself was paper pieced and you can get a copy of the pattern for yourself here. (You're welcome!)

You may have noticed that even though I said the mug rugs could be hung if desired, I didn't add any pockets (like these) or loops to hang it with. I didn't want any hardware on the back which would unbalance a glass and decided a simpler, less permanent solution would work:
A safety pin! The quilts are small enough that they will hang from the pin--all you need to do is get it reasonably centered. Here's proof:
There it is merrily hanging on a wall from a safety pin. And if you don't want to hang it, just take the pin off.

And now's the part where I give you a little tip. It's something I picked up from my sister when we were having a quilting bee. We had four of us set up on four sides of a quilt we were binding so we could all work on the same quilt at once. I couldn't help but notice that my sister really was just whizzing along. Finally she showed me her secret, and now I'll show you:
I love simple tricks.So obvious once you're told.

I think I have gone on long enough now. I hope you've voted. I hope you are able to use my tip one day while binding. I hope you have a merry advent season, giving with a cheerful heart! (Set me a good example.)

Sunday, June 12, 2011

First Swap

I can finally share with you a project I did back in April.

On March 31st, I signed up for a "mug rug" swap in the quilters group on Ravelry. (What's a mug rug? It's a little placemat-like object to be used as a combination coaster and plate for a drink and snack.)

This was my first ever swap! I was excited. I thought the project was just the right size and commitment for me (small) and was also a good object to receive--no worries if it doesn't match or you're really not that crazy about it. (You may call me a cynic or a pessimist but I do worry about these types of things.)

Actually a bigger problem is that I don't drink or snack much while crafting, but I wasn't going to let that stop me from participating.

Anyway, when I saw the idea being floated, I jumped on the band wagon, and it's a good thing because it filled up fast! (Fast enough they had a 2nd and 3rd chance swap going in short order.)

The rules: make a quilted mug rug and send it soon enough to be received by June 1st.
The organizer matched people up, and for the most part you didn't receive from the same person you sent to. And, of course, it was a secret so it was all hush hush until the package arrived!

There was a thread for progress reports so people could share how they were doing and one person was done on April 5, only days after the signups closed! Most people posted pictures of the mug rugs that they received and it really was a marvel at the variety. So many lovely ideas!


and so many more...  There were 30 people in the swap, I think.

I finished my mug rug about the middle of April and finally got it mailed the day after Easter. I made a free form rose, of sorts, with a side panel in the "focus fabric."
and quilted it in parallel lines that followed the shape of the side panel.

The back was made of strips of the fabrics from the front and I signed it in marker:

I even had the perfect mug to model it with:
I was excited to finally send it off...but then it wasn't acknowledged in the thread for about a month. That took some of the shine off, unfortunately. On the up side, the recipient seemed to really like it and that is the main thing.

I patiently waited for my own mug rug and heard on the day of the deadline that it would be late. I waited patiently some more and yesterday received my mug rug: (It actually had been so long that when the package came, I assumed it was something my husband ordered and gave it to him. He was surprised to open "his" package and see a mini-quilt!)

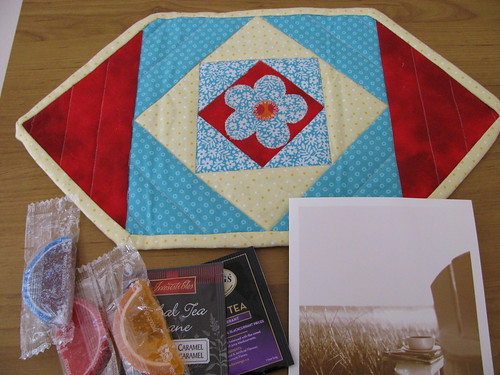
You can see it's in the very colours that I did mine in!! (And she didn't see mine because the recipient didn't post pictures.) Perhaps she was spying on my projects and saw that I liked red. Or maybe she just got lucky. Or maybe we're both riding the same trend right now. In any case, I really like the bold colours and sharp contrasts.

She also sent along a nice selection of teas (I did specify that I drank tea over coffee).

She also chose to piece her back. I really like that trend.
Although I'd have to admit that I will only cautiously commit to another swap, this was fun. I enjoyed making my mug rug, and I very much appreciate the mug rug I got!

May I suggest?

I Say! or at least I did once...