

After basting the edges and down the center in both directions, I started in on the red squares. I already knew what I wanted to try on those squares, and just like taking tests, you start with what you know and the rest will come more easily.
I put on the clear free motion foot, dropped the feed dogs and off I went. I stippled around the outside of the main circle to push it into the background, outlined the circle to define the shape and then let the design on the fabric tell me where to go after that. I did two different patterns on the two squares.

Here’s the back of each square which shows the patterns more clearly.

Once the red squares were done, it was time to move to the yellow ones. The only thing I knew for sure was that I was going to sew a curve from each corner to the next. That means it was time to audition my bowls and plates to see which one would fit.

So I used it to mark the curves with my blue water soluble marker.

And then there’s nothing left to do but sew.

After that was quilted, I had this:
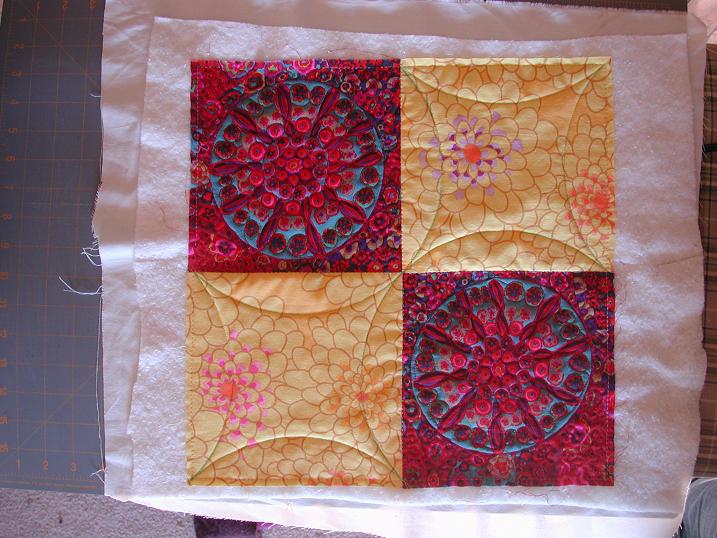
Hopefully you can see what I'm trying to do: outline the red squares in big circles. It's not so apparent on this small piece, but on a larger layout with many more squares it will work better.
And then the big question that's been holding me back on this project--what do to in the center of the yellow squares. I doodled on paper a lot. Geometric designs. Flower designs. But I wasn't getting anything that I liked that filled the space nicely.
And then while looking at remodeling magazines (for the kitchen we're working on), I came across this tile:

So I worked on it. Drew out a full sized square, marked out my curves and the diagonal lines, and then drafted some fleurs de lis:

Then I cut it out very carefully:

I put the free motion foot back on and went to town. After it was sewn, I soaked it to remove the markings and dried it on the line. That gave me this:

Here's the back if you want to see the quilting pattern more clearly:

I was about to sew this up into a pillow cover (yes, I was that excited) when I stopped myself. I wasn't sure that the pattern on the yellow squares was apparent enough. I mean, yes, you could tell there was quilting there, but certainly not what it was.
I was a little nervous about trying more, but told myself that this was my practice piece so I had better practice! There was no sense in doing the whole quilt wondering if I should have tried something else.
I decided I needed to fill in the "background" space between the fleur de lis and the curve. I rejected generic stippling because a lot of the spaces were just too narrow. Then I remembered a pebble fill that I've seen a couple time. It's pretty thread-hungry and time consuming (what isn't?) but it also continues the circle theme. So I gave it a try:

Again, here's the back. The new yellow square is on the lower left:

And just to confirm my thoughts, why don't you help me out again by offering your opinion?
Do you prefer the plain original (left) or the pebbled (right)?

Thanks again!


No comments:
Post a Comment
Comments are moderated so you will not see yours post right away. Thank you for leaving a comment; I enjoy reading each one!