Showing posts with label Mesa. Show all posts

Wednesday, September 10, 2014

Mesa Sweater: Final Wrap Up

This sweater has been finished for a while, and in fact I brought it to the Netherlands when I went in June. (We had unseasonably warm weather so I only wore it once!) Oh wait, I wore it twice because I got my mom to take some pictures of it for this very post on the beach on the island of Texel. But those pictures were on the camera that became lost. :(

But the weather has cooled down and I was able to face retaking some pictures, so it is time for a final wrap up.

I told you about ripping out the folded picot edging on the collar. I decided to go with a short roll over hem. That's a fancy-ish term for knitting a few rows of stockinette and letting it curl like it wants to:
The whole thing sits much better than the previous finish. I think the trick was to keep the edging very narrow.
The fit is much narrower on the body than the original pattern suggests, but I think it's one of the ways to keep this crazy design wearable in the regular world.
I really like wearing it, but it still is a little awkward. The sleeve joins are very low so any time I move my arms up even a little bit, the sweater rides up on my arms and I have to pull it back down. The shape of the stacked wedges makes it feel like the piece is falling off my one shoulder, but that is just something to get used to. I know some people only did four wedges instead of five but I decided I didn't want to go that far in taming the design.

I am still loving how the stripes lined up across the body and sleeves.

Speaking of sleeves, I finished them with a fold over hem:
Even though I reduced the number of stitches after the fold by 10% like Elizabeth Zimmermann tells me to, it's still a little bulky and bulges out a little. I still think it's a nice, neat finish. If memory serves, the pattern had you just end the sleeves and let them curl over (like my neck line) but I didn't want them to be "unfinished."

The bottom edge was finished with a garter band:
Since the whole bottom wedge is done in garter, it blends in nicely. I considered substituting stocking stitch (which I prefer) for the garter wedge, but couldn't face all the calculations of adjusting the short rows to account for the different row gauge. In the end I like it how it is.

All in all, a very satisfying knit.

Project Stats
Started
: 12 Apr '14
Finished: 21 May '14
Pattern: Enchanted Mesa by Stephen West ($12 in ebook with 2 other patterns)
Materials: Rowan Purelife British Sheep Breeds DK (1.6 skeins in colour 780); Evilla Longad (444 yards yellow/purple/brown/green and 220 yards blue/brown); and a wee bit of Appletons Old English Crewel Wool (54 yards) (~$30)

Saturday, May 24, 2014

Mesa Update: Undoing, Ends, and Blocking

In the last week, I have undone the neckline folded picot hem:
I ran out of blue and finished the hem with white. It was
on the inside so not visible anyway, and meant the
Kitchener stitching matched the original stitching and
was less likely to show through.
 That was a lot of Kitchener to undo. Phew!

I ripped out the knitting to just below where I originally added the holes for the picot edge, picked up the stitches, and did a bind off row in the blue. Not too tight, but not too loose either so the edge had some structure. The yoke and shoulders of this sweater were going to need all the help they could get.

Then it was time to deal with the ends.
There were a lot of those in a tight space up on the one shoulder. The pattern called for the same yarn to be used where I added all the different colours, so I only have myself to blame for this. But a little careful work and all of those were taken care of.

Then time for a bath and block. I soaked the sweater overnight because I didn't have time in the same evening to soak it and block it. I was surprised to learn recently that alpaca (or was it cashmere?) needs to soak overnight to get fully saturated. Important for dyeing and blocking. Anyway, I figured overnight wouldn't hurt this wool any either.
I then laid it out with blocking wires. I had debated with myself about whether to block it "straight" or follow the lines of the knitting. (Compare the shape above to this picture:
Big difference, right?)

Obviously I went with blocking it "straight." I had to pull the right shoulder pretty firmly but not too bad. I later realized I could have pulled the left side seam down to make the bottom hem straighter and will probably try that next time I block it. I think a sloping hem works with this sweater, so I don't really mind.

I tried it on when it was dry and it feels wonderful. No longer feels awkward or twisted on me. And I think it looks fabulous. I am so happy with it. Pictures of the finished piece on me will come when I get a chance...

Friday, May 16, 2014

Wackadoodle, but the Colours Line Up Beautifully

I have been working steadily on my Mesa. It's the only project I have going (not counting the socks for taking with me everywhere) and I want to have it done for a trip I'm taking in June. So, yes, progress.

Working with the colour changing yarn has given me some challenges as I try to make it match and "lightly" control where the colours land.

At some point I needed a little green and burgundy for the second sleeve and didn't have any left. I thought about dyeing some of the light grey and trying to match, but didn't have the confidence that I could get it to match (and I didn't have any purple KoolAid when I was on fire to get it done).

Then I remembered I had some wool for embroidery in a variety of colours. I got out the bag and found a burgundy and green that would work. It was too thin and I thought about just stranding it as I went but I decided to spin it because I thought I would be able to better blend from one colour to the next.

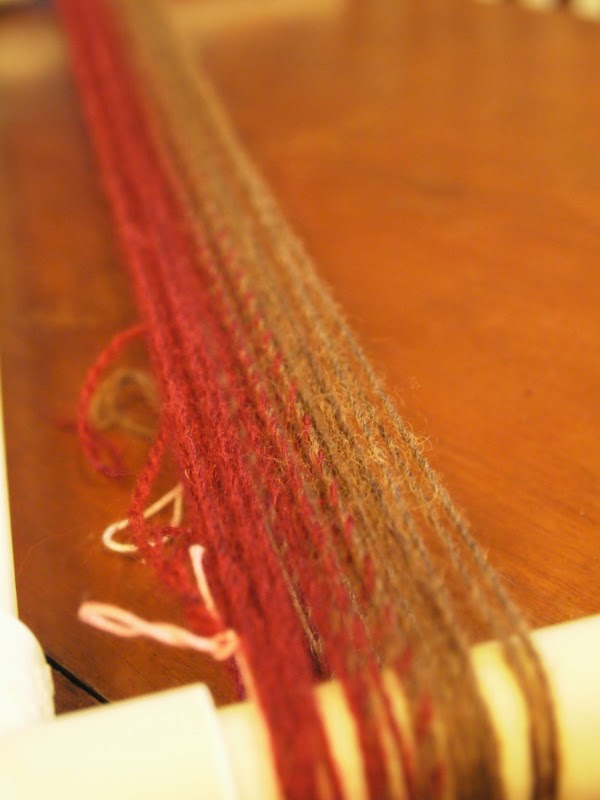
I took the yarn and Navaho-plied it making it a three-ply yarn:
 I soaked the yarn and wrapped it around my niddy-noddy to set the twist.
You can see the colour blend I was able to achieve above. I started with just the green, and then at some point I started spinning one strand of burgundy with two of green. Then it was two burgundy with one green, and finally three strands of burgundy.

The yarn is a little different than the rest I was using. I think it's the same thickness, but it's smoother and less hairy so it has a much better stitch definition. Also the colour blend is definitely not like the other yarn. It almost looks pixelated. But it's more blended than a sudden switch, so I'll be happy with it.
(I also worked hard on that yellow section. I ended up ripping out the first arrangement and re-knitting it, using the yarn blending from brown to yellow after the yellow to "fake" the green colour.

Right side, good. Left side, bad. :(
Before finishing the sleeves, I had to do the neckline so I could measure properly. (I made the sleeve lengths match along the outside edge since I didn't think the underarms started at the same point.) I did a folded hem with a picot fold line.

I really like the look, but it's not sitting properly. It's lovely on one side but won't stop standing up on the other! I can't figure out why. (Besides the general observation that the two shoulders are very different and the whole sweater is biased.) I now have to decide whether to take it out now and redo it or to block it first (hoping that it will "block out") and risk having to redo it after blocking. Time for some research on Ravelry for other projects that modified the neckline. (It was designed with a long cowl but I know I've seen some others without it.)

Here's the whole project fresh off the needles:
What a hot mess, isn't it!!? But check out how I got the colours to mostly line up across the sleeves. I'm really enjoying that.

Here are a few quick shots while I tried it on (hoping--in vain--that the neckline would work out better on the body)


I was tempted to make it longer but I only have enough of the lightest brown for a couple more rows and that hardly seems worth it. I like the length when I'm standing normally, but with the low armholes, the sweater rides way up when I lift my arms. I think I'm just going to have to not lift my arms. (That sounds totally possible, right?)

But I think the next thing I'll do on this is work in all those ends. Choosing to do a different colour in between all of the yoke wedges caused a lot of extra ends, plus all the ones from manipulating the colours through the rest of the sweater. One of the less glamourous parts of knitting, but oddly relaxing and satisfying in its own way. And it will give me time to think about how to tackle that neckline and gear myself up for blocking this thing. (More decisions: force it into a regular sweater shape or follow the knit shape??)

Tuesday, April 29, 2014

A New Project: Mesa

I'm working on a new project! With all the time I had on my recent vacation, I got a lot done:
"What the what is that?" right? I know. It's a strange one.

Let me break it down.
Well, the top looks like it might be the
neck-hole.
Here we have a sleeve-hole.
And I guess this is the other sleeve-hole.
Well, that looks like a sweater, right?

Here I am trying it on:
It's not as loose as I was hoping, but I'm going with it.
The pattern is written in one-size only. You up- and down-size it by changing your gauge. I did one gauge swatch and then went up a needle size when I started the project. Not the most thorough way to do things, but I figured this whole thing was crapshoot anyway. (With the bias shaping, it's not quite as simple as (gauge)x(number of stitches)=(inches around).)

I saw this sweater pattern on Ravelry and was instantly intrigued. You should be able to see more examples by clicking here: Enchanted Mesa by Stephen West. It's by the same designer who brought you "swants." I didn't buy it right away but when later on I saw another design of his that I liked and realized they were available in the same e-book, I went ahead and bought it.

Although I believe West is American, he lives in Amsterdam. When my mom and I started to make plans to go to the Netherlands this June, I thought it was the perfect excuse to go ahead and make the project! (It doesn't take much to start a project you want to do!) I think it will be about the right weight for the weather and fun to see in all of the photos I'll be looking at after the trip.

Most people used multiple colours on the top wedge sections and made the rest of the sweater neutral. Since I wanted to use the colour-changing yarn I had, I decided to make the wedges more neutral. I used the coloured yarn between the wedges, using a different colour for each insert. This meant I had to wind the ball to the right colour, cut it, use what I needed from the ball and then cut it off. Then I rejoined the two ends of the ball. The colour changing still works, but there was just a little less of each colour. (I also got to show my mom the magic of spit splicing. She was suitably amazed.)

I started below the collar with a provisional cast on so I could decide later what kind of neck I want (and what yarn to use). I'm not sure I want the cowl. A few people have done just a ribbed collar--like a wide crew neck. We'll see.

I've got a couple more inches to do to make it longer and then I start a short-row section so the hem ends up straight across. Then I will move on to the sleeves. It would be nice if I could get the one sleeve (the left one as I'm wearing it above) to sort of match the stripes in the body, but I don't think that's going to work out.

I really like the colour-changing yarns, but they are challenging to work with if you really like to plan things out. West really encourages using left-overs and whatever you have for this sweater, so we'll see if I can get into the improvisational swing of things.

May I suggest?

I Say! or at least I did once...