Showing posts with label paper crafts. Show all posts

Sunday, November 30, 2014

Paper, Glue, and Tape

I had a great day this past weekend crafting with my sister and her daughter. They drove to my house and we spent the afternoon working on our own projects while watching Dr Who rescue planets.

My niece was working on a crocheted baby blanket. A pretty shell pattern. At one point she had to start a new ball and it turned out it was one of those skeins where you can't find the end from the centre without pulling out half of the ball.

And then it was knotted. So I worked on that for about 30 minutes while she grabbed a different new ball and kept crocheting. (What a prepared crafter to have at least two extra balls with her! Or maybe she was ambitious and thought she'd go through them both...)

After I had that sorted, I rewound the yarn with my ball winder. She was delighted to have a yarn "cake" instead of a skein. She agreed it was a good name for it because it was delicious.

My sister was working on sewing mittens from felted sweaters. Well, she never got to sewing them, but she cut out a lot of pieces and matched them up. I brought out all my felted sweaters that I have been saving up for a blanket. But that day is a long way off, so I let her use what she wanted with no dibs. She was delighted and couldn't help asking several times, "Are you sure? Even this one?" Yup, even that one. I can get more and even more important, I was glad to see them getting used.

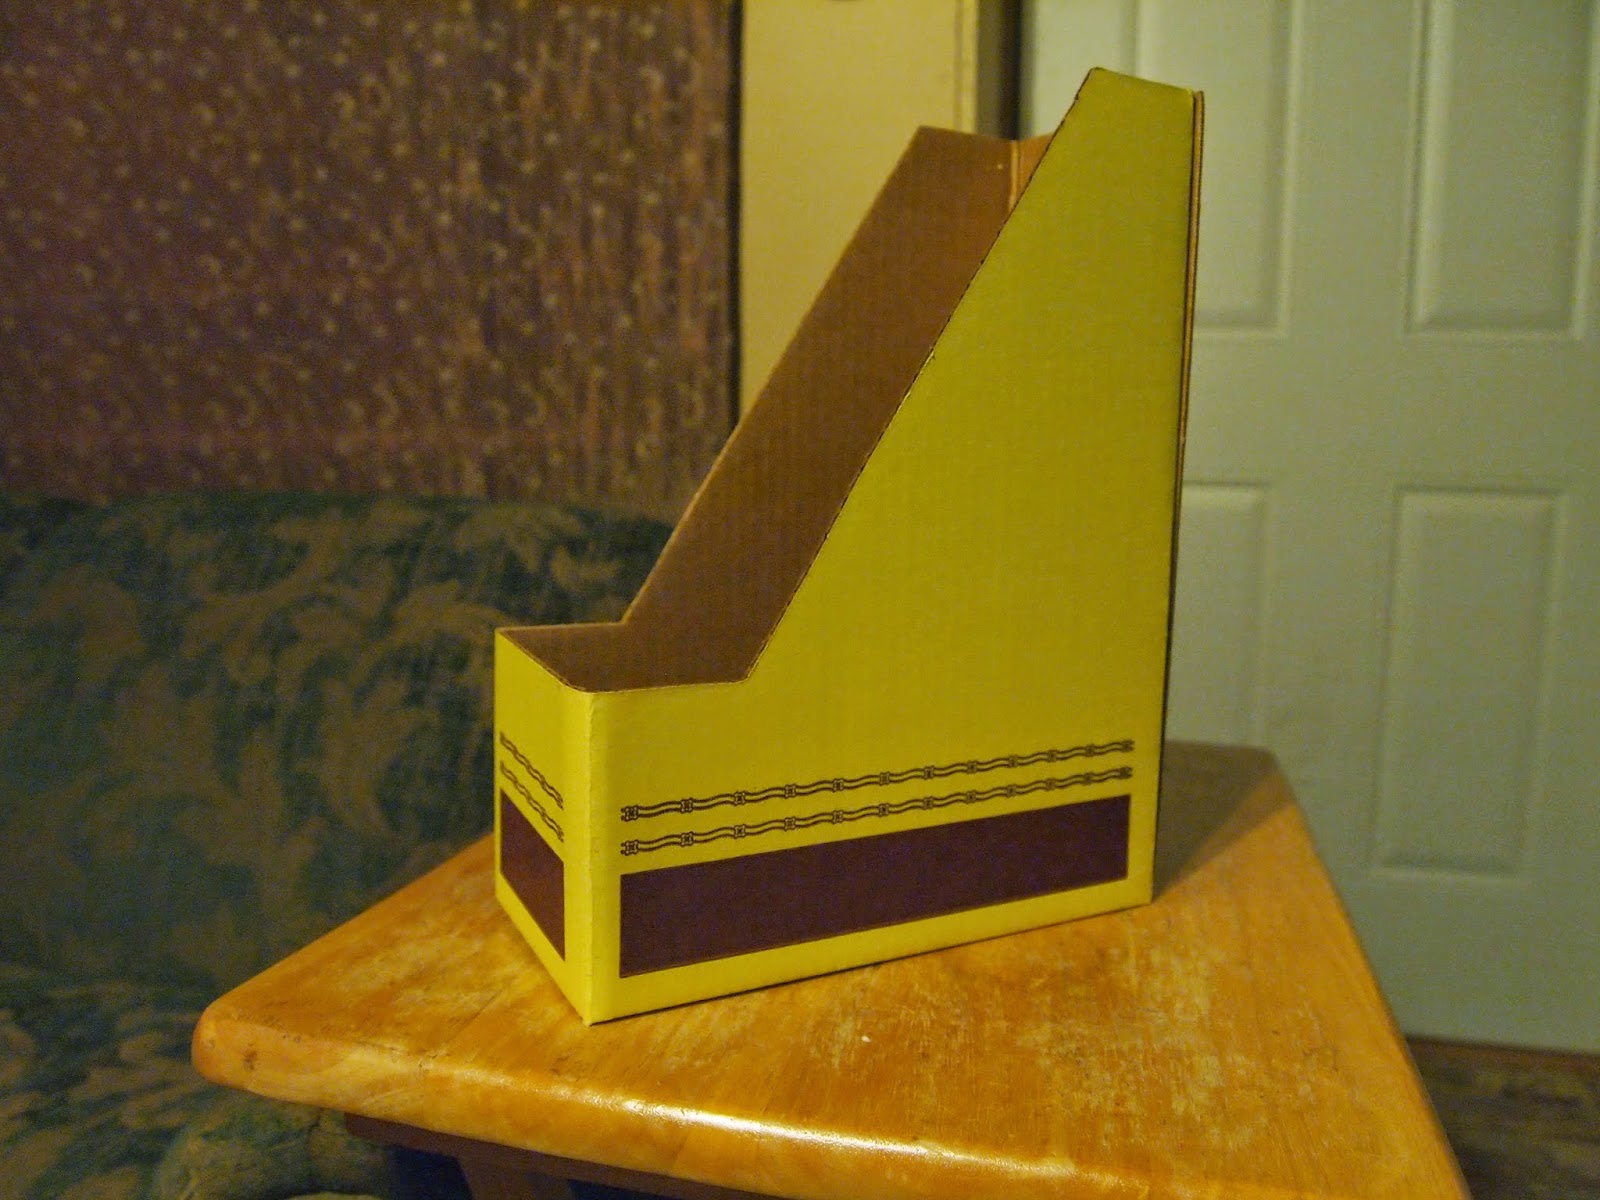
And I decided to work on something completely different. I have been hankering after some magazine boxes for a while. The kind that hold magazines up on a shelf. But it has never been worth buying them.

Then while visiting my mother-in-law while she was trying to empty a house they were selling, she offered me a box of them. I was amused to see that they were from the same company I still get office supplies from at work, but obviously decades old. I think there was a 25 cent sticker on the box so I suspect she got them from a yard sale. These boxes have been waiting a long time to be used!

While my company was with me, I went through a bunch of magazines and ripped out anything that caught my eye. I also had leftover papers from my trip to the Netherlands because I had finally finished up my photo album by sticking in the papers and pamphlets I wanted to include. All the extras became fodder for this project.

After my sister and niece had to leave, I kept working on the project. (Watching Notre Dame get killed by USC certainly wasn't keeping my attention!) I assembled a box:
and then mixed my own decoupage glue. The online recipes recommended three parts white glue to one part water. So that's what I used.

I covered two boxes with the pictures and text that I had cut out:
Elephants, of course, because always elephants.
I loved this line of turtles looking like round little rocks.
Hands shaking:
And text from a sample book by Clara Parkes I thought was appropriate:
I was worried about the durability of the paper along the edges of the box so I decided to wrap the edges. I considered gluing paper or fabric like binding around the edge of a quilt but then decided on duct tape.

Fancy duct tape:
Coincidentally this was a gift from the very sister who was visiting me.

I cut strips long enough for sections of the box and then cut them in half lengthwise so they wouldn't be too wide. I didn't try to carry the strips past the non-square corners, but cut the strips and trimmed them so the pieces would meet neatly.
Unfortunately I didn't know I would be doing this when I put the paper on so I lost some of the elements like these turtles:
and some of the text and small pieces that were right near the edge.
I'm happy with my two boxes and also happy that I have eight more that I can do when I'm in the mood to pretend I'm in kindergarten again and work with some paper and glue.

Although I might try some spray adhesive instead of glue because of the way that the latter wrinkles the paper. I've done a little research online about how to avoid wrinkles (they say to let the first layer of glue dry before adding the top coat) but I'm not confident that it's going to work because I'm pretty sure I let one of the boxes dry before doing the top coat.

In the meantime, the only problem I will be addressing is whether to put the boxes on the shelf with the tall side or short side showing!

Wednesday, June 12, 2013

Post Card from Squam: Day 3

Friday, June 7

Hello! How are you doing? I'm feeling good, but it was good timing to have a break from highly structured activities this morning. So classes went all day yesterday, but today there are only classes in the afternoon. (They'll be continued tomorrow morning.) So although we still had to get to breakfast on time, we didn't have to be worried about being ready with supplies, etc.

Everyone's been talking about the weather. Although Wednesday and Thursday were pretty nice, it was obvious something was moving in. It rained Thursday night and threatened to continue to rain all Friday (which it pretty much did). So much for renting a canoe for the morning! It also got a lot colder over the day. So I started like this:
Day 3's outfit includes the Zig Zag skirt and
Spring Sprout socks.
(My shirt says "I'll Grow on You.")
but added more layers throughout the day and ended it like this:
Added for warmth, the Mariah hoodie and
Bias Asymmetric Scarf.
That's a lot of knit wear to be wearing all at once!! The skirt was well received and I tried to convince them all that it was less work than a sweater. They weren't buying it. I also got a lot more people today asking about the lace coat. Now they are reporting that they were looking it up on Ravelry or that others in their cabin are showing it to them. What a lot of fun!!

The teacher, Christine Mauersberger, demonstrating
how to fold a Blizzard Book.
There were two optional sessions Friday morning, one on crochet and one on intarsia design. But the crochet teacher got stopped at the border (coming from Canada) and Elizabeth managed to find someone to pull together a class at the last minute. The class was on paper folding a "blizzard book." Now there's something I can get into!

Here's the story behind the book:
The Blizzard Book is made of one sheet of paper which is folded in such a way that it creates multiple pages, each of which have a pocket. According to Hedi Kyle, back in the mid-nineties snow began falling in Philadelphia one January morning. Soon, everyone on the east coast was staying home as the predictions for a major storm came true. This, the Blizzard of 1996, became a perfect day for Hedi to work in her studio. As the hours passed snow accumulated outside of her studio while folds accumulated inside. Towards the end of the day it occurred to her to manipulate some folds a certain way. This resulted in the creation of a structure which more or less bound itself. Months later when Hedi heard talk of "Blizzard Babies" conceived during the storm, she began to think of her own creation on this day as the Blizzard Book.
Doesn't that sound like a great project!? The one that we made was sized to fit business or credit cards.
Project in process
The teacher demonstrated the whole process (there were about seven steps) and then we started in on it.
There were no tables set up (they didn't need them for
the crochet class that was planned) so we pulled out
some benches to use.
Between the four of us sitting at the same bench, we made it right through and finished at least two books each. We also got a hand out for how to size the starting piece of paper to fit any final dimensions.
Those are my own business cards inserted. I happened
to have some on me so I could try the book out right away.
It's a really neat project. (If you google "Blizzard book" you can find instructions and videos if you're interested in making your own.) My mind immediately went to making one out of two sided paper and making some out of fabric and, and, and... But don't do it outside on a rainy day. The paper was so damp it wouldn't even fold properly! It kind of just bent. But we managed, and it was a lot of fun. The class was only an hour long, so we had a nice break before lunch. A little time to knit and relax with a fire going before jumping into the afternoon class:
I took the picture above all sneaky like, or at least no one noticed it even though I was making no secret of it. A couple minutes after I took it, someone said, "Hey, let's take a picture of us knitting!" I laughed and said, "Done!" But I offered them a second chance to look at the camera and give us a smile:
We're missing two people who were staying in the cabin; they were probably at the talk about intarsia design. I'm not sure we ever had a time we were all there and could take a picture.

After lunch, I had to find my way to the opposite end of camp. It was through the woods and along the lake and up the hill, but then I found the "classroom":
Isn't this a great setting to learn the ancient art of tablet weaving?

There were only six of us in the class (compared to 10 in the previous class) and I thought it was a good size. John [Mullarkey, the teacher] started with some lecture about what we were going to do and alternated lecture and hands-on portions throughout the class. It was really good, although I have to admit by the end of the first lecture, I was really ready to get my hands moving!

We started by threading the tensioner. We worked in pairs so that while one beginning weaver managed the cards and wrapping the threads, their partner could manage all the threads coming off of four cones simultaneously. My partner? Casey, rock-star coder of Ravelry. I, of course, had to mention the only other Casey I knew (the puppet from Mr. Dressup), but of course he had heard of him before. Then it was enough talk and time to get busy.
See how one strand is looped around an extra peg?
That's not how it's supposed to be... :/
I guess I did too much talking while working, because I ended up doing John a favour by making not one mistake but two so that he could demonstrate how to fix them! Oops. I made the one pictured above and I also made an extra loop without a card. Both of them are fixed with scissors and an extra knot. (I was "fortunate" to go around an extra loop so I had extra length to use. If I had missed a peg, that would have been a lot harder fix.)

But we got that all sorted out and "finally" got to some weaving. By the end of class, I had some practice stripes and the start of the alphabet.
John graciously let us take the looms back to our cabins for the night when the class broke up for dinner. Although he said it shouldn't be done when other stuff is going on (he turns off the TV, music, and anything else while he does this method), I boldly attempted it while we were all hanging out in the living room that night.
I managed to get to the letter U before I ran out of room. I also learned to "unweave" as I messed up the letter R the first time around. But I managed to fix it (yay!) and kept going. The strap is 34" long and I put it out at breakfast the next morning where it garnered some attention. (Later, John thanked me for doing that and I know he sold all his looms at the Fair so I may have had something to do with that!! Or John could just be really nice (which he is).)

Once I took off the first sample, I restrung the cards so I would ready for class the next day:
This time I did it right. ;)
A little bog with the lake in the background. This scene
caught my eye every time I walked by as I went to and from
the dining room.
A couple people in the cabin went to the evening's talk. It was a fiber artist who embroidered and stitched on fabric, but I just couldn't leave the warm cosy cabin! We had a fun night talking and knitting. And it was a late one!
Part of the Squam garden. Pompom alliums and a
little mouse popping up to say Hi!

Sunday, December 9, 2012

Little Gifts: Part 1

I have two posts on the subject of little gifts--one about the gifts themselves, and one about the package they come in. First let's talk about the packaging.

I received some candies one year in the cutest handmade boxes, obviously made from used Christmas cards. I have always meant to make some myself and this year I had the perfect excuse to do so.
If you want to make your own, you'll need some Christmas cards. You can see my box of cards to the left. I keep all the cards I receive, partly out of sentiment and partly because I love making things out of old cards. I fished through the box and didn't find too many I was ready to do without.

It was fun to look through them all and to read old letters and cards. (And easy to get distracted!) I saw a card from my one sister and was surprised it was only signed by her. Then I remembered that it hasn't really been all that long that she's been married with kids...they have just become such a part of the family I couldn't think of her without them!

Of course, you also may find some "landmines" as I did. In the same way I was surprised to find a card signed only by my sister, I was surprised to see another one signed "Mom and Dad." It's been seven years since my dad died, and I have become used to seeing just "Mom" in the signature. I went ahead and read the letter in the card, and it was the one from when he was sick and we knew he wouldn't live much longer. Mom's letter was so brave; it was hard to read and yet good too.

In the end I found a few cards I felt I could use.
If I need more sometime, I'll have to look at the used and "new-old stock" cards I sometimes see at antique and second-hand stores.

Then I studied the box I was given because it was all I had to go on. I took some measurements, made some marks, cuts, and folds and ended up with this:
That can't be right!

So I tried again and had much better success. Here's what you do:

1. Select a card and cut it in half along the fold line:
2. Mark the inside of both halves with an X, making lines from corner to corner:
3. On the top and bottom of the piece that will become the box top, mark 1.25" in from both sides. On the piece for the bottom, mark just longer than 1.25" (between 1-1/4 and 1-3/8). I know this is technically 1-5/16", but it's easier to just mark half way between 1-1/4 and 1-3/8. It doesn't have to be that precise.
4. Draw lines from the marks you just made to the diagonal lines:
5. Fold the card between the same marks:
6. Now turn the card a quarter turn, and make a fold to intersect where the partial lines meet the diagonal lines:
7. Cut along the partial lines:
8. Fold the long edges up and tuck the tabs inside:
9. Fold up the end:
10. Wrap it around the tabs and make a crease:
Now you have a top and a bottom, hopefully the former a little bigger than the later (because I made that mistake on one box too!):
Slip the bottom inside the top,
and voila, a lovely box:
Keep at it for a few more minutes, and you can have a whole collection of little boxes:
They stay together pretty well as they are, but if you want to add a bit of ribbon or metallic elastic, you go right ahead:

May I suggest?

I Say! or at least I did once...