Showing posts with label cowl. Show all posts

Saturday, April 6, 2019

Hasukai Cowl

Ready for another "finished project" post? I introduced this project in this post at the end of September. I finished it the next day.
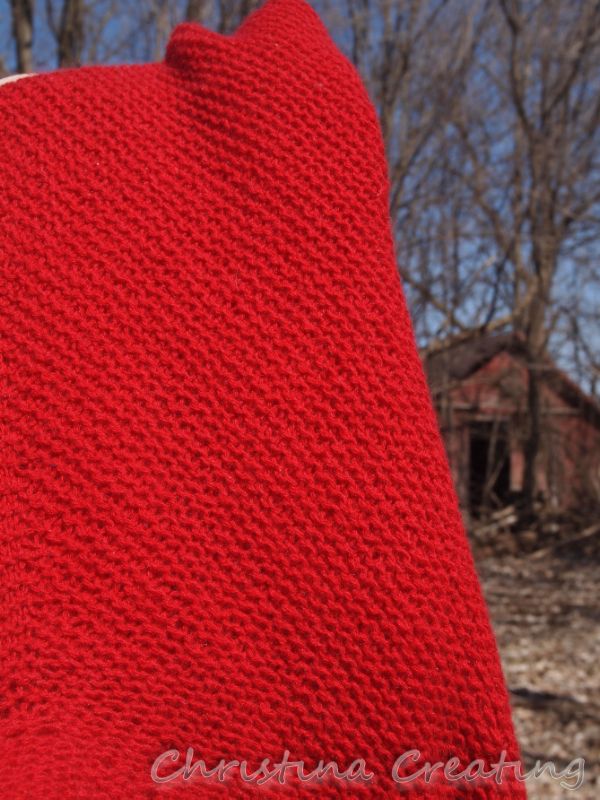
Look at all that plush garter.
I'm not the biggest fan of garter stitch,
but sometimes....mmmh.
You're right--it does help that it's cashmere.
So why did I not write about it until six months later? Well, I had plans to dye the finished piece. I find this red a little flat and I was hoping to add some depth and variation with a dip in some dye. But I wasn't confident in how to do it and haven't (yet) felt adventurous enough to try. So I started wearing it like this and then it seemed a little after the fact to blog about it. But here we are.

If I ever dye it, I'll let you know. (I'll try not to wait six months.)

The scarf is a tube of garter stitch with increases on one side and matching decreases on the other so that the rows end up running diagonally. Then the ends are finished with a ruffle.
Each end is the same except that the long point on one side lines up with the short end on the other side.
The scarf can be worn as a basic scarf, just wrapped behind the neck:
or wrapped around the neck:
But the reason this pattern caught my eye is that it can be worn as a cowl too. To get there, you have to configure the scarf as follows:
Put your hand inside the scarf and hold the other edge.
Pull the one edge over the other, like you're
turning something inside out.
Line up the "inny" and "outy" points and
arranged the scarf so it is folded roughly in half.
Open up the center of the tube.
Stick your head through the hole.
Now you have a cozy cowl that pools around your neck and drapes over your shoulders:
No cold is sneaking between this cowl and your shirt's neckline.
Or you can pull all the bulk to the front if you don't want your shoulders covered:
If you want to be able to move your arms, this is also what you have to do if you're going to wear it under a coat:
But you can wear it outside the coat too:
I really love throwing this cowl on. (I don't really wear it as a scarf.) It was great to wear inside on the cold, cold days we had this winter when the woodstove was throwing out heat but couldn't stop the cold drafts that were suddenly noticeable. On the milder days we're having now, it's great to wear out of the house like a wrap or poncho.

If you want a simple project that is way more interesting than a long rectangle scarf, definitely give this a go.

Since the scarf is worked in the round in garter stitch, the pattern instructs you to knit one row and purl the next. I applied the same "no purl" method I used on my Honey Cowl to avoid all that purling, especially as it is easy to do so.

I used one end from the outside of the yarn cake and one from the inside for my two strands since I started this for a trip and wanted to be able to travel light(er). (This way I only needed to carry one ball of yarn instead of two.)

Project Stats
Started
: 7 Aug '18
Finished: 30 Sep '18
Pattern: Hasukai Cowl by Hiroko Fukatsu (¥2 JPY, which is currently ~$1.85 US)
Materials: 135 grams cashmere raveled from a Patrick Clark sweater, held double ($2.50 for the whole sweater, 228 grams)
Ravelry project link: Hasuki Cowl for Iceland

Sunday, March 10, 2019

True Hope Cowl

About a year ago, my sister and I went to Vogue Knitting Live Chicago. One of the things we picked up was a kit for the True Hope cowl.

Profits support Handspun Hope, an organization providing work and training to women in Rwanda.

The program started with their spun yarn. I don't know if they had sheep in the beginning, but they do now. Besides being handspun, the yarn is also organically dyed with natural plant materials from the area.

I chose one undyed skein and a subtle pink dyed from avocado pits. (Avocado pits! Who knew.)
I didn't start knitting on the cowl until August. It was just the thing I needed when I didn't want to make any decisions and wanted a project that was ready to go. It also filled the time before I left for a trip because I didn't want to start on my travel knitting!

The cowl is double knit so you get the same pattern on the front and back but in reversed colours. I was cruising along pretty well until...
one of my yarns ran out! I had three rows left to go plus the bind off. !! What !! I didn't know what to do about that for a while.

I finally decided to shorten the pattern by three rows (even though that wrecked one of the crosses). It's always fun to ravel double knitting because you can see the two layers so clearly:
I got through the new last three rows and used the undyed for the bind off since I had plenty of that. I tried a bind off with the needles first but I didn't like the look of it. I went with a Kitchener bind off instead knowing it would match the cast on and would perfectly marry the two layers together.

Here it is on the right side of the cowl:
You can see that it's quite a bit looser than the cast on. Instead of trying to adjust all those stitches to pull it in, I went with a "faux" bind off; i.e. crocheted a chain stitch.
The top edge is just the Kitchener stitch
bind off. The lower edge has the crocheted
chain stitch.
This looks a lot like a line of bind off stitches while bringing in the length. I had to experiment to find the right length of chain stitch to avoid it being too tight. And with that done (and a blocking), the cowl was ready for wear!
The cowl is quite thick. It's knit with a heavy aran weight and a double layer on top of that. Because of the thickness it doesn't drape very well. It also bunches up quite a bit behind the neck:
I tried it folded over as well:
The cowl doesn't work very well under a coat, but for an extra layer over a sweater on those "in between" days, it's great.

Project Stats
Started
: 6 Aug '18
Finished: 21 Sep '18
Pattern: True Hope Cowl by Ann Turley Dreith
Materials: Handspun Hope Organic Merino Handspun in undyed and avocado pit, 179 grams total


Saturday, November 24, 2018

Thread the Needle Cowl

The week the Blooming Brioche KAL was supposed to start, the designer's computer broke down and she was unable to release the pattern. To help us cope, she gave us a coupon code that could be used for a free pattern for one of her other designs.

As I was giving a little look through her patterns, one really caught my eye and I went for it. It was another cowl (I have been knitting a lot of them lately!) but I loved the design and it would be perfect to use up this ball of blue yarn I bought on our trip to Banff, Alberta (in 2013). I had only recently raveled the first project I knit with it because the yarn wasn't good for that pattern. I was itching to knit it up again.

I paired it with some Malabrigo lace I had in my stash, doubling the Malabrigo to make it a similar thickness.

The hardest part was the cast on. Oh my word, 369 stitches.
But I got it done, putting a marker every 20 stitches so I never had to count higher than that!

The cowl was shaped with short rows so at least every row I did was a little shorter than the last.
Because my left hand/wrist/arm was getting sore, I knit this cowl with many different methods to minimize repetitive movements. (Or at least too long with one movement.) The garter border was done with both continental (picking) and English (throwing). My tension isn't exactly the same, but close enough. (And I think getting closer the more I use them both.)

On the stockingnette part, I did the knit rows either continental or English, but the purl rows, I did either by purling (English) or by knitting from the front side, working left to right. (That I do "continental" by holding the yarn in my right hand.) Some people call this left-handed knitting but but I don't think that's right. Since you use both hands to knit either from left to right or right to left, there's no real "right-handed" or "left-handed" knitting. Using all these different methods also kept it interesting.

When the body of the cowl was done, you finish the neck hole and then "sew" the seam with knitting.
It was very clever and gives a very nice result.

I wasn't sure how to block the cowl since it wasn't flat, but ended up folding it in half:
I folded it wrong side out since the seam (the diagonal yellow line on the top right) naturally wanted to fold the other way. Blocking it "against" the fold resulted in a flat finish.

Besides the eye-catching design and the pop of lime I used, I really like that the cowl can be worn in multiple ways.

1. With the end slipped through the hole:
2. Double wrapped and the end slipped through the hole:
3. As a hood. (Pretty ridiculous here, but probably not quite as ridiculous with a long coat over it.)
And let's face it, if I'm cold enough to wear it this way, I am way past worrying about looking ridiculous.

4. Long and loose over the head (again, probably a better look under a long coat):
5. And the one that really caught my eye - as a vest:

I really like asymmetrical looks. And you may notice, I already had a belt and necklace to match!
The belt is from years and years ago (I covered an existing D-ring belt with a tie) and the necklace is from my last Squam retreat (2017). Apparently I have liked this colour combo for a while.

I really enjoyed the knit. The blue yarn is soft and fluffy and was great to work with. The pattern was always changing but in a recognizable repeating way so everything made sense as you went along. (Ok, it took me a minute to work out what she meant in the transition from the neck hole to the seam, but I got it. Figuring out something new and unexpected is also enjoyable!)

Project Stats
Started
: 27 Oct '18; Finished: 2 Nov '18
Pattern: Thread the Needle by Xandy Peters
Materials: New Juniper Yarns (aka TwoJ) Merino Pure (colour Spruce Grove), 90 grams, $25; and Malabrigo Yarn Lace (colour Frank Ochre 35), 10 grams (held double), $5.50 but leftover from another project


Small note for anyone who wants to make this cowl (and I recommend you do):
I found the ending of Clue 2 confusing as to how to be prepared for Clue 3. I think the last row would be better stated as:
Row 34: K2, PM, KTNM, RM, K1, [P1 TBL, K1] rep to M, RM, KTNM, SM, K4, Break Yarn.
(Changes are in bold type.)

Saturday, September 29, 2018

Hasukai Cowl Progress and Regress

I mentioned in my post about Iceland that I cast on a project for the trip. The long and drapey Hasukai Cowl that can be worn long like a scarf or slipped over your head like a cowl caught my eye a while ago. I thought the long garter stitch project would be perfect for a trip.

I actually cast it on while I was still at home since it's good to get a start before you leave to minimize the chance of getting stuck without your tools! I was explaining the project to my mom who was beside me and trying to talk her through how I was going to do it without purling. She admitted she didn't really follow the specifics but she got that I would be working around and around. She asked somewhat incredulously, "Don't you feel like you're just going to be working on that forever, just going around and around without it ever ending?" And I said, "You bet...but you make that sound like a bad thing!" We had a good laugh.

The picture on the right shows some progress I'm making at the first airport. I didn't do much more during the flights since we were flying overnight and I did my best to get a little sleep. (We were in the back row where the seats don't incline at all; it wasn't a great trip for sleeping.)

I took it with me every day but I didn't pull it out to work on until at least half way through the trip -- I was too busy with the camera and looking around. The first half of the trip was also busier than the second. What follows are a bunch of "knitting while..." pics.

On the bus at Dettifoss:
By the time I got home, I was about half way done the cowl. This is the Saturday after we got back:
 I got to enjoy a backyard concert of bluegrass music and the knitting came with:
 Watching my first football game of the season:
Perhaps motivated by all the stripes on the uniforms, I decided to add white stripes to one end:
There's always been something I didn't like about garter stitch ruffle, so I tried a different construction on the second ruffle. Then I did a little poll on IG.
Ruffle 1
or Ruffle 2.
1
or 2.
Ruffle 1
or Ruffle 2.
(Can you tell I used to give eye exams?)
What do you think? I tried to make it clear that it was not about the white stripe or not, but I don't think that was clear to everyone.

In the end I decided I preferred the fullness of the first ruffle. The second one was done with alternating stocking and reverse stocking stitch (similar to the ruffles on the dress I made for my niece), but with this gauge, it was too loose and there just wasn't enough fabric there to make it ruffle-ly.

So I ripped out the second ruffle. (Even though I blocked the cowl, I left all the ends loose for just this reason.) I also decided to take out the white stripes. They are very striking, but they're not what I wanted for this project. I added them on the spur of the moment and forgot that I was planning to overdye the project after it's knitted. The dye wasn't going to work on the white stripe, so out it goes!

I'm about half done the ruffle the second time and hope to finish soon. I have some ideas about how I want to dye it, but it will be an adventure.

May I suggest?

I Say! or at least I did once...