
I had been pondering what purse/bag to take on the trip because it needed to be big enough to carry a lot, small enough not to be bulky, comfortable, easy to carry, somewhat secure from sticky fingers...the list goes on. The one I preferred is this sad and sorry looking messenger bag:

So I've been thinking about adding a "skin" to freshen it up. Since it seemed to be the only good candidate to take on my trip and there was no way I was going to appear in all those vacation pictures with this sad thing, I decided to take action.
My thought was to cover it with a felted sweater. I could have used regular fabric but then I would have to deal with raw edges etc. The felt could just be cut and applied.
I went through my stash of sweaters and narrowed it down to these two options, both cashmere but not suitable for raveling:

Next step was to make a pattern from the bag:


I carefully cut the pieces from the front so that the argyle would line up on the two pieces above and below the zipper.
The argyle pattern was only on the front of the sweater, so I ended up using some of the plain black from the back as well.
5. Sew in place. No pictures. I guess I was too busy stitching! I did a small section by machine where I could, but most of it was done by hand. I just took small stitches on the front so the thread wasn't visible.
And by the end of a couple hours, I had a new (looking) bag!
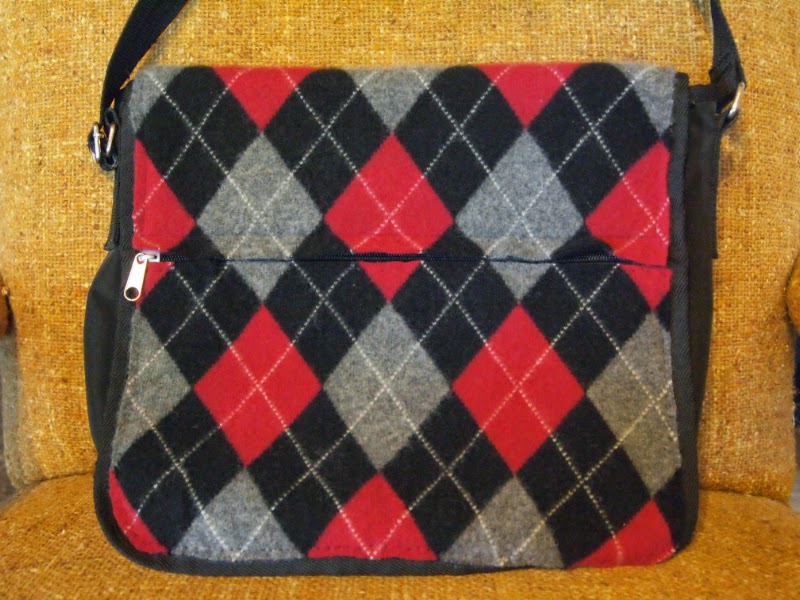 |
| Front. |
 |
| Back |
This is a project I've been meaning to do for a while so it feels really good to have accomplished it. I'll keep the pattern pieces so I could always change the look again if I want. (I suspect what's really going to happen is that I'm going to end up recreating the whole bag, but that is for another time.)
And I think I will have to do something about the aging strap...something woven in black and red diamonds I think...(but again, another time).
For the final touch, I added a little pull to the zipper:


No comments:
Post a Comment
Comments are moderated so you will not see yours post right away. Thank you for leaving a comment; I enjoy reading each one!