Showing posts with label buttons. Show all posts

Wednesday, August 7, 2019

Sweater for Wool-Aid

Here's a project I've been working on in the background. I had a good quantity of wool raveled from a sweater. I believe I purchased it from someone on Ravelry, but I can't find any record of it.

If that memory is correct, what I actually purchased was a half-finished project. I raveled it and ended up with a lot of different balls (about 25) from large (182 grams) to small (7 grams).

It was a nice colour of red and quite a bit of yarn so I thought I would make a garment for myself with it. But after a few years of not doing anything with it, I let that idea go. It was enough that I could make a sweater (or two?) for Wool-Aid.

In February I finished my last vest for Wool-Aid and when I went to post it in the group (we all like to share finished projects), I saw their posted theme for February:
We have a special request from the Kyegu Monastery in Gamrau, India, for turtleneck or high mock-turtleneck sweaters for next winter (maroon, brown, red, and gold items are appropriate). The young monks in Gamrau are between 12 and 18 years old (I’m figuring sizes 32” to 40”). Perhaps we can get a good start on this special request, so we have enough sweaters in their sizes to ship by early fall.
This seemed like a good way to use this red yarn--it was the right colour, I had plenty for a sweater, I like doing the larger sizes, and my favourite shawl colour Vneck style would work great.

So I cast it on and worked on it for the following three months. Then it sat waiting for buttons until the week before the fair. (I entered it in the Pullover-Child category.)
Since they asked for high necks, I adjusted the shawl colour so that it didn't angle in from the lower point. The collar was worked straight until I increased for the upper collar portion.

I had thought I might be able to put a button near the top so that it could be a full turtleneck if the top button was done up,
but decided it was too tight around the neck to actually wear that way.
I also thought about putting the top button further up (see finger below) and spacing three buttons from there to the bottom of the collar. (The top button would not be done up most of the time.)
But in the end, I went with just two. You can still pull the collar up if more warmth is needed on the back of the neck.
Once I had the position of the buttons, I crocheted some loops on the one side.
I slipped stitched from the bottom, working just inside the selvage stitch (along green line). When I got to the place for the button loop, I chained 10, and then continued slip stitching in the next stitch.
After both loops were done, I slipped stitched twice and then pulled the end to the back through the last loop to finish. I thought about doing the trim all the way around the collar because it was a nice finish, but decided not to because both the top and bottom of the collar are seen and the slip stitch looks good only on one side.
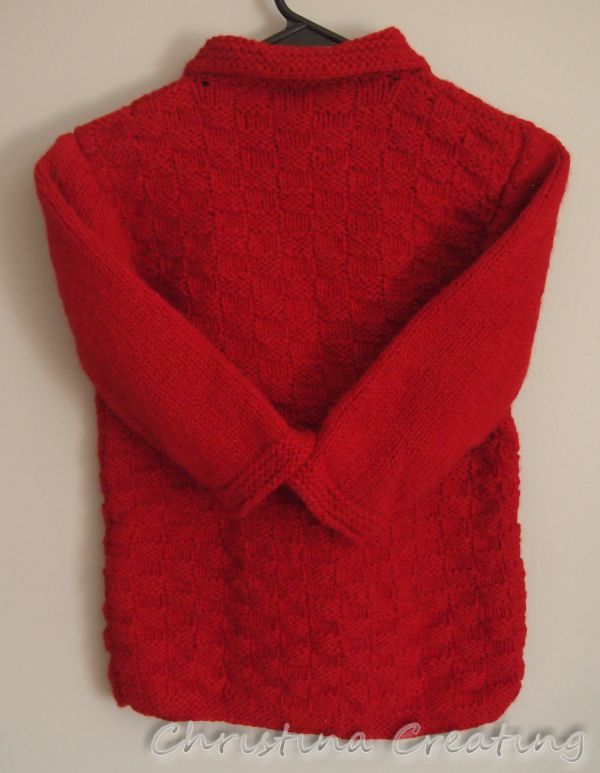
I did a 4x4 basketweave stitch for the main part of the back and front (the texture makes it warmer) with stocking stitch on the sleeves. I did my usual garter stitch edge for the hems of the sleeves and body.
I tried it on to check the collar fit but you can see the sleeves are way too short.
Wool-Aid likes the sweater body to be longer than usual for extra warmth, but it makes the sleeves look really short. I try to make the sweater into "realistic" proportions, but in the end, I figure anything close to reasonable will fit someone!

Project Stats
Started
: 27 Feb '19
Finished: 21 May '19 (the knitting; buttons not until July)
Pattern: Based on the Steppe Ahead Sweater by Irina Makarow
Materials: wool (485 grams); raveled from unknown sweater
Ravelry project page: Wool-Aid Sweater 2019-1 (4)


Sunday, February 24, 2019

Snips Baskets

I mentioned in my last post that I made some snips baskets (or thread catchers if you prefer) to give away at the craft retreat. I have for you a little tutorial in case you would like to make your own.


Cut out two triangles that are 9 inches on each side. 9 inches with the seam allowance or without, you ask? It doesn't really matter. One choice will result in a little smaller basket than the other but either will work.

One triangle is your "outside" fabric and one is the inside. Put them right sides together and sew 1/4" seam all around the outside, keeping 2-3 inches unsewn on one side, but making sure to sew all three corners. Trim the seam allowance around the corners and flip it inside right. Press.

Ok, I am seriously lacking in pictures so far but hopefully you get it.

Here is my triangle after it has been sewn and flipped:
There is still an opening that is not sewn on one side. The seam allowance should be pressed to the inside along the same line as the seam.
If you are planning to do the rest of the sewing with a machine, you can top stitch around the triangle close to the edge and that will close up the hole. Specific instructions below are for hand stitching, which is what I did.

Now fold one edge in half with the inside fabric on the inside. Just make sure it is not the edge with the opening. (You can use the opening to get inside and hide your knots.) Mark half-way with a pin.
Then mark half the half way with another pin.
You can double check that the second pin is in a good place by folding over both corners and making sure they just reach the corner and are even.
If they aren't even, adjust the second pin (yellow above) until they are.

Now sew the two sides together along the edge between the two pins, either starting or ending at the fold. (I prefer to end at the fold because things are less likely to get misaligned.)
You can do it by machine (sewing right on top of the top stitching) or by hand, which is what I did, sitting by the wood stove. Mmmm, cozy.

Here the seam is sewn and you can see that the top half of the edge is left unsewn:
Now do it again to the second side (the remaining side without the opening):
Now it's time to close the opening.
The basic idea is to sew the opening closed and then sew the folded seam as on the other two sides.

More details: I folded the edge in half as with the other sides so I could check which end of the opening was furthest from the halfway pin.
Sew the opening shut starting at the end furthest from half way. When you get to the other end, tie off with a knot but do not cut the thread. Then insert the needle next to the knot and move it between the fabric layers to the halfway point. Pull the needle through, sew a knot to anchor your thread and then sew the seam.

Finger press from each sewn corner to its neighbours to shape the bottom. and now you have a triangle pyramid with loose flaps on top.
What you do with those is anchor them down with a button, bow, yarn, or just a stitch - whatever you want.
Fold each side down so the point is just above the folded edge of the bottom and centered between the sewn corners. Secure with your doo-dad of choice.

And when you want to make some gifts to take to a craft retreat, you do it all a few more times!
I had fun going through my button collection and finding some to complement each fabric combination.

The thing I liked about this little basket is that if you're working away from home, you can just fold up the basket and throw it in your project bag. The threads or yarn ends won't fall out.
I will find this very handy as I bring my knitting or hand sewing with me to plenty of places and am always making little piles of cut offs that I hope I will remember to throw out when I leave.
Compelling little shapes, aren't they!

Tuesday, April 7, 2015

Cute as a Button

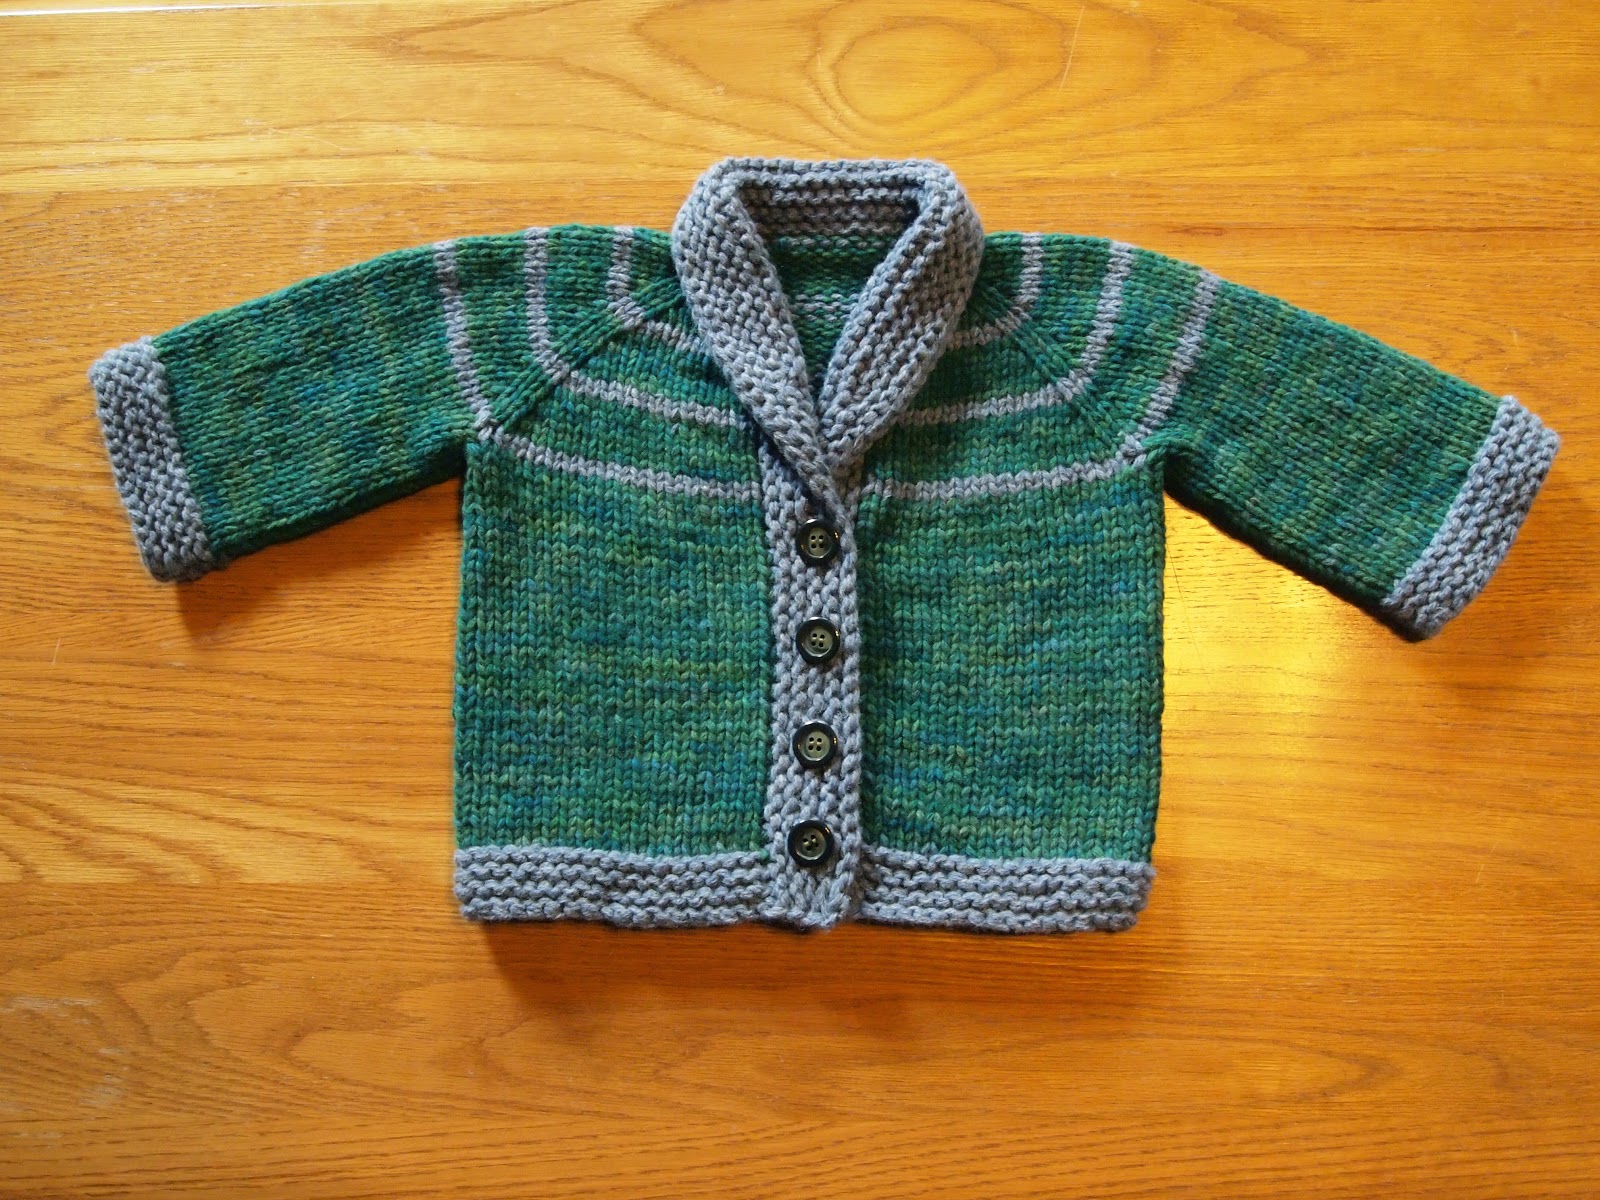
It wasn't done in a weekend, but the little sweater for my co-worker's child is done.

There was some drama with the dyed yarn and whether I would have enough. I ended up making the sleeves a little shorter than the pattern called for, but I think they look a little long so I'm glad.

The sweater has been waiting about a week for the buttons. Not my favourite part of the job.

But while I was sewing them on, I thought I'd show you a few tricks I've picked up over the years.

First, I use doubled thread for buttons. That's pretty common. I used to thread the needle over one strand and then knot the two cut ends together.
But that leaves you with a knot and some loose threads after the knot. Also, it means you're restricted in how close you can sew to the end of the thread because the needle is stuck in the loop and needs room to turn around.

So a better way is to thread the needle with the two cut ends and leave a loop at the other end.
 Now, when you start to sew, you can catch the loop with the needle after taking the first stitch,
 and in that way, secure the end:
Take one more anchor stitch, and you're ready to sew on the button.

When you're sewing buttons onto knits, you usually have to watch that you don't sew them down too tightly. There needs to be room behind the button for the fabric around the button hole. Otherwise, the buttons are hard to do up and the button band won't sit properly.

You can convince yourself that you will just make loose stitches, but it's hard to do. Like, it's an absolute delusion to think you can do it. The stitches will have uneven tension and it's almost impossible not to make them tighter and tighter.

So, prop a match stick (or a toothpick) between the button and the fabric after making your first stitch through the button. Continue to sew the button on over the matchstick.
Now you can pull evenly on the stitches and be sure that there will still be a space between the button and fabric.

After stitching the button securely, knot it on the backside by taking a stitch and then pulling the needle through the loop before pulling the thread tight (twice). Then remove the matchstick and pull the thread to the front side of the fabric but behind the button. Wrap the thread around the stitches a five or six times (between the button and the fabric) and then knot it again in the same way.
 Wrapping the stitches makes a sort of post for the button and reinforces the thread as well.

And with four buttons, my little sweater was finished:
I think it looks rather smart and I hope it will fit the little tyke next winter.

Project Stats
Started
: 21 Mar '15
Finished: 28 Mar '15
Pattern: Baby Sophisticate by Linden Down (free)
Materials: 120 grams of ravelled wool, used double. The green was dyed with KoolAid.


It looks rather proud of itself here, doesn't it!

Sunday, May 19, 2013

Buttoned Up

I sat down on Thursday night and went through all my buttons. They still fit into a coffee can, so not too bad of a job. I've got them sorted by colour and went through each colour, one by one. Although I was pretty sure I didn't want a green, blue or purple button, I couldn't be sure there weren't buttons in a very light shade of those colours that would work. So I looked, and sorted.

Every time I pull out my buttons, I sort them a little further. Matching buttons get put together and tied with a thread. Time consuming? Yes. Can I help myself? No.

I saved the metallic buttons for last because I thought they were my best bet. Ok, maybe that sounds backwards, but I wanted to give the other colours a chance.
There were a lot of shiny buttons so I was worried I wasn't going to find anything, but I did find a couple candidates.

From the green bag, a pair of green flowers:
They were from a previous garment and I really like them. But too green and too big for this project.

Next, some not too, too shiny metallic buttons:
Still a little too shiny for this project.

Finally:
Some metallic buttons that also came from a previous garment. They have a touch of green, but not too much.  The only draw back is that they are pretty heavy. I was worried they were going to be far too heavy for this lace garment, but it turns out I was wrong; they're fine.

I sewed them on to one side, and the open loops of the trim work for the buttonholes.
That's how I assume it's supposed to work. The pattern didn't really say.

Sorry to keep you waiting, but pictures of the finished garment will follow soon. I did wear it to knit group today and it got a very warm welcome!

May I suggest?

I Say! or at least I did once...