Showing posts with label recycle. Show all posts

Wednesday, August 7, 2019

Sweater for Wool-Aid

Here's a project I've been working on in the background. I had a good quantity of wool raveled from a sweater. I believe I purchased it from someone on Ravelry, but I can't find any record of it.

If that memory is correct, what I actually purchased was a half-finished project. I raveled it and ended up with a lot of different balls (about 25) from large (182 grams) to small (7 grams).

It was a nice colour of red and quite a bit of yarn so I thought I would make a garment for myself with it. But after a few years of not doing anything with it, I let that idea go. It was enough that I could make a sweater (or two?) for Wool-Aid.

In February I finished my last vest for Wool-Aid and when I went to post it in the group (we all like to share finished projects), I saw their posted theme for February:
We have a special request from the Kyegu Monastery in Gamrau, India, for turtleneck or high mock-turtleneck sweaters for next winter (maroon, brown, red, and gold items are appropriate). The young monks in Gamrau are between 12 and 18 years old (I’m figuring sizes 32” to 40”). Perhaps we can get a good start on this special request, so we have enough sweaters in their sizes to ship by early fall.
This seemed like a good way to use this red yarn--it was the right colour, I had plenty for a sweater, I like doing the larger sizes, and my favourite shawl colour Vneck style would work great.

So I cast it on and worked on it for the following three months. Then it sat waiting for buttons until the week before the fair. (I entered it in the Pullover-Child category.)
Since they asked for high necks, I adjusted the shawl colour so that it didn't angle in from the lower point. The collar was worked straight until I increased for the upper collar portion.

I had thought I might be able to put a button near the top so that it could be a full turtleneck if the top button was done up,
but decided it was too tight around the neck to actually wear that way.
I also thought about putting the top button further up (see finger below) and spacing three buttons from there to the bottom of the collar. (The top button would not be done up most of the time.)
But in the end, I went with just two. You can still pull the collar up if more warmth is needed on the back of the neck.
Once I had the position of the buttons, I crocheted some loops on the one side.
I slipped stitched from the bottom, working just inside the selvage stitch (along green line). When I got to the place for the button loop, I chained 10, and then continued slip stitching in the next stitch.
After both loops were done, I slipped stitched twice and then pulled the end to the back through the last loop to finish. I thought about doing the trim all the way around the collar because it was a nice finish, but decided not to because both the top and bottom of the collar are seen and the slip stitch looks good only on one side.
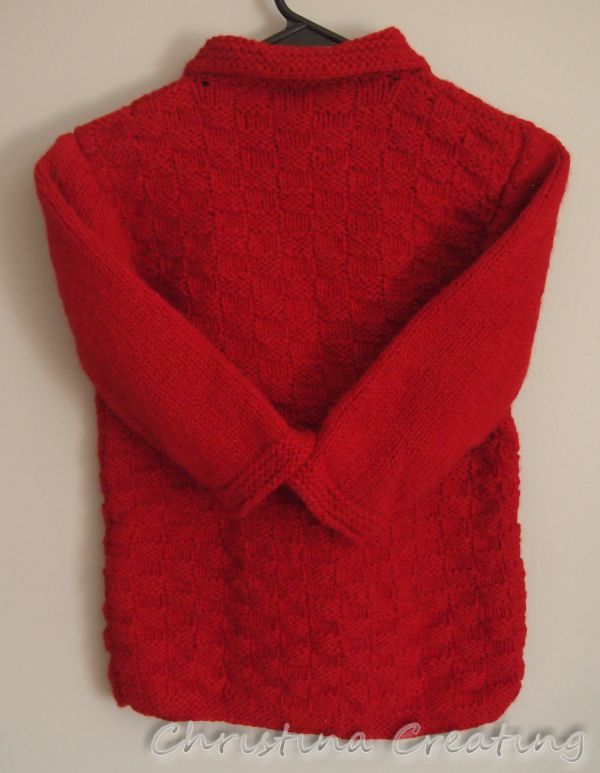
I did a 4x4 basketweave stitch for the main part of the back and front (the texture makes it warmer) with stocking stitch on the sleeves. I did my usual garter stitch edge for the hems of the sleeves and body.
I tried it on to check the collar fit but you can see the sleeves are way too short.
Wool-Aid likes the sweater body to be longer than usual for extra warmth, but it makes the sleeves look really short. I try to make the sweater into "realistic" proportions, but in the end, I figure anything close to reasonable will fit someone!

Project Stats
Started
: 27 Feb '19
Finished: 21 May '19 (the knitting; buttons not until July)
Pattern: Based on the Steppe Ahead Sweater by Irina Makarow
Materials: wool (485 grams); raveled from unknown sweater
Ravelry project page: Wool-Aid Sweater 2019-1 (4)


Saturday, April 6, 2019

Hasukai Cowl

Ready for another "finished project" post? I introduced this project in this post at the end of September. I finished it the next day.
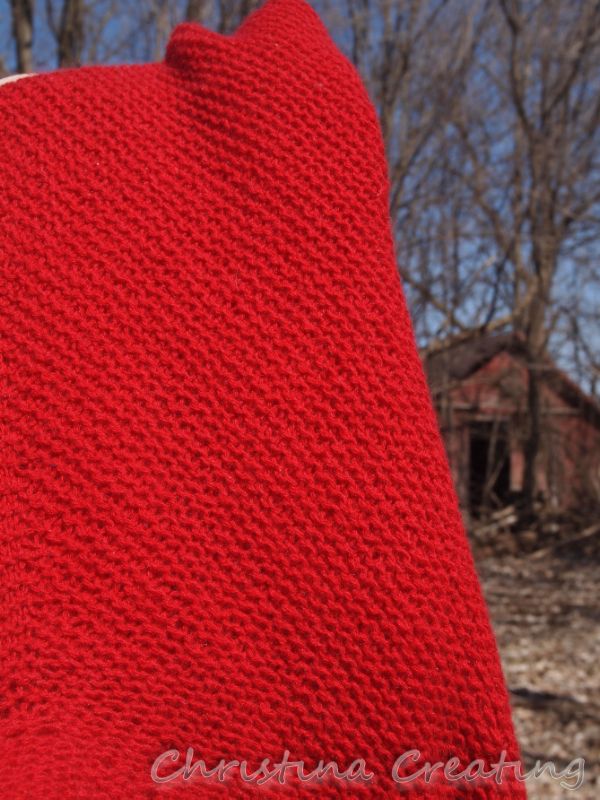
Look at all that plush garter.
I'm not the biggest fan of garter stitch,
but sometimes....mmmh.
You're right--it does help that it's cashmere.
So why did I not write about it until six months later? Well, I had plans to dye the finished piece. I find this red a little flat and I was hoping to add some depth and variation with a dip in some dye. But I wasn't confident in how to do it and haven't (yet) felt adventurous enough to try. So I started wearing it like this and then it seemed a little after the fact to blog about it. But here we are.

If I ever dye it, I'll let you know. (I'll try not to wait six months.)

The scarf is a tube of garter stitch with increases on one side and matching decreases on the other so that the rows end up running diagonally. Then the ends are finished with a ruffle.
Each end is the same except that the long point on one side lines up with the short end on the other side.
The scarf can be worn as a basic scarf, just wrapped behind the neck:
or wrapped around the neck:
But the reason this pattern caught my eye is that it can be worn as a cowl too. To get there, you have to configure the scarf as follows:
Put your hand inside the scarf and hold the other edge.
Pull the one edge over the other, like you're
turning something inside out.
Line up the "inny" and "outy" points and
arranged the scarf so it is folded roughly in half.
Open up the center of the tube.
Stick your head through the hole.
Now you have a cozy cowl that pools around your neck and drapes over your shoulders:
No cold is sneaking between this cowl and your shirt's neckline.
Or you can pull all the bulk to the front if you don't want your shoulders covered:
If you want to be able to move your arms, this is also what you have to do if you're going to wear it under a coat:
But you can wear it outside the coat too:
I really love throwing this cowl on. (I don't really wear it as a scarf.) It was great to wear inside on the cold, cold days we had this winter when the woodstove was throwing out heat but couldn't stop the cold drafts that were suddenly noticeable. On the milder days we're having now, it's great to wear out of the house like a wrap or poncho.

If you want a simple project that is way more interesting than a long rectangle scarf, definitely give this a go.

Since the scarf is worked in the round in garter stitch, the pattern instructs you to knit one row and purl the next. I applied the same "no purl" method I used on my Honey Cowl to avoid all that purling, especially as it is easy to do so.

I used one end from the outside of the yarn cake and one from the inside for my two strands since I started this for a trip and wanted to be able to travel light(er). (This way I only needed to carry one ball of yarn instead of two.)

Project Stats
Started
: 7 Aug '18
Finished: 30 Sep '18
Pattern: Hasukai Cowl by Hiroko Fukatsu (¥2 JPY, which is currently ~$1.85 US)
Materials: 135 grams cashmere raveled from a Patrick Clark sweater, held double ($2.50 for the whole sweater, 228 grams)
Ravelry project link: Hasuki Cowl for Iceland

Sunday, October 8, 2017

I Can See Right Through You

I was given tickets to the Colts game this weekend, when Peyton Manning's jersey number was retired. My two favourite things: football and Peyton Manning. Ok, so maybe that's the same favourite thing, but anyway.

When I finally did some research about getting to the stadium and getting in the stadium, I learned that the NFL has a "clear bag policy". That is exactly what it sounds like - any bag you bring in has to be a clear, see-through bag. (Women are allowed a small hand clutch, but that's it.)

I thought about packing light and putting everything in pockets. It wouldn't be too hard as I usually put all my valuables on my person instead of in my purse when I go to games. But I just couldn't picture going through Saturday (when the same policy applied to the statue unveiling) and Sunday without a bag. What about my extra camera? What about my sunglasses? What about my knitting? (You know, in case of an emergency. Like the 7 hour weather evacuation I had at a Notre Dame game - I was very happy I had my knitting that day!)

Of course, I also didn't like the idea of buying one of the licensed Colts or NFL bags, and I didn't have a clear shopping bag. (Also, ew. They're just not nice to carry.)

So when my eyes lit on a clear case that I was using to store yarn, I hatched a plan. A simple, quick plan - add handles to this zippered case. (It's one of the cases that sheet sets come in.) In addition to being available, it was close to their size guidelines.
I was out of bed a little early on Friday morning and I finished this before going to work. I had leftover strips of black fabric from cutting out another project.

I sewed two together end to end to get the length. Then I folded it in on itself twice the long way so that no raw edges were showing. I then top stitched along all four sides. Repeat for strap two. I sewed them onto the plastic bag and done.

I didn't make the straps very long. In fact, I didn't really measure the length at all. Two of the scrap pieces end to end seemed like it fit in the acceptable range for purse straps, and I didn't consider it any further. (This was a quick project I was doing before work in the morning, after all.)

But much to my delight, when I got ready to go out on Saturday, I discovered that it was the perfect length for wearing over my shoulder. Truly the best way to carry a bag.
I couldn't have been happier!
I have no pictures of it in action at the game, but trust me, it worked perfectly.
I posted this pic on IG and it was of the ones
they displayed on the scoreboard!
 And I did manage to fit in a little knitting before the game and between plays:
In keeping with my habit of attending long football games, this one went into overtime. I'm not going to say it was my awesome clear bag that helped Vinatieri kick the winning field goal in my end zone, but you can't deny it didn't hurt! ;)

May I suggest?

I Say! or at least I did once...