Showing posts with label scarf. Show all posts

Saturday, April 6, 2019

Hasukai Cowl

Ready for another "finished project" post? I introduced this project in this post at the end of September. I finished it the next day.
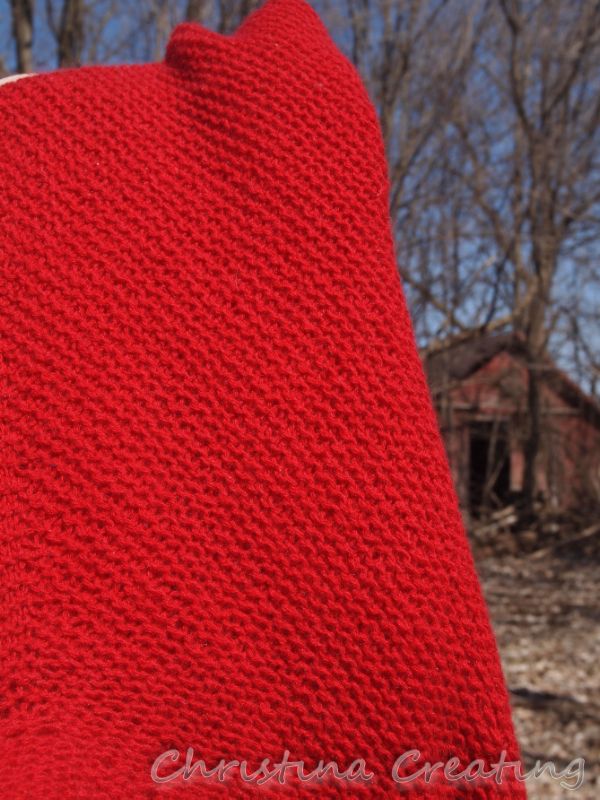
Look at all that plush garter.
I'm not the biggest fan of garter stitch,
but sometimes....mmmh.
You're right--it does help that it's cashmere.
So why did I not write about it until six months later? Well, I had plans to dye the finished piece. I find this red a little flat and I was hoping to add some depth and variation with a dip in some dye. But I wasn't confident in how to do it and haven't (yet) felt adventurous enough to try. So I started wearing it like this and then it seemed a little after the fact to blog about it. But here we are.

If I ever dye it, I'll let you know. (I'll try not to wait six months.)

The scarf is a tube of garter stitch with increases on one side and matching decreases on the other so that the rows end up running diagonally. Then the ends are finished with a ruffle.
Each end is the same except that the long point on one side lines up with the short end on the other side.
The scarf can be worn as a basic scarf, just wrapped behind the neck:
or wrapped around the neck:
But the reason this pattern caught my eye is that it can be worn as a cowl too. To get there, you have to configure the scarf as follows:
Put your hand inside the scarf and hold the other edge.
Pull the one edge over the other, like you're
turning something inside out.
Line up the "inny" and "outy" points and
arranged the scarf so it is folded roughly in half.
Open up the center of the tube.
Stick your head through the hole.
Now you have a cozy cowl that pools around your neck and drapes over your shoulders:
No cold is sneaking between this cowl and your shirt's neckline.
Or you can pull all the bulk to the front if you don't want your shoulders covered:
If you want to be able to move your arms, this is also what you have to do if you're going to wear it under a coat:
But you can wear it outside the coat too:
I really love throwing this cowl on. (I don't really wear it as a scarf.) It was great to wear inside on the cold, cold days we had this winter when the woodstove was throwing out heat but couldn't stop the cold drafts that were suddenly noticeable. On the milder days we're having now, it's great to wear out of the house like a wrap or poncho.

If you want a simple project that is way more interesting than a long rectangle scarf, definitely give this a go.

Since the scarf is worked in the round in garter stitch, the pattern instructs you to knit one row and purl the next. I applied the same "no purl" method I used on my Honey Cowl to avoid all that purling, especially as it is easy to do so.

I used one end from the outside of the yarn cake and one from the inside for my two strands since I started this for a trip and wanted to be able to travel light(er). (This way I only needed to carry one ball of yarn instead of two.)

Project Stats
Started
: 7 Aug '18
Finished: 30 Sep '18
Pattern: Hasukai Cowl by Hiroko Fukatsu (¥2 JPY, which is currently ~$1.85 US)
Materials: 135 grams cashmere raveled from a Patrick Clark sweater, held double ($2.50 for the whole sweater, 228 grams)
Ravelry project link: Hasuki Cowl for Iceland

Monday, November 26, 2018

All the Way Around Robin's Barn

That's another way of saying "the long way around" in case you're unfamiliar. (Listen to A Way with Words and you'll learn about lots of interesting phrases!)


This project started with a collection of yarn I thought might suit each other in a project. Rummaging around in my stash brought out the pale yellow angora mix from Fleece Artist and I got an urge to use it up.
I knew I had some mohair remnants that I thought might work well with it.

I first tried a stitch from a free pattern I got from a yarn store that was written for a light mohair yarn.
I held the angora with one strand of the mohair, switching colours every two rows.
With the two strands of yarn, the fabric was not airy enough. I soon took it out.

I tried again alternating one strand of angora for two rows with one strand of mohair for two rows, while changing which colour of mohair I used from stripe to stripe.
I didn't mind the effect, but quickly realized that I would not have enough of the mohair to get very far. My Ravelry listing for the light purple has a lot more yardage listed than I have. I wish I could solve the mystery of where that yarn went, (I'm one of those who likes to keep their Ravelry listings up to date) but in any case, there wasn't enough for this idea. I considered making a narrower rectangle, but that didn't really appeal to me.

These are the bits I was left with after the second try since I had cut the yarn between stripes:
Then I bagged up the mohair and put it away for another day and started again with just the angora.

I had just seen a pattern from Churchmouse Yarns on Kristy Glass's video of her visit there which looked like just the thing. It was an airy triangle "kerchief" designed with a mohair/silk blend.
It's a repetitive pattern done on large needles and it didn't take long to make some serious progress:
A good stretch during blocking really opened up the pattern and the large eyelet borders:
It's not a very large piece,
but is just right for wearing around your neck
and adding some fluffy warmth on chilly days.
Even though the kerchief is more holes than yarn, it is seriously warm. I had it on the other day and I felt like I could feel heat radiating from it!

It does shed. Little hairs drift off and tickle my nose while I'm wearing it and my clothes look like I have a pet after I take it off. Some days worth it; some days not.

Project Stats
Started
: 17 Oct '18
Finished: 22 Oct '18
Pattern: Blackberry Kerchief by Churchmouse Yarns and Teas
Materials: Fleece Artist Peter Rabbit (colour Cornflower), 45 grams

Saturday, September 29, 2018

Hasukai Cowl Progress and Regress

I mentioned in my post about Iceland that I cast on a project for the trip. The long and drapey Hasukai Cowl that can be worn long like a scarf or slipped over your head like a cowl caught my eye a while ago. I thought the long garter stitch project would be perfect for a trip.

I actually cast it on while I was still at home since it's good to get a start before you leave to minimize the chance of getting stuck without your tools! I was explaining the project to my mom who was beside me and trying to talk her through how I was going to do it without purling. She admitted she didn't really follow the specifics but she got that I would be working around and around. She asked somewhat incredulously, "Don't you feel like you're just going to be working on that forever, just going around and around without it ever ending?" And I said, "You bet...but you make that sound like a bad thing!" We had a good laugh.

The picture on the right shows some progress I'm making at the first airport. I didn't do much more during the flights since we were flying overnight and I did my best to get a little sleep. (We were in the back row where the seats don't incline at all; it wasn't a great trip for sleeping.)

I took it with me every day but I didn't pull it out to work on until at least half way through the trip -- I was too busy with the camera and looking around. The first half of the trip was also busier than the second. What follows are a bunch of "knitting while..." pics.

On the bus at Dettifoss:
By the time I got home, I was about half way done the cowl. This is the Saturday after we got back:
 I got to enjoy a backyard concert of bluegrass music and the knitting came with:
 Watching my first football game of the season:
Perhaps motivated by all the stripes on the uniforms, I decided to add white stripes to one end:
There's always been something I didn't like about garter stitch ruffle, so I tried a different construction on the second ruffle. Then I did a little poll on IG.
Ruffle 1
or Ruffle 2.
1
or 2.
Ruffle 1
or Ruffle 2.
(Can you tell I used to give eye exams?)
What do you think? I tried to make it clear that it was not about the white stripe or not, but I don't think that was clear to everyone.

In the end I decided I preferred the fullness of the first ruffle. The second one was done with alternating stocking and reverse stocking stitch (similar to the ruffles on the dress I made for my niece), but with this gauge, it was too loose and there just wasn't enough fabric there to make it ruffle-ly.

So I ripped out the second ruffle. (Even though I blocked the cowl, I left all the ends loose for just this reason.) I also decided to take out the white stripes. They are very striking, but they're not what I wanted for this project. I added them on the spur of the moment and forgot that I was planning to overdye the project after it's knitted. The dye wasn't going to work on the white stripe, so out it goes!

I'm about half done the ruffle the second time and hope to finish soon. I have some ideas about how I want to dye it, but it will be an adventure.

Friday, September 18, 2015

Mesh Stripe Kerchief...Success!

I finished the linen kerchief I was working on. It is a smallish triangle of fabric to wear around my neck when I want a little warmth. It's cool feeling against my skin (even as it's keeping me warm) which is lovely in summer.

I had a hard time stopping this one. I really didn't want it to get too big but I was so enjoying knitting with the linen and the simple pattern.

I believe I mentioned before that I alternated rows of stocking stitch with rows of the mesh. The mesh is a simple combination of knit-2-togethers and yarn overs on one half and the mirror image SSK and yarn overs on the other. You wouldn't have to mirror image, but I can't help myself.

For the shape, I increased two stitches at the center on every other row and one stitch on each edge every row. The extra increases on the edge made the ends extend a little further than a regular 45-degree angle would have done. I thought that would make the ends a little more suited to tying.

I wasn't planning to add a border on the edge but as I got closer to the end, I realized that it would roll horribly if I didn't do something.
So I added a few rows of seed stitch, which mostly does the job. I thought the texture of the seed stitch would also play off of the mesh texture nicely. I finished off with what I would call HJSSBO (Half Jeny's Surprisingly Stretchy Bind Off) because I added a yarn over on every other stitch only. It came out the perfect amount stretchy.
I am really pleased with the final scarf. I looked a few times for a pattern that matched what I wanted and couldn't find one. This came out pretty much just like I was thinking.
Even though I think it's a pretty colour, it's a bit odd and I don't seem to have a lot to wear with it. But as you can see from these pictures, sometimes I don't care and just wear it anyway. :) These were taken when I had a chance to walk along the river in Niles and enjoy a day where the sun was just warm enough and the breeze just cool enough to make it perfect outside.

I have plenty more linen from the sweater I raveled to get it so now I'm considering what other things I could make from it. I really did enjoy working with it even though it should feel more like cotton (ew) than wool (yum) while I'm knitting it. I briefly considered a skirt, but I know I don't have enough for that!

Project Stats
Started
: 15 Jul '15
Finished: 13 Aug '15
Pattern: Mesh Stripe Kerchief (my own) More details here if you want to make your own.
Materials: 81 grams raveled linen (lace weight)


Friday, July 17, 2015

When the Cat's Away...

At the end of May, we took in a cat that was apparently abandoned. We couldn't keep her because of Troy's allergies, but we really enjoyed her cuteness while we had her.
Her cuteness was enough for me to forgive her inability to resist my yarn, but only because I knew it was for the short term. (Well, and because she was just so adorable.) On this occasion, she repeatedly pounced on my lap to attack the yarn ends as I tried to finish my skirt:
Again, I could live with it in the short term, but this week when she went to her "forever home", I had a real sense of release. I could work on anything! I could leave it out! I could spin! I could wind yarn! I could knit! Unfortunately, I've had meetings both nights since she's been gone so I haven't had time for these things, but I could!

One thing I started this week was a kerchief out of some linen that I raveled from a sweater. (I tried to wear it because it was a nice summer cardigan, but it was a size too small.) I was a well behaved knitter and made a swatch:
The lower portion was on 2.75mms and the upper part on 2.00mms. Of course I liked the fabric made on the smaller needles so the project is going to take a lot more knitting. But if using them makes an end product that I like, it will certainly be worth it.

I had decided to do something with the linen because I wanted to have a project I could work on during a camping trip next week. ("Car camping", so nothing where I have to limit the weight I'm carrying or anything.) To me, linen was a much better choice than something in wool.

I've have spent some time looking for a pattern, but I never found one that had all the elements that I wanted. So I am going to make it up as I go.

I looked up how to make different shawl shapes and found this article on Craftsy very helpful. The "wider, shallower triangle" was the closest shape to what I had in mind so that is what I'm going for.

I started with 5 stitches cast on over a double loop of the yarn end. That way I can cinch up the yarn end and have a "seamless" start. (Similar to how I start hats, but in this case I would work flat instead of in the round.)
It looks pretty good, I think.

I then started my increases along the centre line and edges while working a little stockinette stitch and then a simple mesh lace stitch:
I hope to end up with an elongated triangle scarf or kerchief with stockinette and mesh stripes. At first I thought the stripes would have varying widths, but now I think I'll keep them all the same. We'll see...

Sunday, December 1, 2013

Jeweled Cowl


You've been warned.

Remember the beading tutorial I did a few weeks ago?
I have finished the project I was working on at the time. All laid out for blocking:
Being a gift, I didn't write much about the scarf, but it was a pleasure to make. I repeated the yarn combination that I used for a scarf for my mother last year. (You can see it in this post, although it looks like I never did a final post on it.) The green is a soft merino and the blue/green is a sock yarn (merino and nylon). The green really helps soften the other yarn and I love the colour combination. I alternated the colours on every row.

It came out really long.
Probably too long to wear as one loop.

This is a triple loop:
A nice jumbled mess around your neck.

Here's a long/short double wrap:
Nicely shows off the lace and bead work section, if you have time to arrange your scarf just so.

Too cold to have your head uncovered? No problem; try a loose double wrap:
Or a double wrap around your neck:
And I realized after it was wrapped, the most likely way the recipient will wear it is to put it around the back of her neck, pull the two ends to the front and put one folded edge through the loop of the other end. No muss; no fuss.

Project Stats
Started
: 13 Oct '13
Finished: 3 Nov '13
Pattern: Jeweled Cowl by Sachiko Uemura
Materials: Pagewood Farm Denali Hand Dyed Sock Yarn (Sante Fe) (62 grams) and madelinetosh tosh merino light (Jade) (40 grams)


May I suggest?

I Say! or at least I did once...