Showing posts with label Baby Sophisticate. Show all posts

Tuesday, April 7, 2015

Cute as a Button

It wasn't done in a weekend, but the little sweater for my co-worker's child is done.

There was some drama with the dyed yarn and whether I would have enough. I ended up making the sleeves a little shorter than the pattern called for, but I think they look a little long so I'm glad.

The sweater has been waiting about a week for the buttons. Not my favourite part of the job.

But while I was sewing them on, I thought I'd show you a few tricks I've picked up over the years.

First, I use doubled thread for buttons. That's pretty common. I used to thread the needle over one strand and then knot the two cut ends together.
But that leaves you with a knot and some loose threads after the knot. Also, it means you're restricted in how close you can sew to the end of the thread because the needle is stuck in the loop and needs room to turn around.

So a better way is to thread the needle with the two cut ends and leave a loop at the other end.
 Now, when you start to sew, you can catch the loop with the needle after taking the first stitch,
 and in that way, secure the end:
Take one more anchor stitch, and you're ready to sew on the button.

When you're sewing buttons onto knits, you usually have to watch that you don't sew them down too tightly. There needs to be room behind the button for the fabric around the button hole. Otherwise, the buttons are hard to do up and the button band won't sit properly.

You can convince yourself that you will just make loose stitches, but it's hard to do. Like, it's an absolute delusion to think you can do it. The stitches will have uneven tension and it's almost impossible not to make them tighter and tighter.

So, prop a match stick (or a toothpick) between the button and the fabric after making your first stitch through the button. Continue to sew the button on over the matchstick.
Now you can pull evenly on the stitches and be sure that there will still be a space between the button and fabric.

After stitching the button securely, knot it on the backside by taking a stitch and then pulling the needle through the loop before pulling the thread tight (twice). Then remove the matchstick and pull the thread to the front side of the fabric but behind the button. Wrap the thread around the stitches a five or six times (between the button and the fabric) and then knot it again in the same way.
 Wrapping the stitches makes a sort of post for the button and reinforces the thread as well.

And with four buttons, my little sweater was finished:
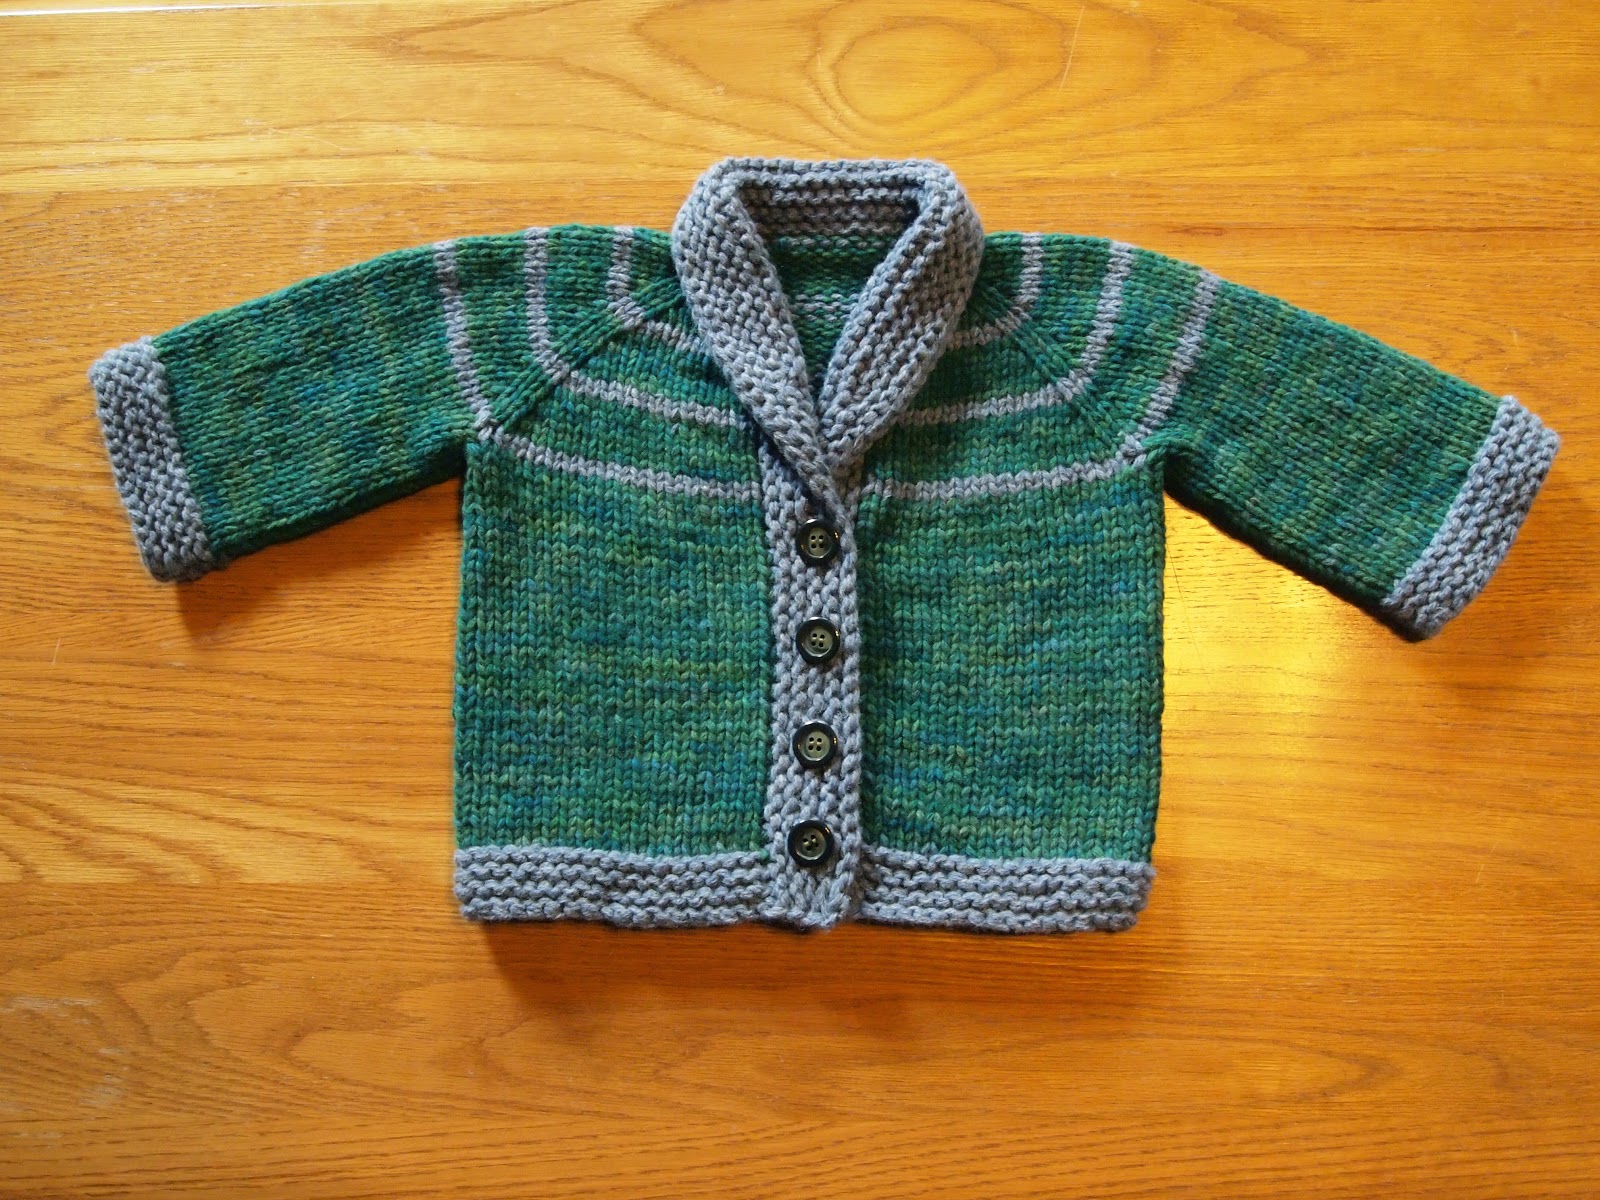
I think it looks rather smart and I hope it will fit the little tyke next winter.

Project Stats
Started
: 21 Mar '15
Finished: 28 Mar '15
Pattern: Baby Sophisticate by Linden Down (free)
Materials: 120 grams of ravelled wool, used double. The green was dyed with KoolAid.


It looks rather proud of itself here, doesn't it!

Saturday, March 21, 2015

When You Start Knitting a Gift the Day After the Baby Arrives

I finished the dyeing I wrote about at the end of my last post. I was going for a tonal (that's fancy dye talk for uneven) blue/green result.

I ended up with a tonal green. I started with a full immersion of the hank in green to get a base. As soon as that dye was absorbed, I pulled hank out of the water and let it cool enough to be handled.

Then I twisted it into a skein and dropped it into the water with some packets of blue KoolAid. I left that on the heat for a while and then to cool overnight.

The next morning I looked at what I had and it was not enough color, so I untwisted it and then twisted it again so different parts of the hank were exposed. I also twisted it more loosely so more yarn would be exposed to the dye.

After that cooled, I decided there still was not enough color even though I really liked the highs and lows of the blue. I decided to untwist it and dye the loose hank in another round. But I didn't have enough blue so I added more green to the final dye.

It turned the whole hank green. The blue KoolAid only has Blue 1. The green KoolAid has Blue 1 and Yellow 5. It's amazing to me how much influence the yellow has even though it "should" be a relatively weaker color.

But green is nice so ok.

While working with the yarn, however, I noticed that it was very easy to pull it apart. It hardly took any strength at all. That got me worried that this wasn't the best yarn for socks. (Of course, I've already made two pairs out of the sleeves and sent them to WoolAid. All I can do now is hope that they last.) And, of course, I can not repeat what might be the same mistake.

Also, my coworker's wife had her baby on Thursday and I was thinking maybe I should get working on a gift for them. I already had found this book
for them (we work at a haunted house, remember) but kept thinking I should add a hand knit as well. But they were having a boy and sorry boys, you're just not as much fun to knit for.

On Friday evening, however, while reading the forums on Ravelry, I saw someone's version of this sweater:
and I decided it was cute enough to make it worth the effort. It's Baby Sophisticate by Linden Down. I'm using the free version, but she also has a full version (more sizes, better tested) available for sale.

This morning, I picked up the green yarn and started to knit. After a couple inches, I decided the fabric was too stiff and my gauge was too small. Rip, rip, it went. Then I started again on a larger needle. After four rows, I decided it still was too small and went up another size (without ripping).

I'm still not quite at gauge, but the fabric feels good, so I'm going for it.

Besides the cute result, I also decided to start this sweater because so many Ravelers who made it said they got it done in a weekend!! Challenge accepted!

Here's what I have so far:
And now, if you'll excuse me, I have some more knitting to do...

May I suggest?

I Say! or at least I did once...