Sunday, October 28, 2012

Things on my Mind

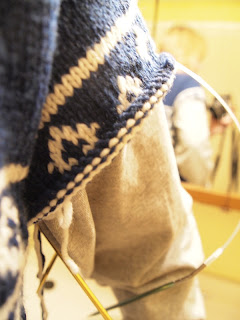
Here's how the Snowflake sweater is looking tonight:
I got through the colourwork on the first sleeve,
(it was a bit of a slog, but perseverance came through for the win)

and have gotten a good start on the second sleeve:
When I tried it on to test the fit (and take pictures), the sleeves felt more snug than the body of the sweater. I know that the sleeves are tighter now than they will be after blocking because of the colourwork, so I trust it will all work out. I mean when has a gauge swatch ever lied? (ha ha--nervous laughter)

The other project I've been working on has hit a crisis of indecision. Or maybe I should say crisis of changed-my-mind.

I've been working on this blue and green scarf and really love the colors and the look of the brioche stitch. BUT I've come to the realization that the person I'm making it for doesn't wear long scarves.


My original idea was to add some subtle shaping so that the scarf would also work as a hat in a pinch. I figured it would make it an easy accessory to grab and use for whatever the weather threw at you.


But I went a little crazy, maybe, and the first half of the scarf hangs practically to my knees. I wanted enough length to make sure there was enough to wrap around your neck, but I'm realizing it's just too long.

So now I don't know what to do. I love the yarn; it's perfect. But what to make for someone who really doesn't use hats, mitts, or scarves? Do I press on just because it's pretty? Pretty, but useless--is that really what I want to give as a gift? (Well, that sums up a lot of things sold as "gifts," if you ask me, but I still don't like it.)

On the bright side, I've gotten pretty good at a two-colour brioche stitch. (That's not really making me feel much better though. I wouldn't mind taking out this scarf if I had a good idea of what to do instead. As it is, I'm just frustrated. Sounds like it's time for a time out for this scarf.)

The other thing I've been doing the last few days is working on my raveled sweater stash. It's part of a recently renewed process of decluttering around here. Instead of just putting it in a closet and doing stuff that maybe I "should" be doing (like knitting a sweater which needs to get done), it "had" to be dealt with. So I tore apart sweaters, raveled the yarn, balled it up and labeled it. There were also three sweaters I decided I would never do anything with or didn't need (like the third red cotton one) and so I donated them back.

(In the following pictures, the real colour is usually closer to the one the right, if you're curious.)

307 grams of wool/angora/nylon blend:
PA275780 combo
I wore this last winter and it was ok, but I was done with it and the neckline never was very comfortable.

219 grams of cotton:
PA275779 combo
I wore this for the summer since "tangerine tango" was picked as the colour for 2012. It didn't quite fit right, so I didn't mind raveling it. It's a lovely colour and probably still will be in 2013 (or whenever I use it). ;)

517 grams of off-white cotton:
PA275778 combo
Is there dying in my future? Who knows...but if there is, I'll be ready with this on hand!

425 grams of red cotton:
PA275776 combo
(Check out the details on those sleeves!)

441 grams of bright pink cotton:
PA275774 combo

314 grams of a silk/rayon mix:
PA205771 combo
What a hideous style this sweater was. The yarn, however, is a really nice warm wheat colour; not too yellow and lovely. And silk...I'm a sucker for silk.

350 grams of a wool/acrylic blend:
PA205769 combo
Normally I wouldn't do acrylic, but this blend is washable and a lovely soft pink. It'll be good for a baby or child item.

285 grams of silk:
PA205768 combo
It's hard to photograph the colour, but it's a really nice teal.

So it's all rolled into cakes, wrapped up and stored away. And no more piles of sweaters in my living room!

I really don't know what I'm going to do with all that cotton--I don't use it that much besides the dish clothes that I make while walking (which hasn't been happening all that often). But it's all I've been finding to ravel and the colours are very seductive.

With this project off my mind, perhaps I'll get to some of the other stuff that needs to be done!

Thursday, October 18, 2012

Putting on my Thinking Cap

I have not been working on the snowflake sweater for a few days now. (Ok, five days if you're going make me get specific.) It's not that I've been avoiding the sweater, but I've needed some time to sit and work out how I'm going to do the sleeves.

They need to be done top-down, which is already something new for me. It means all the trickier important shaping is done right up front. It occurred to me that it's easier to start a sweater or a sleeve from the bottom because once you get to the tricky stuff you have a lot of momentum behind you pushing you on. Of course, if you get all the tricky stuff out of the way first, the rest should roll along like an avalanche.

So tonight, I shut off the TV for a bit and made some notes so I could think. And I came up with a plan of attack.

1. Pick up stitches all around the sleeve opening.
I could have knit the sleeve separately and sewn it in, but I was really attracted to the idea of a no-seam, no-sew option. It seems more elegant. And I would have feedback on fit and size as I went. (And I just wanted to see if I could do it.)

I picked up a stitch for every selvage stitch. I'm a big believer in picking up every stitch and then adjusting the number of stitches on the next row. You can always decrease or increase evenly across the row to get what you need and it makes for a neater pick up row. (Never mind it makes the pick up row almost mindless!) In this case I picked up 76 stitches and had figured out that I want to end up with 78. I couldn't believe how well that worked out!

2. Knit across the twelve stitches centered over the shoulder and turn. On each subsequent row, knit one or two extra stitches and then turn. I set up a plan of a certain number of rows adding two stitches and then a certain number of rows adding one stitch, to make sure that all the stitches around the armhole opening are used up in the right number of rows. To make this easier both to work and to keep track of where I'm at, I have kept the picked up stitches on one cable and am knitting across the rows with a second cable needle.
When I get to the end of the row, I just knit one or two stitches as needed off the "holding cable."

And with an hour or so of knitting, I have a nicely crafted sleeve cap:
I have never done this before and feel like I am making it all up as I go, but I dare say it's going to work!

Only a few more rows and I will be adding the colourwork to the mix. (But remember, after that it'll roll like an avalanche...get out of the way then!!)

Saturday, October 13, 2012

Big T Quilt: Borders and Basting

Over the last few weeks I have been working on my Big T quilt. I designed a double border and discovered that I had enough of the first border fabric (same as the setting blocks), but nothing that would work for the outside border. Off to the quilt shop!

I went looking for something in dark brown, but found something even darker. It looks crazy dark in the picture to the left, but I think in the close up below you can see that it is not straight black and works well with all the browns in the main quilt.
I applied the first borders maybe a week ago when I had a short block of time, and got to the final border today. Once I had those done, I hung the top on the wall and stood back to admire study it, and to celebrate that it was done...yay! That final border is awfully dark, but I then I decided it just makes it look more modern.

Once the top was done, I didn't want to stop there. Success wants more success.

I had been thinking about how to do the back. I found a few pieces that I liked, but none of it was enough to do the whole back. So it would be pieced.

I laid out some of the fabrics on my design wall (on a regular day that would be called my living room floor) and came up with something I think I will like:
It's far too wide in this picture, but it would be easier to cut after the layering. All along, I loved the cityscape fabric on the right and the forest fabric on the left but didn't think they worked very well together. But the longer they sat on my floor design wall, the more I liked the combination. I added some more orangey-brown fabrics on the side and bottom to finish out the size and called it good. (Some were used on the top; some were purchased for this quilt but not actually used on the top.)

I thought I would be done then. I mean sewing on borders and then piecing together a back was quite enough for one day.

But apparently not. I had already purchased a batting and that meant I was ready to layer and pin baste. Which is what I did. (Any doubting Thomases can come put their fingers on my sore and safety-pin dented fingertips!)

But that really is where I stopped. I thought I knew how I was going to quilt it, but now I'm considering a different version. The original idea had all straight lines and right angles. Now I'm considering the same concept but with curved lines. I think the first idea is too │  │     │  │     │  │ (imagine my hands in a karate-chop position, simultaneously slicing the air in front of me three times from top to bottom in parallel); you know, too straight, too lined up, too square. This was a good place to stop and think about it. Plus ND had just won their game in overtime so it was a good time to stop and celebrate.

I did do about an hour's worth of knitting on the Snowflake Sweater this morning. I'm very close to finishing the body and then will have to do the sleeves. I'm sure all the sewing today was in no way avoidance of having to do the work of figuring out how to do the sleeves. I'm making up a new method...I'm sure that will be no problem whatsoever.

See? No reason to think I was avoiding that task at all.

Sunday, October 7, 2012

Snowflake Sweater

I promised you an update on my commissioned sweater, and here it is!
Front
I slipped the stitches onto a pair of cables and tried it on myself. It'll block a little larger, but the size is close enough for me to get a rough idea and to take pictures.

I have a little bit further to do on the bottom and then I have to start the ribbing. I'm going to do a 3x3 rib because the client doesn't want it to pull in a lot. It's the same rib I used on Troy's cable sweater and I like how it turned out.
Back
I think I've said this before, but I really feel like I've turn the corner on knitting continental. Since I finished the colourwork, I have just been whipping along in continental and my tension is really consistent. I started a new ball of blue wool on Thursday night, and already finished it this morning. That was about three hours of knitting. Maybe the balls are smaller than most, but that seemed really fast to me. (Of course it also made me panic about whether I have enough wool, but I really think I do. It was just startling to get through it that fast.)

I had been keeping notes about my time in Ravelry, but this weekend I transferred them to an Excel spreadsheet. I found out that I have spent
-15 hours in communicating with the buyer, planning, and pattern design
-2 hours on the swatch
-1 hour ripping back, and
-37 hours actually knitting.

I also added a formula to report my wage; it's updated with every entry I make. I'm right around $4.50/hr right now and probably about half way done the knitting.

It helps to not think of it as a job that pays $4.50/hr, but as a hobby that pays $4.50/hr. How many of your hobbies make you any money??

(But don't think about it too long. I'm not sure the argument holds up.)

Yummy Goodness

We are celebrating (Canadian) Thanksgiving today, and yes I knit a pie crust. (I knit a pie crust! How cool is that?)
I saw someone's project on Ravelry in the last year or two, and the idea stuck in my head waiting for the right occasion. I hope it tastes as good as it looks!

Happy Thanksgiving to my Canadian readers. (The rest of you can be grateful too! :)

May I suggest?

I Say! or at least I did once...