Showing posts with label colour bleeding. Show all posts

Wednesday, November 21, 2018

Blooming Brioche KAL - Stages 1 and 2

Knitting has continued on the Blooming Brioche shawl. Each "stage" of the knit-along is being released on a Thursday.

It's been a lot of knitting and I am enjoying the brioche and the new-to-me techniques of decreasing and increasing stitches to create the flowing pattern on the front.

Depression has grounded me to the couch recently and sometimes I can't even knit, but a lot of the time I have been able to at least work on this project.

I decided to go with the green and red combination.
It was softer with more drape than the red and black, and my sister assured me it did not look like Christmas. BTW, I just got this comment on one of my Instagram posts: "that screams Christmas !" Hmmm....

I decided to ravel the swatch to use the yarn again. (Some people keep their swatch for reference during the project - I usually don't bother.) I'm glad I did. You can see in the picture below how much of the red bled onto the green during the soaking:
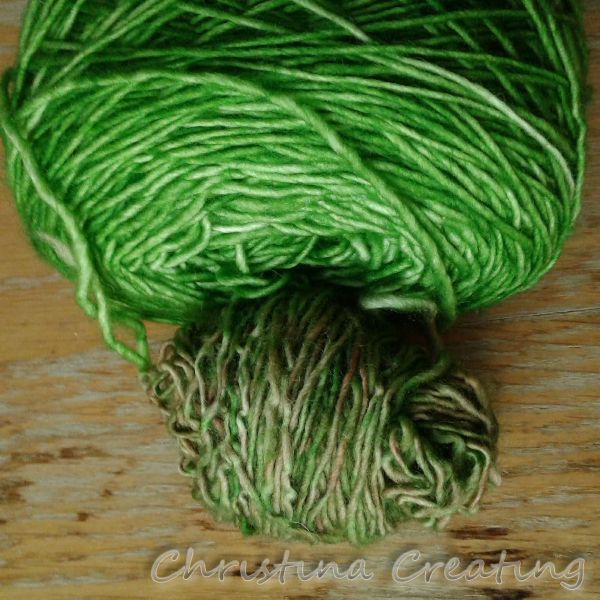
The little (lower) one is from the swatch.
I wanted a bright vibrant green in my shawl, so I set about rinsing the red yarn. It turned the water of several rinses vivid red so I tried a vinegar rinse. (Vinegar helps dyes to set.) The water came out almost clean and so did the next rinse. But the following rinse (just to be sure) was bright red again. Apparently the yarn had enough vinegar in it going into the first rinse that it still had an effect.

So I did another vinegar rinse but heated the yarn. Heat and vinegar should really do the trick. But I got the same result: rinse 1 was clear; rinse 2 had lots and lots of red in the dye. I was out of ideas but still wanted to use the yarn, so I decided I will just have to always rinse the shawl in vinegar water. How's that for cutting the Gordian knot?

The designer (Xandy Peters) has organized the pattern into different sections within each stage. The first was the "roots", i.e. the cast on:
It's a simple but brilliant cast on that gives a completely smooth beginning to the pattern -- a bunch of stitches coming from one point. The red is bordered by a green selvage all the way around. It really is great.

Next was short section of seeds:
And then the bulbs. Here I have the first repeat of the bulbs done:
The back, if you're curious:
Although the back is neat and has an interesting pattern of its own, the shawl is not reversible in the sense that the front and the back are the same.

And now all three repeats of the bulbs are finished:
I'm making the smaller version of the shawl, or I would have had more bulb repeats to do.

That was the end of Stage 1. I finished it the day that Stage 2 was released so I was not feeling very much behind the knit-along.

The first section of Stage 2 was the sprouts. You can just see the first leaf shapes in the picture below:
Here the sprouts and the next section of leaves are done:
And finally the "vines" are done as well and that is the end of Stage 2:
I've had to tink back several times as I missed some part of the pattern. Once time I took back a couple rows for something I thought was a mistake. I realized it wasn't a mistake but I had missed something on the following row so all my tinking was not a waste.

There are parts of the pattern done on the wrong side and it was a real exercise of trust to just follow the chart stitch by stitch without being able to see the pattern on the front. One of the reasons I like using charts is that you can see the pattern or design develop and can see how the row I'm doing builds on and fits with the previous rows. I couldn't do that from the wrong side in brioche and found myself often peaking over to the other side to make sure things were "ok". I did get a little better at working from the wrong side as I went.

The shawl is definitely growing in size. The stitches fill up my 40" needle cable and the shawl makes a half circle shape:
In the next pic you can see the various stages of the pattern and how they each develop from the previous:
I'd like to knit a rectangle shape from this pattern at some point because I think it shows the development of the pattern more clearly than the half circle shape. That is what I really love about the pattern.

Stage 3 is to be released tomorrow. (Yes, even though it's Thanksgiving!) I am ready. :)

Thursday, March 1, 2018

TBT Christmas Table Topper

Remember this project? I wrote about it last November. I did get it done in time for Christmas.

Although I started it for myself, somewhere in the process I decided it really was perfect for the sister whose name I had for gift giving. She loves to decorate her table for a holiday.

I quilted the background in lines that echoed the shape of the stars/flowers about 3/8" apart. The first side I did on the go but the second side, I marked the turning points so that the two sides would match.

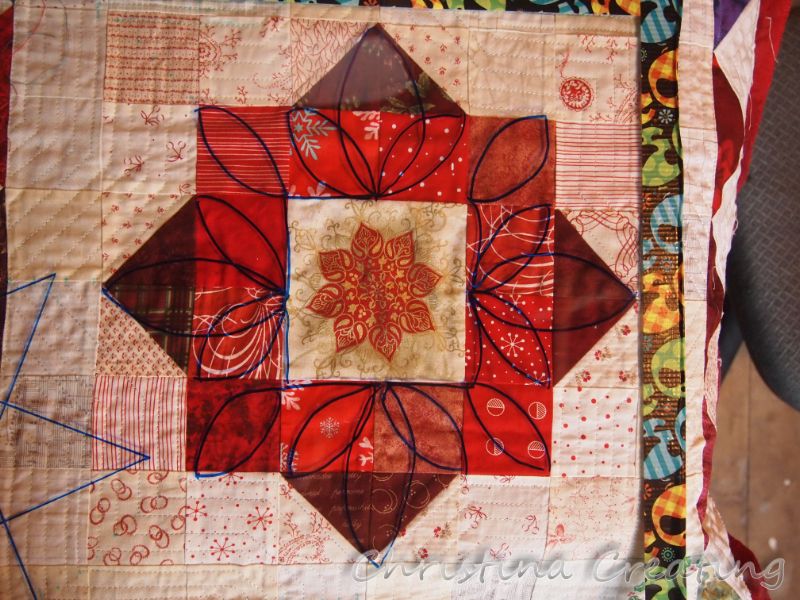
When it got to the stars/flowers, I had a few ideas. I drew out a couple on a pane of glass and took a poll on my IG feed.

A number of people voted and gave their opinions, which were all fun to read, but when this sister chimed in her preference, I was done and went with what she liked. She picked the bottom design. I made a change in the corners after this picture. Instead of another petal/leaf in the corners, I simplified it to a curve that travels to the point and then on to the other side (without crossing itself).

I bound it with a subtle red strip on cream. It could look like candy canes when you got close, but didn't detract from the center design.
Then it was time to wash it to remove the markings. I also knew it would be washed in its future life and I feel like I should do it first in case anything goes wrong.

Well, it did. The red damask I used as backing bled like crazy. It seeped to the front side where there was stitching (you know, like everywhere):
and there were areas of general red splotchiness. The binding seemed especially suseptible.
It wasn't terrible but it gave an overall pinkness to the table topper.
So I did some reading online and got a recommendation from someone I trusted to clean it with blue Dawn dish soap. So I did. And it bled like crazy and continued to do so through several washes. And the red kept depositing on the front. I have since read others who expressly say to never use blue Dawn because it will pull out more colour (and not the colour that was deposited). I think we know who's right.

So I accepted what was and gave the table topper to her anyway. She really likes pink so I sincerely thought she may even prefer it.
It is interesting to see where the red did not stick - you can see a couple of whiter squares in the background area.

I almost like the pink over all of it, except the center of the stars/flowers. I would have liked it if they stayed cream. And that it emphasizes all the seams in the background. It prevents the different fabrics from blending together.
But my sister liked it and she can wash it without fear - it can't get worse!!

Sunday, July 24, 2016

Block 28: Baby Chick Block

I gave you a sneak peek at the Baby Chick Block showing some of the embroidery the block required.

Here is the entire block:
Isn't that little heart on the side so cute?

I don't know it's noticeable, but the red of the background fabric bled! Horror! I've started marking all of the seam lines with the blue water-soluable marker and so I give the block a soaking before I start and iron it.

When I went to iron this one, I noticed little red blobs all over the background. I tried washing the area and then I soaked it in diluted vinegar for a while. (I've read vinegar will set colors.) The marks were much better, but I can still see a few.

I used this background fabric in quite a few blocks so I'm going to have to go back and treat and test them before I put them into the quilt. Wouldn't want to wash the whole quilt for the first time and have red spots all over.

Here are all the blocks in a mock layout:
__________________
Here is Kim's block:
She cleverly made her chick fabrics match the fabrics of her mama hen block!

May I suggest?

I Say! or at least I did once...