Showing posts with label Star wall hanging. Show all posts

Saturday, February 27, 2021

"Yellow Star on Blue" Wall Hanging

Last time I talked about this project was April when I completed the top and basted the layers together. Then I left it hanging on the display board.

I really can't remember over what time period I worked on the quilting, but by January 7 of this year, I had the center portion quilted:
.
I marked all of the lines with disappearing ink and free motion quilted it.

I repeated the back and forth lines on the outside of the star in the center as well, except I made the lines wavy to match what was going on with the fabrics. (This piecing was an improv technique learned at the class where I originally made the center star.)
I can't say I think it looks great. Now I know.

In the yellow part, I did curves from point to point that are similar to what was done in the yellow areas of the wall hanging I have been trying to match.
The only thing left to quilt was the outside border, which would be done in a "square in a square" pattern. I thought if I put the binding on first, I could make sure the points lined up exactly on the edge. But I didn't want to tackle the binding because it included piping and that was just a step to far at that point. So it was left hanging again.

Two things pushed me to pick it back up:

1. It was listed on my UFO (UnFinished Object) list in the Ravelry quilting group. I hadn't participated in the UFO Club in the summer and fall, but signed up again in January for the winter quarter, and even signed up for the "send" group. That means, if I finish a project, people would send me a FQ!! (FQ=fat quarter, a quarter yard of fabric. Well, never mind, it's fabric!) One member went so far as to tell me she had one that she had been saving for me--she knows I like elephants so I have reason to believe I'm going to like that one! ;)

2. Joy at the Joyful Quilter issued a "Table Scraps Challenge", with extra kudos for including the Rainbow Scrap Challenge colour of the month. Although I was making this project as a wall hanging, it could easily double as a table topper. And the colour for February was yellow!

Last week, I pulled this star off of the board and took a look at what it needed. Fortunately I had cut all the remaining pieces because without them, I would not have remembered my plan at all. I chose to use blue piping instead of yellow, in part because I just didn't have any more of the bright glaring yellow that I had used on the other one.
I pulled out my Piping Hot Binding book and tool and applied four strips of piping around the edge in pretty short order.

Then I realized the difficulty with quilting the outside border. The piping is designed to lift up--it's only sewn on one side. So do I line the points up with what was visible? Do I line them up with the actual seam (which was under the piping)? Further complicating it was that if I pulled the piping far enough back to not cover any of the points, the edge of the quilt wasn't going to be caught up in the binding seam. /big sigh

I just did the best I could, balancing the need to capture the raw edge and not covering up too much of the little squares.

After that was done, I trimmed the quilt and applied the first two sides of the binding. Then, thankfully, I tried to fold the binding over the edge to see how it would look...it was too small! It also happened that the binding lined up so that a seam would land exactly at a corner--not good! Obviously, I was going to have to remove it and try again.
On another day, I gave my seam ripper a workout and removed the binding. I trimmed the quilt with the smaller setting on the tool and started again, making sure to shift where I placed the binding! No seams landed at the corners and all was good.
I gave myself one more problem before I finished...when I cut the binding to attach the end to the beginning, I measured perfectly and then cut the angle the wrong way. So instead of the two edges aligning,
they made a big empty triangle. 
Did I throw up my hands and walk away? No, I did not. I sewed in a short piece of binding to fill in the gap, thus giving myself more opportunities to practice the skill.
Then it was done. Oh wait. No. I had to sew the binding to the back, which I did by hand. That was done during daylight hours considering it was dark blue thread on busy fabric.

As with the first wall hanging, I sewed two triangles on the top corners for hanging:
You slide the ends of a dowel under the triangles and it holds the quilt up. On smaller pieces, it's a nice way to avoid having to do a hanging sleeve along the entire top edge.

And here are the two pieces together:
I have to admit I didn't really like how the blue and yellow in the outside border lined up on the two of them. (I have no memory if that was a conscious choice or if that's just the way it turned out.)

But when I displayed them side by side, I liked it a lot more:
There were several design things that went wrong on this latest piece. Some I corrected and some I left. Now that's it's finished, I think it would have been a stronger piece and a better match to the first if the light blue area around the star was filled in with dark blue squares instead. But when I made the original block,
I didn't know this was what I was going to be doing with it! :)

It was an interesting challenge to try and make a match to the first piece a few years later. I still had some of the same fabrics, but had to find substitutes for others. Some things I had to piece together to have enough (like the backing) and other things were solved by a combination--did you notice the narrow yellow border is different on the second one? I had to find a second fabric to have enough to go all the way around. I ended up piecing the fabrics together so that the original is in the  middle of each side and the new fabric is in the corners. (You can see it in the detail pictures of the piping above.)

Linking up with the Joyful Quilter February Table Scraps Runner/Topper Challenge, and
Quilting is more fun than Housework Oh Scrap!

Project summary
Started: Center block made June 21, 2018; wall hanging started February 23, 2020
Finished: February 19, 2021
Size: 18"x18"
Pattern: my own
Material: 100% scraps, almost all cotton quilting fabrics
Cotton batting.
Walking foot and free motion quilting on my Viking Sapphire.
All blog posts about this wall hanging: link

Saturday, January 16, 2021

2020 Planning....How'd that Go?

Remember back in a more innocent time when I made plans for 2020, prompted by a link-up party? I had planned to revisit this every quarter but haven't posted anything since April. Just for fun, let's take a little look.

1. Quilt the Nocturne Star Quilt. Um, no. But it is basted.
And I'm pretty sure this is going to be my next big project to tackle once my machine gets back from being serviced and Troy finishes the adapter so I can uses cones of thread. So stayed tuned.

2. A wall hanging from a block I made in a class with Pat Sloan. I added the borders to the block and got it mostly quilted.
This was an adventure in finding and piecing together fabric to match the other wall hanging I had made years ago.

3. Sashing my Lucy Boston blocks. I had 24 done at the beginning of the year and now have 51 out of 56 done. Here's the last one I finished:
By "sashing" the block, I mean adding
the grey honeycombs around the outside
My goal is to finish by the end of the month (that will be three years since I started). That is going to be a push.

The goal also mentioned starting on the connecting crosses and I have done that. Here are a couple:
I probably don't have half of them done yet, but I think I'm getting close to that. I can sew together one of these in about an hour.

4. Finish my Joy to the World quilt top. That was done at the last update in April.

5. Start a quilt with my "antique red" fabrics. Not started. But I pulled out all the fabrics I had assembled and took out a few that really didn't go. I picked the order I would put them in for a Boston Commons quilt.
I still want to make this one but am not in a hurry to start it.

6. Make a cashmere memory blanket for a friend. This also was already done by the April post.

7. Calligraphy. I didn't do the drills with the big brush pen as I suggested I could in the April post, but I have continued lettering. Mostly a lot of decorated envelopes.

This would be one of my fancier ones:
And I was proud of this circle design:
I enjoy fitting words into shapes.

For Christmas, I did a lot of hand lettered envelopes:
Banners:
Ornaments:
and Christmas trees:

I made some personalized cards in the spring with floral initials:
Pretty much every project and design is still inspired by the Happy Ever Crafter (on youtube and Instagram).

8. Skating more. As I reported in April, I went twice in January and that's it. I haven't been this winter yet (Covid) but hope to go soon again. The outdoor rinks are opened with precautions.

9. Take a trip with Troy to celebrate our 20th anniversary (in September). Um, no. You know why.
I got out my wedding dress and put Troy in a suit and took some pictures in our yard.

10. Pray more: still going. I had a daily Lectio Divina practice until the summer and then it dropped off. I'm averaging a couple times a week now and that seems like a good amount. Last week, my church started a scripture series where we're reading a prayer from scripture and then doing a relevant prayer practice. The series goes up to Lent and I hope to keep up with that. (Not that I did in the first week we just finished!)

I'm not worried about evaluating whether I won or lost in meeting these goals, but I was interested in reviewing them after the end of the year.

Sunday, June 14, 2020

When Stars Align

I've been itching to clean up some of my sewing stuff that has been lying around, so of course, I did this by working on a project. I pulled out my blue and yellow star wall hanging because I knew it was close to being done. Last time I talked about it, I had put it in a time out. The final border of 1" squares did not fit.
You can see the excess length at the top that was not going to "ease in". I made the strip of squares fit by sewing some of the seams a little bigger. When I had done five seams, I tested the length against the center of the quilt and it fit, so I went with it. You might protest that all the squares are not identical in size and in fact are not even squares anymore. While that is technically true, it is not at all noticeable and does not detract from the effect. Which is good enough for me.

I sewed one strip of squares to one side and then a second one to the opposite side. Then I had to make the corner squares. The square-in-a-square units are tiny and fiddly, but I managed them with paper piecing, but no pictures, I'm afraid. You'll just have to see the final result after I sewed on the final two strips with the corner squares:
 And the top was done!

While I was at it (I was trying to clean up, after all), I pieced together some pieces for a backing and found a scrap of batting that was big enough.

I decided to go ahead and baste the layers together. My good basting pins were packed away with a large quilt I was preparing to baste, so I used my "bad" pins.

Long ago, I separated my "craft" quality safety pins, but never got rid of them. (Surely they'd be good for something?) I decided to suffer using them for this project just to get it done. I got the piece basted, disposing of about one pin in ten that was just too bad to keep.

I hung the basted quilt on the board above my sewing table. The clear bag is holding fabric I cut for the piping strips, the binding, and two squares for the triangle corners to hang the quilt. Now that I had everything I needed to complete the quilt, I could empty the project box of yellow and blue fabric and redistribute it to my fat quarter and scrap fabric storage.

Here you can see the uncompleted wall hanging next to the original one I'm attempting to match it to.
Not really a matching pair, but I think they look like they go together.

So I have one less box with a pending project inside and was able to organize and put away a lot of scrap fabric pieces that were lying around. Not the quickest way to clear off a work table, but the best way for me to feel more organized and less scattered. Plus this project is only a couple of straight forward steps from being done.

Linking up with:
  -"Finished (or Not) Friday at Alycia Quilts
  -"Oh Scrap" at Quilting is more fun than Housework
  -Quilting Patchwork and Applique

Wednesday, April 1, 2020

2020 Planning Party: First Quarter Update

If I went through the trouble of doing some planning for 2020, maybe I should go through the effort of some updates too! (For the original list, see this post.)

After the first quarter of the year, here are status updates for the projects I listed:

1. Quilting my Nocturne Star: no progress. The top, back, binding, and thread are all still hanging out in the same box. I haven't used the batting intended for this quilt, so I still have all of the necessary pieces.

2. A wall hanging from an orphan block. At the retreat in February, I sorted through my blues and yellows to see what I had from the first wall hanging and what else may work
and then cut up a lot of little squares.

Not long after getting home, I sewed the first border of rectangles together and attached them to the center block.
I couldn't find enough of the fabric I wanted to use for the next border. It was a light orange with blue flowers that was perfect in the first block. I did some more looking but never did find any. (Except for the squares of this fabric in my plaidish quilt. I was giving them the side eye for sure.)

When I finally decided I couldn't wait any longer for some to magically appear and wanted to move forward, I worked with what I had. I had enough for 10" of the 12" border. So I grabbed another fabric that isn't the same but I kept mixing them up in my mind, so I figured they were close enough to the same. I put the new fabric in just the corners, leaving the center for the orange fabric.
Not terrible.

Then I decided to press on and sew on the next border, which was also a set of squares. It would have been smarter to strip piece this--make one set 6" wide and then cut them into 1.5" strips--but I didn't think of this on time. So I sewed little 1.5" square together, one by one.
And then they were too long. By a good amount:
I think I can make each seam a smidge bigger and make it fit, but for now the whole thing is in time-out.

3. Sashing Lucy Boston blocks
This got seriously derailed by the Third Block contest in February, but I was able to finished 4 so far this year


and am working on the fifth:
This last one will be block #28 to be sashed, which means...I'm half way! Wow, imagine that!

4. Joy to the World quilt bottom (back)
Good news here, I got the back done!
This got a big push by the #sewthescrapoutofMarch sew along on Instagram (and being home all day every day) and I definitely wanted it off of the design wall.

Here's a close up of the border print:
Carefully chosen by the fact that it was the only red fabric I had enough of to do the borders.

5. Antique red fabric quilt
I bought more fabric for this quilt, bringing in some teals that I think will really help, but nothing else done. If I do the Boston Common pattern I'm looking at I really will need that design board the Joy to the World quilt just vacated.

6. Cashmere "memory" blanket
I got a good start on this one at the retreat in February. The blocks were cut and sewn into rows. Soon after getting back, I sewed the rows together.

I started the hand embroidery to sew down the seam allowances on March 3 and finished in about two weeks. (Another reason my Lucy Boston blocks were slowed down.)

I finished the label just in time to say I did it on this post. I hope to deliver it on Thursday.
Although intended for a couch, here it is
laying on my queen sized bed.
7. Calligraphy
I completed the online "drills" course I started. That was a great start. I did not sign up for any of the following (not free) courses that actually teach letters. I just looked at examples and started. I made these 4x6" cards to hang on the prayer board at church.
I am interested in hand lettering, which is a great thing to combine with calligraphy. Here's the design I put on the postcard I swapped at the retreat.
I'm learning that calligraphy and hand lettering are more about the layout than how well you can make letters. (Although of course you need both.) I took a class on hand lettering at Make South Bend a couple years ago, and both of these experiences have taught me that it's more like drafting than writing.

Here's a fun habit I picked up from the calligraphy drills instructor:
She loves to decorate her envelopes, and apparently I do too. It takes a long time though, so please don't be offended if any mail you get doesn't look like this! :)

I am not keeping up with regular drills so I'll have to "get in shape" before I do any serious calligraphy projects. I also haven't experimented with the "big" brush pen. I could do the same drills with the big tip pen and see how that goes.

8. Skate more
I managed to skate twice in January at the new local skate park:
And a picture to prove I was there:
It was nice. I think after that the weather was iffy and I had things that filled the time gap where I would have went skating. Apparently it is a good thing I didn't get the season pass.

9. Take a trip with Troy: no progress
And now that we are self-isolating (self-isewlating in my case), getting to the grocery store is considered a major trip.

10. Pray more.
I'm definitely doing this, and with all the time at home that I could want, I have lots of opportunities for it. I have kept up a daily practice of Lectio Divina each morning, and small groups that I was getting together to pray with are trying it on Zoom. It's not great, but it's not horrible either.

Well, all in all, not bad I'd say. This might have been a better goal list for the first quarter of 2020, than for the whole year! But then again, I do have that whole quilt to quilt (#1).

Wednesday, February 26, 2020

Wonderful Weekend

Now where was I?

Oh ya, Orillia! For the third annual Family Crafting Retreat. I would call this a photo journal because I have a lot of pictures to post, but we all know I will write a lot too. (What can you do.)

Thursday (a good day to start a weekend on!)

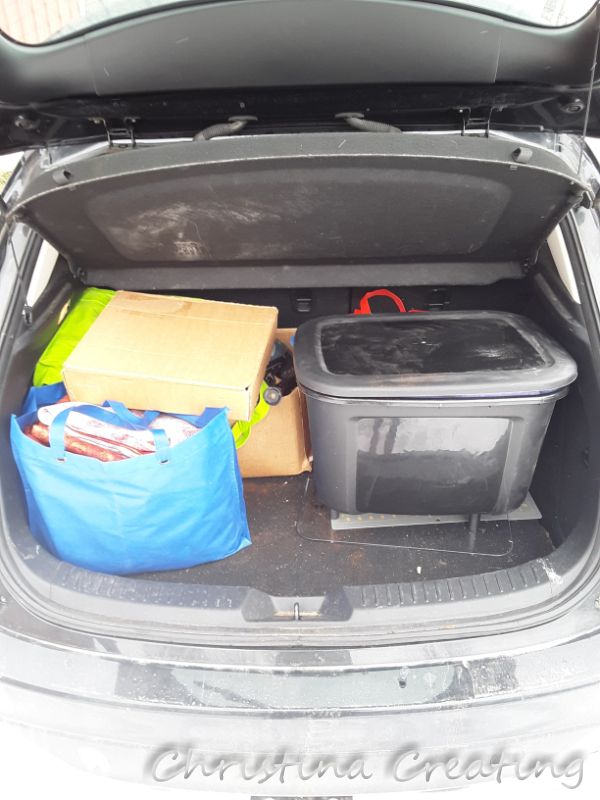
I packed up my car in the morning. I was a little scattered in the days before so I wasn't as organized as usual about packing. At some point I thought to myself, I have enough to keep me busy; surely this is enough.

Then I made myself check the list because you know that it is a good idea. First thing on the list: sewing machine. It was still sitting in my sewing room where I would have forgotten it. Lists are good. Consulting them, even better.

I had a meeting at noon and then left shortly after that. A cousin lives about two-thirds of the way there and she graciously offered me a place to stay for a night.

Despite some blinding snow in southern Ontario (along Lake Huron), the drive was uneventful. I arrived after dinner and we enjoyed some good visiting.

Friday

We got possession of the house where we were going to stay at 10 am, so I was determined to leave early and not waste a moment. I think what that turned into was leaving by 9:30 or so and stopping at a recommended quilt shop on the way!

I was happy to see sunny skies
but it was cold!! When I got in the car, it said 0F, but on the drive, it read as low as -10F. Good thing my car has a great heater! (And I wear a down coat and a hat and mitts...I am a knitter after all!)

I arrived around 12:30 to find my sister and a different cousin there already. (They really had gotten up early and arrived by 10!)

We stay in an old farmhouse. (Click Fireside Retreat, if you want to read more.) They get you in the right mood right away with the many quilt block boards hanging outside. It's a new one on the front porch each year. (Good for photo ops, of course!)
It has a spacious dining room:
(That's a design board on the left with my sister's quilt-in-progress on it.) We make a schedule of who's cooking and make two meals a day. For the rest, you are on your own.

The main gathering room is a converted porch. It's a few steps down from the main house. On the left is a sitting area with a wood stove:
and to the right is a work area with four tables and a cutting station.
It wasn't long until the cousin I stayed with arrived with her sister, and then my mom with another aunt. Another of my sisters would arrive the next day and that was our party of eight.

Friday I worked on:
  • cutting squares from cashmere sweaters to make a blanket. (That's what I'm doing in the picture above.)
Once I had them cut, that was enough on that for that day.
  • some hand sewing on some fabric wall hangings I was installing in a room at church:
The concrete block walls were depressing, so I installed this fabric behind the shelves. Made the panels the right size and hot glued them to the concrete. Worked a charm.
  • Then it was time for play. I had a lot of left over pieces from this quilt, but not quite enough to make another quilt. I thought about putting them together for a centre and adding borders, but it just wasn't appealing to me. So I took about half of the pieces and put this small top together:
It's about 40"x44" and by the end of the evening, it was sewn together!

But while I was still playing with blocks, I took the ones that were left and put this together:
I have plenty of the black fabric to fill in the outside rows with solid squares. I don't have quite enough pieces with coloured corners and I wasn't as convinced by this one, so it didn't get sewn together.

Saturday

I know we didn't go to the quilt store first thing, but I don't remember what I worked on in the morning versus the afternoon, so this is how I'm going to tell the story.

The mother of the woman who runs the retreat centre owns the (very) nearby quilt shop. When we stay, we get a gift certificate for said quilt shop. Needless to stay, we visit the shop and, well, shop.

Here I am with a sister and my mom.
I am holding a panel of fabric, parts of which I found last fall in a scrap bin at a store where I live. It's the most beautiful watercolour style birds. (Click here to see on my IG account.) Now I have more to play with when I decide what to do.

Kim and I doing quilt maths:
I got lost half way through, but she was able to keep track (or at least know what she needed to buy at the end), so that's all that mattered!

At some point on Saturday, I:
  • pulled out my Plaidish quilt and got it basted. (I did it on the dining room table with my cutting mat underneath.)
Before I left home, I remembered a large piece of fabric I had picked up second hand, and when I looked at it, it was big enough to work as a backing for this quilt. So I threw it in my bag with a batting I already had, and crossed my fingers that I had everything I needed. I had to sew one seam in the backing fabric, but that was done easily enough.
Anything better than putting in 600 pins while talking with a sister? I don't think so!
  • took all the cashmere squares and laid them out. The sister who I helped with quilt maths, helped me with arranging the blocks. That's how it goes.
Once that was done, I sewed the blocks into rows. That was enough for that day. I'm using a stretch stitch which is much slower than a regular straight stitch, and uses more thread, and is almost impossible to take out if you make a mistake -- no pressure!
  • got out my Lucy Boston Patchwork of the Crosses later in the day and added sashing pieces to a block. (The one with the cutest hedgehogs!)
I had about half of the pieces done by the time I stopped.

Sunday

We started the day with breakfast and then some of us visited a local church for the service. (Same one as last year. We were happy to hear the roof they were fund raising for last year was completed.)

It's become a tradition to go out for lunch, the ones who weren't at church meeting us there.
We found a nice place last year so we went back there. I enjoyed the plum pockets (wontons with plum and goat cheese, dressed with hot sauce) -- they were good.

When we got back, I rectified a project that hadn't worked out. The quilters among us had agreed to exchange quilted postcards this year. (My "secret projects" on Instagram in the last month may come to mind!)

I had mine ready in good time except for sewing the paper onto the back. The first one -- fine. The second one -- completely jacked up. I got as far as taking the bad stitching out before I left for the weekend, but didn't have time to fix it.

So I gave it with a promise to fix it!

I'll show more of these postcards in a separate post. (Stay tuned!)

Then I pulled out a project that I knew would be a pain in the butt.

I had this block from a class I took a couple years ago.
More recently I had the idea that I could finish it up so it would pair up with this wall hanging I finished a few years ago:
I threw my blue and yellow scraps and a good number of fat quarters into a box (and a bag) so I could go through them to see how many of the same fabrics I had left and what new ones I could add to them.

That was a lot of sorting, then some quilt maths to see what to do to make the block the same size as the centre of the original quilt,
and then a lot of cutting of little squares.
I found a lot of the same fabrics. I got enough squares cut but I did not try to start to sew them together.

I also knit on my current Wool-Aid sweater, but no pics of that. The back has been done for a while and I got close to finishing the front.

Here are some projects finished by other people at the retreat:
My cousin (on the right) asked for indigos in our fabric scrap exchange last year and she used them for this quilt. She saved sewing the binding for this retreat and got it done. It was put to use right away:
Another cousin was working on putting together the latest Bonnie Hunter mystery quilt, "Frolic".
I've seen it with more of the blocks put together and it's gorgeous!

Here is another (smaller) one she finished:
On Sunday, we also ventured out for a group photo.
Six cousins and two aunts from four different "families".

Then my immediate family took a picture too.
I do not know what the rest of us are looking at, but Patricia, at least, is paying attention to what we should be doing! (And now that I think of it, I was controlling the camera with a remote, so why in the world did I take this one? Oh well.)

Here's a nicer one:
We're missing two sisters who weren't there. I have to point that out so they know that we did miss them!

Monday

We had the house until 3, but I had too long of a drive to be able to do any crafting on Monday. It was pack up, load the car and go.
A far cry from travelling with one carry-on!
(You know, by 11:30 or so...)

I took my favourite walk at the Guelph OnRoute to the Ellis Chapel to stretch my legs.
I got home tired after another drive that ended with snowfall, and Troy kindly took every thing out of my car for me
to be put away "later".
Taken by my cousin who gets up early enough for sunrises.
My only question now is, "Is it next year yet?"

May I suggest?

I Say! or at least I did once...