Showing posts with label sisters. Show all posts

Saturday, January 18, 2020

Cross Stitched Family Portraits (file under best gift to make ever)

What could they be looking at?
This year my family exchanged gifts the week after Christmas and this post about one of the gifts I made is still ridiculously out of season! But it's worth the wait! I really loved this project.

My sisters and I exchanged gifts among the five of us last year and this fall decided to continue. Being practical, I said (or was it another practical sister?), let's skip the picking of names and just make a schedule. That way it's done and we can shop all year. (We do like "picking things up" when we see them!)

But that meant this year, we didn't have our "name" until the fall. Not much time for people who make gifts...

Picture from Cotton and String
Late last year the sister whose name I had, asked about learning cross stitch because she fell love with the work of Cotton and String. (Link to etsy shop here -- she'll post listings as she has time to make them. Check out the reviews for pics of previous work. Or check out her IG feed.)

I told my sister of course she would be able to do it, but it never really  happened. When I had her name this year, I moved onto the thought that I could make one for her.

One thing that really intrigues me about Brie's work at Cotton and String is that she asks for photographs and then stitches versions of actual outfits. And not just for weddings and big events; she also does it for regular clothes.

So I asked my sister for a bunch of family pictures. (Apparently I asked around the same time that I asked for help with a photo project for my mom and she totally thought it was all for the same project. I was being sneaky without even knowing it!!) And one day when I wasn't feel well, I sat on the couch and went through her entire IG feed!

And then I couldn't decide on just one portrait...so I decided to do four. Um, sure it was the middle of October already. No problem...

The four portraits would capture each stage of their family as they made "additions". And then once I had the number four, four seasons came to mind and I decided to do each portrait in a different season.

I started in the Spring:
My sister and her husband. In green, for St Patrick's Day (also in the Spring, aren't I clever) and incorporating this shirt:
My stitched words are a little tough to read, but she knows what they say and that was the point. All of their clothing is stitched in green of various shades because they really take the St Pat's thing seriously in their house.

The next portrait is set in summer and we have added their first child.
You might thing a "Leafs Nation" shirt is out of season, but no, Leafs fan-wear is good any season in this household.

Also featured on Rob's head is his Breitling hat:
I did not know or remember this hat, but it was in a lot of pictures. So I thought it should be incorporated. You can read the letters on this hat even less than the Irish shirt:
but after doing it twice, that was the best that I was going to do. (You can't read a hat from that far away in real life either, right?)

My sister is in capris and has pineapples on her shirt. (She was good enough to recognize what they were...I'm not so sure that is obvious! Again, I did them twice. Apparently that is my limit.) The pineapple shirt is not based on a real shirt, but she likes pineapple motifs and she does wear shirts with fun (understated) prints on them.

Little Amy is in a "jumper" dress with a white shirt underneath. That was a combo that showed up a lot in her early pictures.

I also like Patricia's flip flops (or sandals).

You can guess the next portrait is situated in the fall. I didn't take a lot of progress pics while I was working on this, but I have a few I can show you here.

In each grouping, I started with the big blocks of stitches for pants and shirts:
You can faintly see some purple thread outlining a box. I put that in first to show the outer edges of that scene to help keep me situated on the large canvas.

Here I've added Patricia's scarf and the plaid on Rob's shirt:
Lots of people don't have hair yet!

But here we go:
Rob noticed that I gave him a little less hair in this portrait than in the first one! He thought it was a funny touch. I also made sure to make Amy's hair lighter than Patricia's. She insists her hair is blond and her mother's is not. I indulged her.

And now here we go--hair applied, shirts completed and everything is finished:
The plaid shirts showed up on the boys in lots of pictures, for example this one:
And you can see an example of one of Patricia's scarves. She wears them often.

Here is where I got the inspiration for Phil's eyes to be looking the wrong way.
He's not always patient with pictures and I can only imagine what he is looking at that he would rather be doing. He thought this was a hilarious addition to the stitched family.

Here is the inspiration for Amy's Leafs jersey:
I had to put one in because there were numerous pictures with various kids in jerseys.

The maple leaf is a particular curse on kindergarten students (who have to draw the Canadian flag) and stitchers every where. Knitting, needlepoint, crochet, whatever...it is not fun to try and make a maple leaf. And the same goes for cross stitch!

So this one I did a few times (more than two), and finally ended up with something that at least resembles the maple leaf on the vintage style jerseys:

And lastly, winter.
I had to do this coat for Phil.
And I just noticed I didn't study the colours closely enough--it's not the same! Oh well, you still can tell exactly which coat it was supposed to be.

I used this coat for inspiration for Amy.
And these coats for Patricia and Faith. Those polka dots were fun to do!
Phil likes the Penguins and so I gave me a hat in Penguins colours inspired by this hat:
And Amy got a hat with a giant pom pom. I took the colouring for Faith's boots from this photo too.
Here's the real life version of Faith's hat and Rob's Maples Leafs hat.
I'm pretty sure he's feeding her a maple syrup treat.
I shortened it to TML on the stitched hat so you can actually read this one if you get in close. (And I was not doing another maple leaf!!)
And Rob is wearing a hoodie as in the picture above.

And why is Faith's head tilted?
Well, she likes to pull faces and goof off a little for pictures, which is also why I put a pair of double lips on her.

I can't think of seasons without thinking about trees, so I put a tree between the portraits.

On the top row, the tree is split between spring (with flowers) and summer (with green leaves but brown grass!)
On the bottom row, we have fall and winter.
Obviously there aren't a lot of leaves on the winter tree, but I had a bit of sparkly silver white that I used for snow. You can't see it well in the picture, but it has a nice effect.

P.S. I had to add a hockey stick in Phil's hand because a good part of the family's winter revolves around his games!

At some point I realized I need to put some words on it. I did not want to put their name on it. If it's going to be hanging in their home, anyone who sees it should already know what their name is!!!

So I googled around for a saying about love and homes and family and I don't know if I found this exact one or adapted one, but when I landed on it I knew it was perfect for my sister.

"What I love most about my home is who I share it with."

Perfect with some family portraits, right? (I'm not crying; you're crying!)

I adapted the font from a previous cross stitch project.

Once everything was stitched, it was time to prepare it for framing.

I was very happy to stumble upon a demonstration of the method they claimed the pros use while I was still in the middle of stitching. It looked like a good alternative to the sticky boards that I have used in the past. (It is impossible to get something flat and square across the whole surface!)

First thing I did was hem around the edge so that I wouldn't get any ravelling. I found a piece of stiff paper board that was approximately the right size and marked the centers on the board and on the canvas. (The canvas I marked with sewing thread.)
The next step was to start stitching back and forth to hold the canvas taut in one direction.
And keep going all the way across.
This took an insane amount of thread. Apparently I should use a larger canvas with more blank space around it. It was also a trick to keep the same tension across.

So far so good:
One advantage of this method is that you can adjust the canvas at any time. So if it was crooked, you can just push and pull it to the right position by rotating it a bit around the board where needed even after all the stitching is done.

Next is the other direction:
The demonstration did something with the corners to pull them in on a 45 degree angle, but I didn't find it necessary.
I think my corners came out crisp and square just securing the canvas in two directions.

And now it's ready for a frame!
I was lucky enough to find a ready made frame that I liked. Removing the glass (because you don't want stitchwork behind glass) would make room for the thickness of the board and canvas.

I used the really low tech method of taping the canvas to the back of the mat board.
(Obviously I didn't center it on the board as well as I thought!! It was because I marked the center of the design (through the middle of the trees) and not the center of the stitching. They weren't the same because the families on the right took more room than the families on the left. Oops...forgot about that!!)

And speaking of forgetting, I also forgot to put the pom pom on Amy's hat before I stitched the canvas around the board! Ah...catastrophe!! Ok, that lasted about 3 seconds and then I realized I could stitch it through the board and that would probably be better because the board could support the weight. Whew, crisis averted and actually, a good mistake to make.

Then I tried to make the smallest pom pom ever.
First I tried it with embroidery floss:
That was not good. It wouldn't fluff up!

So I tried again with wool and got something a little better!
I think I trimmed it even smaller after taking this pic, but looking below, it's still huge!!
It's an 8x10 opening to give you an idea of the size.
I posted this pic on Instagram and tagged cottonandstring to thank her for the inspiration and she sent me a DM. I was excited!
But not as excited as I was about how much my sister liked it (and her husband and kids too--yay!!)

This gift checked all the boxes for me:
-I got to make it.
-It was completely customized for the recipient.
-I was positive she would love it.
-I got to obsess about every little tiny detail possible!

Tuesday, March 20, 2018

Runway; Fun Day

I've had some excitement around here and it felt like it happened so fast I didn't have a chance to write about it. And then afterward I thought I'd better wait for the pictures because I remember the first rule of blogging: No pictures means it didn't happen.

Well, the week before the Vogue Knitting Live event in Chicago, I actually read through one of their marketing emails and saw that it was not too late to apply for the Readers on the Runway event. "What's that?" you ask? Well, it's a runway show of Vogue Knitting readers wearing garments or accessories that they have knit from Vogue Knitting patterns. Simple enough, right?

I wasn't planning to go to the event, but Chicago's just a hop, skip and a jump, really, so I applied on a whim. I submitted three articles I had made from the magazine's patterns and thought they might take two. Well, they responded that they would like me to bring all three and did I have any more? So I submitted one more item and they accepted that too. So I was set to walk the runway with no less than four of my knitted garments. Super exciting!

Yes, she's wearing my My Sister's Shawl
and she's keeping it too. :)
I notified my sister to see if she would like to go along and she jumped at it. She lives between me and Chicago so I made a weekend of it by staying at her place the night before.

We took the SouthShore Line train in leaving plenty of time to catch lunch in the city and explore the art installations we passed before we went to the show.

There are a lot of legs walking around Grant Park.
And some extra doors too.
Don't ask me what why we are looking over there.
When we got to the show (at the Hilton on Michigan Avenue), we had to hang out with Krysten Ritter who was featured on the latest cover:
In case you have to ask, she plays the badass super hero Jessica Jones (among other roles). And yes, she knits (and designs).

We also hung out with some bears Nicky Epstein made with all the sample swatches she had made and kept over the years!
We got our measurements taken by the author/designer Deborah Newton (herself), which is one thing I had on my must-do list. It's a little hard to measure yourself. :)

Then we just had time to catch the Vogue fashion show with 20 or so garments from the two most recent issues.
These were the samples from the designers that were actually photographed for the magazine.
And oh look! here's Krysten Ritter again and the model has on the very sweater Krysten wore on the cover:
We then had a chance to wander the marketplace. The only yarn I bought was a cowl kit from Handspun Hope. I had read about the project and was happy to support their mission to provide work opportunities and fair wages for women in Rwanda.
The yarn is either kept in its natural colour or dyed with local ingredients. One of the skeins I chose was dyed with avocado pit. Who knew 1. That avocados grew in Rwanda and 2. that you could dye with them? The result is a pinkish tan that I'll show you some other time.

As at any knitting event, it is normal to openly (and loudly) admire what people are wearing, ask them what pattern it is from, and what yarn they used. I got pictures of a couple that I really liked. Here's a cardigan done in mosaic knitting.
And this crocheted sweater caught my eye but I didn't have a chance to get a picture until I accosted her in the bathroom. (Awkward!)
I love how each of them used colour in their pieces.

Then it was time to get ready for the main event. (My main event, anyway!) And what was I going to be wearing? This:
of course. Ok, honestly, no I am not going to be wearing them all at the same time.

All of us models reported to the backstage area and were given a walking order. I was going to have to be quick about my changes to be ready for my next turn. But from what little I've seen of a real runway show (on TV), it looks like that's true of the pros as well.

We were given a brief explanation and backstage demonstration of how to walk and then, with Trish Malcolm, the editor of Vogue Knitting magazine announcing, we were off!

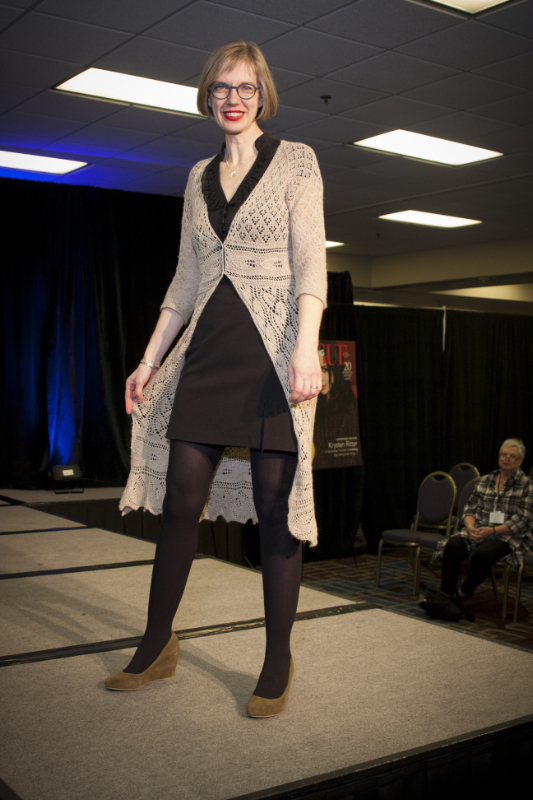
1. The show started with my lace coat:
Photo: Vogue Knitting magazine
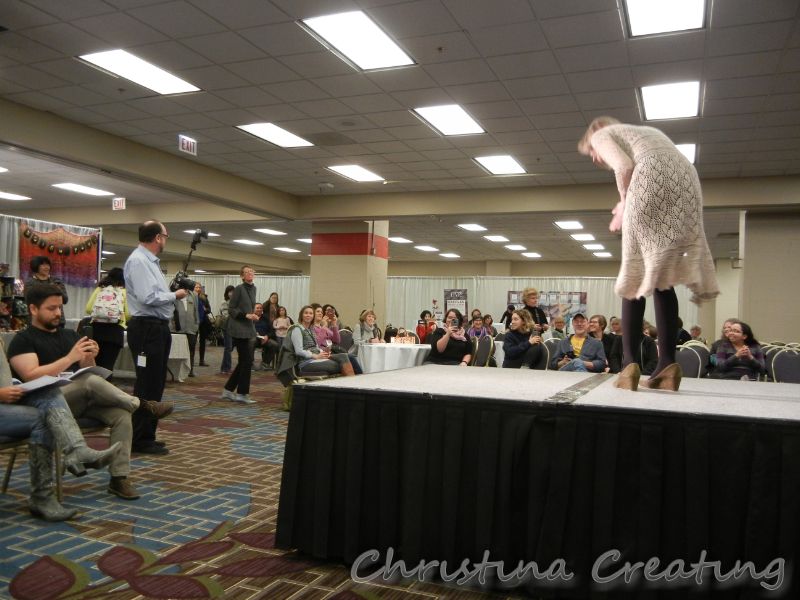
After I had finished my walk and exited the stage, I heard my name and I was called back. The designer, Brooke Nico, happened to be on the show floor and heard it being announced. She ran to the stage because she wanted to see it. So I came back out to show her and gave her a namaste bow for her beautiful design.
Brooke was a very lively woman and this interruption seemed to loosen up the crowd. I noticed they were a lot more responsive after that than they were even during the "real" runway show earlier.

2. The Top-Down Crew Neck Cardi from the Holiday 2016 edition:
Photo: Vogue Knitting magazine
3. Cabled Shawl from Late Winter 2017.
Photo: Vogue Knitting magazine
This woman flew up for Tampa just for this show. (She flew from warm and sunny Florida to Chicago in early March, people - that's dedication.)

4. The ZigZag Skirt from the Winter 2011/12 issue.
Photo: Vogue Knitting magazine
Lest you have any doubts, this was a real walk/pose to the right/turn/pose to the left/walk to the end/pose for the Vogue photographer/turn/and walk out runway walk.
As we were walking, Trish Malcolm announced our names, the pattern, magazine issue, yarns used, etc.

5. Long-sleeved dress with cable details:
Photo: Vogue Knitting magazine
This was a late entry, so I don't have the information and couldn't find the pattern in Ravelry. (I was too busy changing back stage to be able to hear what was being announced.) I believe she added some mods because they were talking about her adding the ribbing at the waist to achieve the shaping.

6. The Sleeveless V-neck Dress from the Spring/Summer 1997 issue:
Photo: Vogue Knitting magazine
There were several entries that I did not get a picture of, but the final item was my Over Knee Socks from the Late Winter 2017 issue:
Photo: Vogue Knitting magazine
Then it was a dash from the stage exit to the stage entrance to join the final walk:
Photo: Vogue Knitting magazine
The white sweater and the blue or mauve wrap behind it are two of the items that I didn't get an individual picture of.
Photo: Vogue Knitting magazine
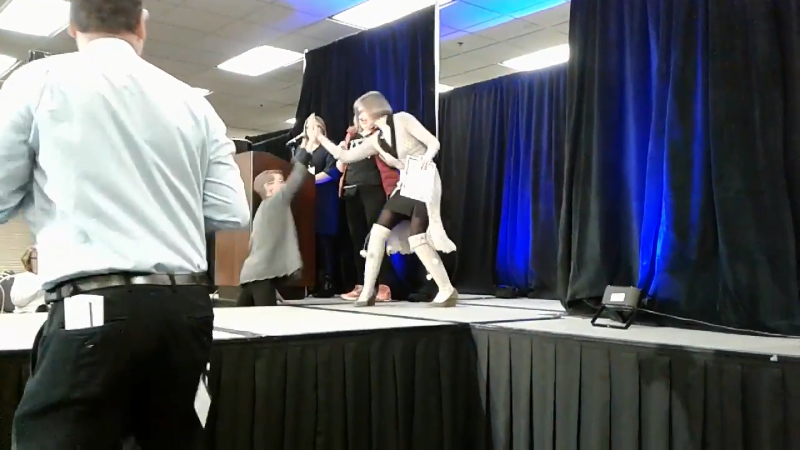
Then we waited back stage for the announcement of the winners. Oh yes, there are winners! I'll let you watch:
That was the designer, Brooke Nico, running up to give me a high five after the announcement:
Here is the group of all the reader runway models with Trish Malcolm (to my left):
Photo: Vogue Knitting magazine
And I got to meet the designer again and get a picture with her:
Photo: Vogue Knitting magazine
The day was a resounding triumph. Especially as we did have enough time to catch the 6:30 train and didn't have to wait for the next one at 9:15! Phew.
Now I get to decide which Vogue Knitting Live event I'd like to go to next to use my prize. San Francisco's in September; Minneapolis in November; and New York in January. Hmmmm....

And I had better start thinking about what to knit for the Reader Runway at the next one; I've used up all my "back stock"!

May I suggest?

I Say! or at least I did once...