Patterns and Tutorials

Sunday, January 31, 2010

An Afterthought

I got my second Outside In sock knit down to the toe the other day, and today could add the afterthought heel. "Afterthought" because while knitting the sock itself, you simply prepare the location of the heel and then when the rest of the sock is knit, you can add the heel.

"Why?" you ask. Well for one thing it makes it easy to continue a fancy lace or cable pattern from the leg to the foot. For another, it may just be a way to put off to later what you don't feel like doing now. I did it for the first time in this sock because the pattern told me too! But I liked it.

The preparation is very simple. When you get to the right place, you knit half the stitches with a piece of scrap yarn. Then go back to the working yarn and knit over the scrap yarn.
It's best if the scrap yarn is kind of slippery and not fuzzy. Just a tip.

Then when you're ready to do the heel, you take out the scrap yarn and pick up the stitches that are released above and below it:
I prefer to pick up the stitches first and then pull out the scrap yarn, but do it in whatever order works for you.

When all the stitches are removed from the scrap yarn, you get a nice gaping hole like this:
This is the start of the heel.

Then you just start knitting around and around, decreasing stitches so that it gets smaller and smaller around as it gets taller.
The decreases are done on both sides--they form the diagonal line that extends up and to the right of the needles in the picture above.

When you get the heel long enough, you Kitchener together the stitches that are left:
If you really didn't like Kitchener, you could do a three-needle bind off, but then you'll get a seam across the bottom of your heel. This might not be comfortable, but that'll depend on how sensitive your feet are.

Et voila, I give you a heel:
(Remember! The sock is still inside out. Proper viewing will be given in the final post.)

Have you been wondering about all the extra loose ends you've seen on this sock?
I almost hate to get myself going, but there were 9--nine!--weak or broken spots in this ball!! I started to wonder if I had moths, but saw no other indications, and didn't think moths would carefully eat the yarn one ply at a time.

I was getting so frustrated with the yarn. I guess I know now why it was on clearance! I'm not sure it was worth it.

All for now. I have a lot of ends to work in tonight before I can call these socks done and show you what they're supposed to look like...Outside out!

Til then, keep the needles clicking!

Saturday, January 30, 2010

Another GW Find!

I went to Goodwill on Thursday with my mom and I made a really good haul. Most of it was clothing to wear as is, but I found a lovely J Crew wool sweater to take apart.

100% wool, two ply, let's call it a DK weight.


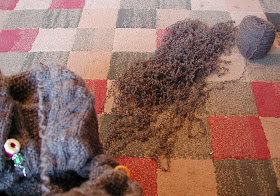
I spent the next afternoon taking out seams and ravelling it and then winding it on my niddy noddy. It yielded these lovely skeins totally about 450 g (over 1000 meters).
Then the next question: what to do with it? Having cleared the docket for my Whistler sweater, I now find myself with two weeks to the Olympics and a severe lack of projects on the go. This led to no delay in preparing for something to do "in the mean time."

I've been seeing these Bella's Mittens by Marielle Henault a lot lately, and the thick cable look is very tempting. I guessed that I would have to double the yarn to make it the right weight. And figured that the sleeves should have enough yardage. So all that was left to do was to wind it up.

First step wind up one sleeve from the hank into a yarn cake.

Then set that one on the floor, put the hank from the other sleeve onto the swift, and wind them together into a new double weight ball:
For those of you who have a tinkertoy swift yourself, I have a little tip for you. The end of the yarn that you're not working with tends to unwind as it's spinning around and get tangled around the swift. But the tinkertoy parts have a slit in the end that you can put to work for you:
Holds the end in place and out of the way: simple solution, but worked like a charm!

I wound the two sleeves up into one yarn cake. It was huge--6 inches across.
Red (the rabbit) was still not impressed. She would have preferred a carrot.

Friday, January 29, 2010

A Lovely Gift

My mother came for a visit bearing our Christmas gifts (since we didn't go home to Ontario this year).

One of the lovely things in my bag was a bundle of yarn she had picked up at a monthly "women's" meeting.

It's a local organization that meets once a month and features local woman doing whatever they do. In January they featured Cindy Osland of Osland Sheep Farm (north of Port Hope, Ontario).

Cindy started small and has built up the farm (with her husband) so they now offer lamb meat, fleece, yarn, knitted items, quilt batts, finger roving, and breeding stock. What my mother picked up for me was 100 grams of lovely wool, a two-ply of "thick and thin."
(This picture is not even close to the real colour. I tried a lot of settings, but could not get it. Picture the variation of colour in this picture, but in more of a plum. Really, plum. Gorgeous plum.

I couldn't wait to try it out, so I didn't even roll it into a ball--I just started knitting from the skein! I had in mind a cowl or a scarf if it got long enough. After a nice big "swatch" I decided the scarf/cowl idea wasn't working.

I undid it all and now am going to try a purse. I have some nice wooden handles I've been dying to use and this might be just the ticket. I'll let you know.

Sunday, January 24, 2010

Laying the Groundwork

Look what has arrived! Some lovely Dale of Norway "Falk" (superwash wool). The grey is just what I wanted. (I picked it from a one inch tassel of four strands. It's a little hard to tell from that what it will look like in bulk so I'm relieved I like it.) What I like is that it's not as heavy or solid as straight black would be, but dark enough to give the contrast you need for colourwork.

The wool is for my Whistler sweater, of course.
Less than three weeks until the great cast on for the Ravelympics!

I have started swatching, hoping to have everything set to go the moment the opening ceremonies start.
I've found out that I don't have the needles I need. For one thing, this sweater is knit on much smaller needles than I expected and I just don't have many straights in those sizes.

I'm aiming for 24 stitches to 4 inches. The bottom section is 26 sts/4". The next is the right gauge but it's done continental style (obviously I'm a little looser continental) and it's much less even. So I tried two different bigger needles, but both of those came out 23 stitches to 4". Not there yet...

A shopping trip is in order!

Saturday, January 23, 2010

Anyone have a Pedestal? (gush alert)

I have to give a shout out to a fabulous knitter, Hiroko, that I just found on Ravelry. Her RavId is roko. If you're not on Ravelry, you can check out her flickerstream or her blog. It's in Japanese, but the pictures alone make it worth it. (She does have a "translate" function which lists almost a dozen languages. You should be able to find one that works for you. Of course, you may end up with phrases like the following:
When you change the design of the short sleeve high-necked dress to the long sleeve turtle [the Cabled Pullover] became the sweater of feeling.
"the sweater of feeling"? I guess a little poetry with your knitting is ok!)

Her projects are amazing, superbly done and she gives detailed instructions for her modifications. From what I've been able to check out, her projects (and project pictures) often outshine the "official" pattern pictures in Ravelry. Really amazing.

Check out a few examples:
Completely awesome cabled sweater dress
To die for pleated T
Just one of her felted bags we all wish we had
And to top it off she makes head pieces for her dog each year to celebrate the Chinese zodiac animal of that year. Her poor dog in the Year of the Ox (Cow)

Inspiring and a sense of humour.

I'm sending a lot of love her way...my hero!

Thursday, January 21, 2010

Crossed Canoes on a Starry Night

The binding has been sewn down on my mini quilt and I set about blocking it. First a long soak in the tub; I don't have a sink large enough to let it spread out.

I was (a little) worried about the colours bleeding as I didn't think I had pre-washed the fabrics or even tested for colour fastness. (I know, I'm living on the edge!)

Anyway, if the colours were going to bleed, I didn't want the yellows sitting on the blues. When I checked on the quilt after a short time, the water did look bluish. I threw in a colour catcher sheet, but I'm not sure it was necessary. Although some colour may have released into the water, it did not deposit back onto the quilt. (Dodged a bullet there!)

After a good soaking, I let the tub drain, let the quilt drip most of the water out, and then put it between two old towels to roll up and squeeze the rest of the water out.
Once most of the water was out, I then set it out on my trusty foamboard, pushed it into shape, and let it dry. I was not only relieved to see that the blues didn't bleed, but also that the water soluble pen washed out completely. (It had been on the fabric for months...they say not to do that.)

And I can now give you a look at the final quilt:
If I were forced to name it, I think it'd be Crossed Canoes on a Starry Night. The whole project has been driven by a desire to explore the colour combination. Once it was all together, the colours really reminded me of van Gogh's use of blue and yellow, especially in Starry Night.

The yellow piping really does pop against the darker blues in the border and binding. You'll notice the binding has some nice mitered corners.

Once it was all put together, I could address the hanging. I found a nice metal dowel of a suitable length just waiting for me in the basement. By inserting each end under the pockets that were incorporated into the backing
I had a secure easy way to hang the quilt.

The quilt is not very big (less than 24" each side), but it packs a big punch for the corner of a room.
I started this quilt in 2006; it's hard to say why it took me so long to finish it.Project Stats
Started
: Fall '06
Finished: Jan '10
Pattern: personal design
Materials: scraps, fat quarters; backing & binding from square dancing outfit! (Est $20.)

All told, I bet it was only about half a dozen sessions--they were just spread out over more than three years! I designed the "block" so I could play with the yellow and blue colour combination. The overall crossed canoe design was formed by 1.25" squares.

The center was done with paper piecing: each quarter was divided into vertical strips. Each strip was paper pieced and then joined with the next strip. The four quarters were joined and then borders added.

I don't actually get out in canoes much any more, but I like to remember the times that I did. With its title, the quilt really makes me think of the few times I was out on a lake in the dark. There's nothing like it.

Thursday, January 14, 2010

Progress Update

Time for an update on the two projects I've got going on the needles.

First is the Woven Cables sweater for Troy. I don't know if I mentioned it before, but I found a second error back in November. (You can read about the first one here.)

This time, the shaping was good but I messed up the pattern. The stitches in the red box should have been in reverse stocking stitch to match the stitches in the black box.
A little thing, perhaps. I debated with myself for a while whether it was worth fixing. But ultimately decided I had better because 1) I predicted it would always bother me, and 2) it was located at a crucial part of the sweater (right in front, part of the "framing" of the face) where the V-neck divided and asymmetry would be obvious.

So then, how to do it? I first tried the scalpel method of only raveling the stitches that were wrong. It was going to be hard because they were at the end of the row and involved decreases, but it was worth a shot.

It didn't work. In only the second or third row down, the yarn twisted around itself in such a way that I could not get it to ravel any further. I never did quite figure it out; it wasn't worth the time to continue trying.

I just got out the proverbial hatchet and ripped out the 8-10 rows to get below the bad patch.
That left me with a lot of wool to reknit. But I got it knit up by the next day and have been making very good progress since. I am getting motivated!

Here is the fixed neckline:
I know, subtle difference, right? But still definitely worth fixing to me.

Things have been moving along so smoothly that I am now up to the shoulder shaping. Before going any further, I had Troy try it on last night to be sure of the fit:
Seems to be good. (And don't forget, there will be added length to the bottom and sleeves.)

It seems to fit right. The neckline seems to start at the right place. And I haven't noticed a "backward" cable yet. Things are good!

The other project that was rather neglected for holiday projects are my Outside In socks. I finished the first sock on January 5. (Notice that is well after any holiday deadlines.)
The finished sock is still inside out--remember, I said
I wouldn't show it correctly until they were all done!

I cast on the second and am making slow progress. (I really am getting absorbed by the Woven Cables sweater.)

It's nice to be over all the holiday projects and be able to simplify down to two projects. One good for travel and the other good for sitting in front of the fire. Nice.


PS: I ordered the wool for the Whistler Olympic sweater. You knew I couldn't resist doing it during the Olympics, right? I've joined Team Michigan in the Ravelympics and can't wait to cast on!

Sunday, January 10, 2010

Sunday Quilting: January

Although I certainly missed the socializing I would have gotten at Red Purl today if I had gone to the new afghan knit-along, I got a good bit done today on my first solo quilt work day here at home. I got myself set up in the living room with a fire in the woodstove on one side and football on the TV on the other. (And I certainly didn't get either of those at Red Purl!)

I decided to start the year off with my crossed canoes mini-quilt. I had a suspicion that I could get it done or nearly done with a good session. We haven't seen this quilt since July and when we left it, I had finished a good part of the quilting but didn't know what to do for the rest.

Back in October, I took it back out to try and figure it out.

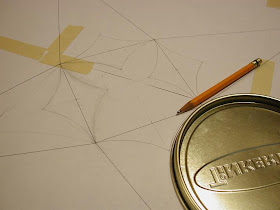
I got out the foamboard, taped together enough paper to fit under the quilt, and then laid down the quilt:

I stuck all the major intersections through with pins to transfer the quilt design to the paper:

I then connected the dots.
(It is funny how much of what you learned in elementary school you do use again later in life.)

I then played around with some curves and a pencil. (And used a lot of an eraser too.)
Until I settled on something I thought might work:
I then transferred it all to the quilt itself, using a water soluble blue marker on the yellow and white chalk on the blue. And then pinned the pattern and quilt onto the foamboard and lived with it for a while:
Yes, that means it was literally sitting on a table in my living room since October. But the more I looked at it, the more I thought it would work. Maybe not the perfect pattern, or the best, but definitely one of possibly many successful possibilities. (I get kind of stuck on trying to find the "right" design, when really there's not really one right way to do it. Pick one and move on!)

So today, I unpinned the quilt and started sewing. First the blue central design:
Then the yellow:
And that meant everything was quilted--Wow!

Next step was to baste the yellow piping that I made in July around the edges:
I did not miter the piping at the corners, but just crossed them over each other. Every strip goes under at one end and over at the other.

Once the strips were sewn on, I could finally cut the outside edges to size. Such a relief to finally neaten them up!

I used the tool that came with my Piping Hot Binding kit. The two grooves fit over the piping to keep everything lined up, and are spaced a half inch and a quarter inch from the edge. You can chose which of those two you want as a seam allowance.

Since this is a small quilt, I chose the quarter inch side, and cut all four sides.
I'm telling you, there's nothing like getting the edges cut off to make you feel like you are finally getting close to the end.

Before adding the final edging (binding), I basted on the two corner hangers. They're just four inch squares folded in half diagonally.
You put them on the back of the quilt at the upper two corners. When the quilt is done, you can slip a small dowel in the pockets and use it to hang the quilt. Pretty slick, eh? This is the first time I've tried it, so I'll let you know how it works.

The one thing I didn't get to was sewing the binding down to the back of the quilt (something I do by hand).
After that is done, the quilt will be finished...oh, except for the blocking. What, blocking fabric? Yes, this is something I've learned recently: blocking's not just for wool anymore. I'll give more details when I get to it.

And with all that in front of me, I'll leave you with a little peak of what the finished quilt may look like:

Not bad for my first quilt day of 2010!

Saturday, January 9, 2010

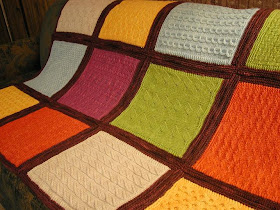
Red Purl Afghan Finished

When we left the Red Purl KAL afghan, it had been assembled, but not edged.

I was thinking about a fringed edge and gave it a try but didn't like how it turned out. I also had doubts about whether this blanket really needed more. Perhaps it was time to tell myself, "Enough already."

So I changed the plan to a simple crocheted slip stitch edging. I considered, and even tried out a "crab stitch" edging that I had read about. It's simply a slip stitch done backwards (hence, crab)--i.e. working to the right instead of to the left.

I found it a lot more awkward to do and saw no difference in the final result. Never one to do more work for the same outcome, I stuck with the regular slip stitch.

A slip stitch edging adds almost no width to the afghan, but provides a very nice finishing line to unify the perimeter. The most dramatic difference is at the intersections of the blocks.


Here are two sample intersections where the top picture is before edging and the bottom is after the edging is applied.

You can see how the edging just nicely fills any gaps and smooths out the outside line.


Now were you wondering about the fringed edging that I didn't think worked?

I read about it in some book (I would guess one of Nicky Epstein's, but I have no idea anymore) but had never tried it. Very simple to do, it could be a nice way to add a little pizazz to some lucky object.

I worked a sample separately, but you could also knit this along an edge attaching it as you go. If you don't attach as you go, obviously you will have to sew the edging on when it's done.

Knit to the length you need:
I chose to knit it seven stitches wide, but it could be worked over however many stitches you want. It just depends on how wide you want to make it.

Then I cast off four stitches. (Again you could experiment with how many you want to do.)
Then drop the three remaining stitches, and ravel them all the way down to the beginning.

The raveled stitches form a nice fringed loop:
Doesn't that look great? And much easier than tying a bunch of loops onto an edge. Recently I saw the same technique described in another book and they suggested using two strands--then the fringe would be twice a thick. (And would go a lot faster too!)

Although I chose not to use it for this piece, I will definitely keep it in mind next time I want a fringe.
Project Stats
Started
: 11 Jan 09
Finished: 2 Jan 10
Pattern: monthly stitch patterns from the owner and patrons of the Red Purl
Materials: Malabrigo worsted
Red Mahogany, Blue Surf, Lettuce, Simply Taupe, Hollyhock, Glazed Carrot, Cadmium, approx. $80-$90

So this is the end of my writing about this afghan. I enjoyed the process very much. Although I can't imagine ever paying $100 for an afghan (even one I like this much) from a store or a craft sale, it was totally worth the price because of the experience.

I loved getting together with everyone at the Purl each month. I loved seeing everyone else's afghans with their individual choices of yarn and colours. And the "mystery" aspect was fun too--not knowing what you were going to do each month and really not knowing what the final result would be.

I will miss going this year's KAL meetings (the first one's tomorrow), but passing up this year's project will make room for other things.

Onward!