
Last time I showed you the sweater, I was just to the split for the sleeves and was working with multiple strands. After that I jumped to the next colour, one of the Lana Grossa Olympia balls.


The second thing I'm going to show you is how I do the underarm stitches. I used to do what patterns told me and cast on additional stitches to go under the arm, and then pick up off the cast on edge when working the sleeves. (And in fact some patterns have you cast on for both the body and the sleeves and then sew this short seam later--even crazier crazy pants.)
But I thought, how much better to do a provisional cast on so that there is no tight pulling at the underarm seam. And that's what I did for a long time--a provisional cast on over a piece of scrap yarn. When I was ready to do the sleeves, I just picked up the stitches and continued on.
But after doing so many socks toe up and realizing that it's easier to do a short row toe when I cast on over the cable of the needle instead of scrap yarn that I have to pick up stitches from, I applied the same idea to my sweaters. (I know--you realized I could do this when I started the explanation, but it takes me a while, people.)
So when casting on additional stitches at the underarm while working the body, I did a simple figure-8 cast on over one needle and the cable.
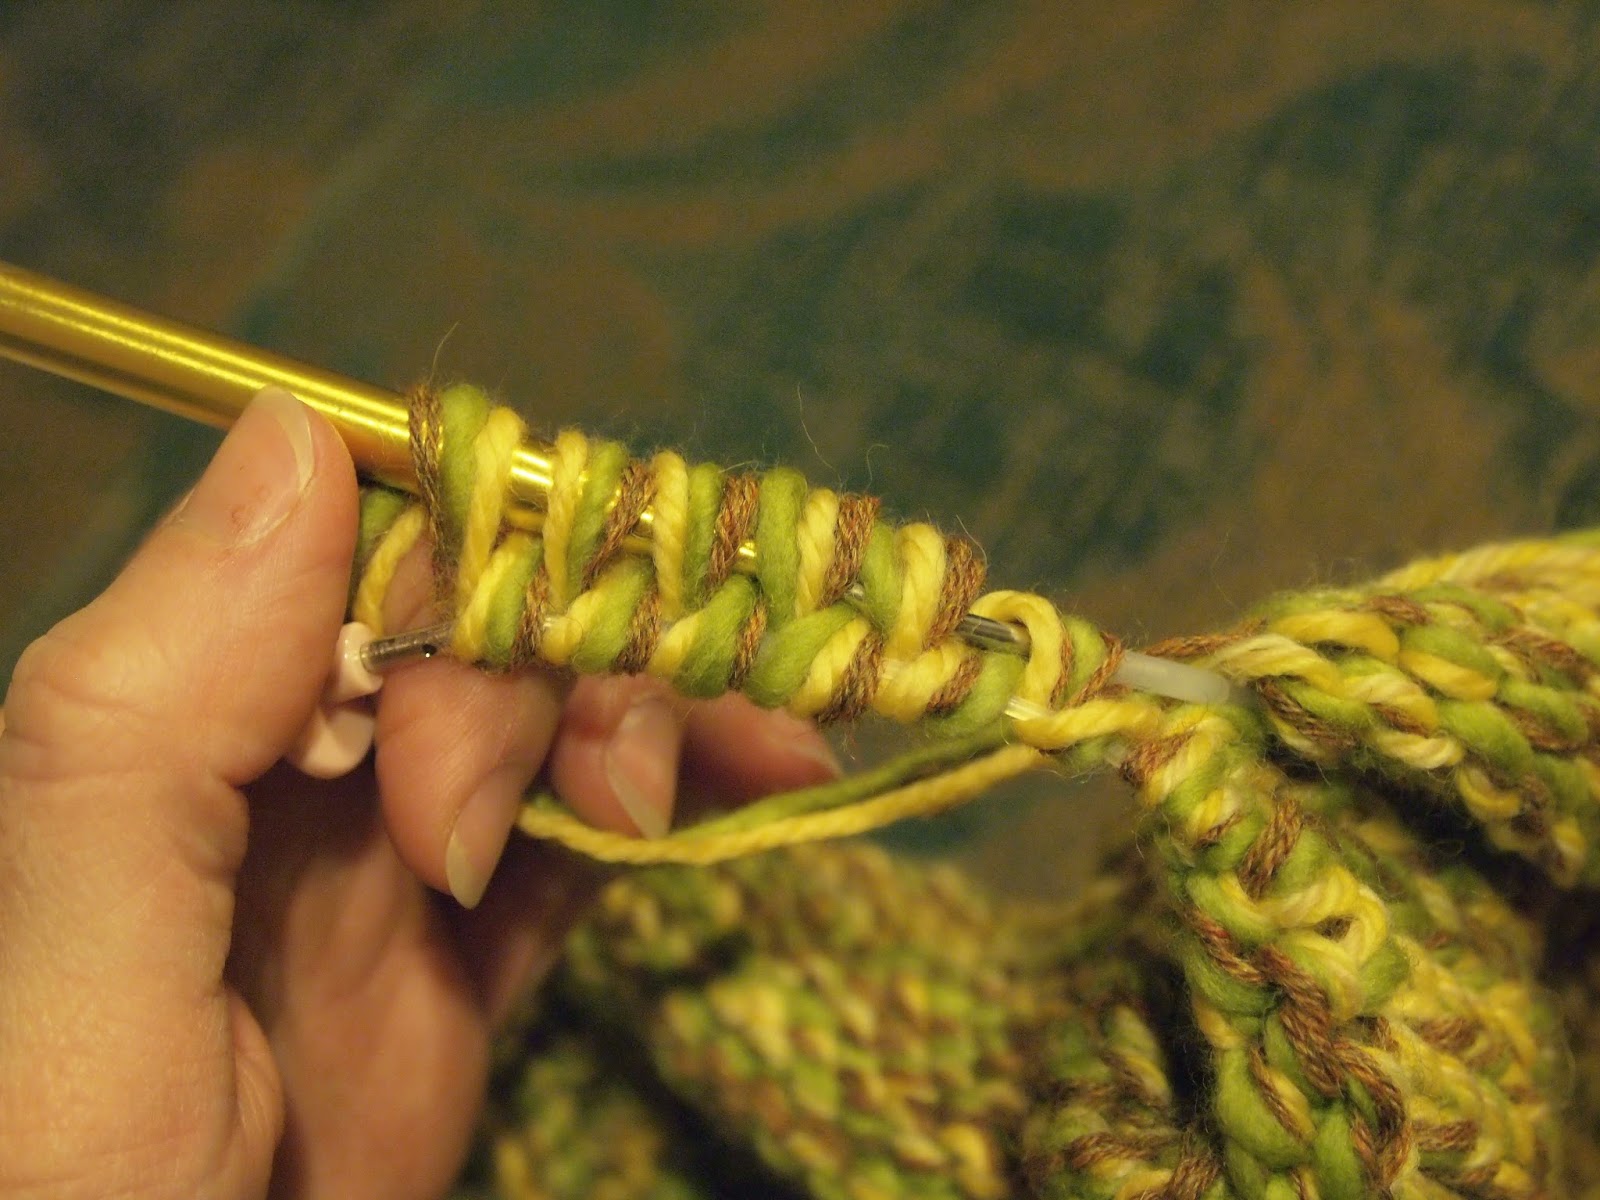

 |
| View along the side "seam". Sleeve on top; body below. |

I'll try to get finished pictures up real soon!


No comments:
Post a Comment
Comments are moderated so you will not see yours post right away. Thank you for leaving a comment; I enjoy reading each one!